5-17
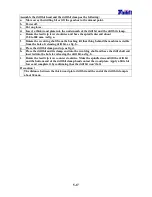
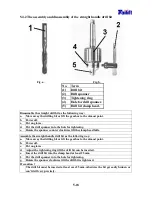
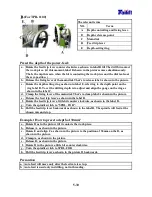
Assemble the drill bit head and the drill bit clamp as the following:
a.
Move away the drilling bit or lift the gearbox to the utmost point.
b.
Power off.
c.
Put on gloves.
d.
Insert a thick wood plate into the underneath of the drill bit and the drill bit clamp.
e.
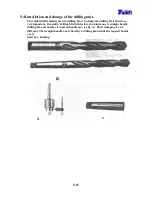
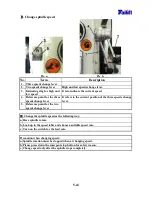
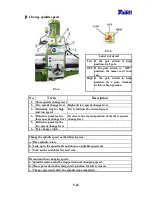
Rotate the feed trip lever clockwise and have the spindle descend about
150 to 200 mm. As fig. a.
f.
Rotate the revolving shaft from the bushing till that thing behind the machine is visible
from the hole of releasing drill bit, as fig. b.
g.
Place the drill bit clamp end up, as fig. d.
h.
Place the drill bit and its clamp end into the revolving shaft and have the drill shaft end
inserted into the hole for releasing the drill bit, as fig. b.
i.
Rotate the feed trip lever counter clockwise. Make the spindle descend till the drill bit
and the bottom end of the drill bit clamp head contact the wood plate. Apply a little bit
force and complete it by confirming that the drill bit won’t fall.
Precaution
:
:
:
:
The distance between the thick wood plate, drill bit and the end of the drill bit clamp is
about 30 mm.
Summary of Contents for TPR720A
Page 7: ...1 6 Arm elevating motor For TPR 720A TPR 820A TPR 920A Arm elevating motor For TPR 1100...
Page 30: ...5 4 5 1 2 For TPR 1100 The front view of TPR 1100...
Page 40: ...5 14 Examples of clamping using the universal clamp...
Page 81: ...9 6 9 6 Electrical Circuit Diagram For TPR720A TPR820A TPR920A Standard...
Page 84: ...9 9 9 8 Electrical Circuit Diagram For TPR1100 Standard...


