6-1
CHAPTER 6
Adjustment
6.1General
Adjustment is needed after the machine has been used a period of time for its parts
will get loose or worn out, In the radial drill, there are three parts needed to be adjusted.
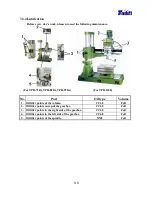
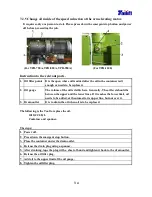
One is the arm clamping lever, another the gap between the gearbox and the arm rail,
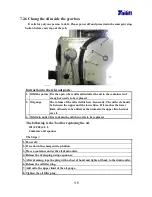
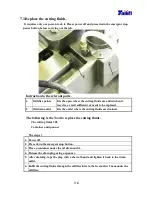
finally the engagement between the feed trip lever and the clutch and
Maximum Range
for spindle adjustment.
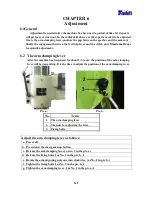
6.2 The arm clamping lever
After the machine has been used for about 3-5 years, the position of the arm clamping
lever will be descending. It is the time to adjust the position of the arm clamping lever.
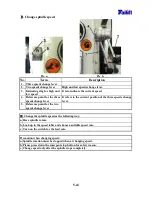
Pic. a.
Pic. b.
No.
Term
1. The arm clamping lever
2. The nuts for adjusting the lever.
3. Fixing bolts
Adjust the arm clamping lever as follows:
a. Power off.
b. Press down the emergent stop button.
c. Release the arm clamping lever.( as no. 1 in the pic. a)
d. Release the fixing bolts
(
(
(
(
as No. 3 in the pic. b.
)
)
)
)
e. Rotate the arm adjusting nuts one turn clockwise. ( as No. 2 in pic. b.)
f. Tighten the fixing bolts
(
(
(
(
as No. 3 in the pic. b.
)
)
)
)
g. Tighten the arm clamping lever.
(
(
(
(
as No. 1 in the pic. a.
)
)
)
)
Summary of Contents for TPR720A
Page 7: ...1 6 Arm elevating motor For TPR 720A TPR 820A TPR 920A Arm elevating motor For TPR 1100...
Page 30: ...5 4 5 1 2 For TPR 1100 The front view of TPR 1100...
Page 40: ...5 14 Examples of clamping using the universal clamp...
Page 81: ...9 6 9 6 Electrical Circuit Diagram For TPR720A TPR820A TPR920A Standard...
Page 84: ...9 9 9 8 Electrical Circuit Diagram For TPR1100 Standard...

