background image

35

Tailwind E-Bikes User Manual

The warranty is void if: The damages are a result of an 

accident, abuse, alteration, non-authorized usage, or use of 

electricity other than that indicated in this manual.

The warranty is void if: Repairs, modifications, or 

alterations were done by a person not authorized by 

Tailwind.

The warranty is void if: The owner or user neglected to 

do routine maintenance required and the damages or 

problems are directly related to such neglect.  It is the 

user’s responsibility to keep the E-Bike in proper condition.

Certain parts of the equipment are not covered by the 

Tailwind warranty due to the fact that they require 

replacement after multiple uses.  For example: buttons, 

pedals, seats, tires, etc.  These parts will eventually 

require replacement at the owner’s cost.

The manufacturers will not be held responsible for 

damages or monetary losses related to the purchase or 

use of their products.  Tailwind denies responsibility for all 

physical and moral damages linked to the purchase and use 

of their products.  In all cases, the damages cannot exceed 

the purchase price paid by the initial owner.

The final decision to honor the warranty is taken by 

Tailwind personnel after a technical inspection when the 

owner returns defective products.

The warranty excludes:

1.  Replacement and shipping costs of products worn out by 

normal use.

2.  Replacement and shipping costs of products due to 

problems related to neglect, abuse, or lack of maintenance.

Warranties are NON-TRANSFERABLE.

Product Data

E-Bike Model:

Serial Number: 

Purchase Date:   

Order Number: 

Summary of Contents for E-BIKE

Page 1: ...Please read this manual carefully before enjoying your Tailwind E Bike If you do not understand the information or if you have a question that this manual does not cover please contact us at our webs...

Page 2: ...simply want to spend more time outdoors we hope you enjoy your new E Bike In a life full of headwinds and tailwinds it is our honor to be the wind at your back If you have questions or comments please...

Page 3: ...ence please fill in the important information below Your serial number can be found on the inward facing surface of the frame seat stay or on head top tube Please retain your sales receipt for any pos...

Page 4: ...MY TAILWIND E BIKE Address Purchase Date Purchase Channel Model Color Serial Name 4 Tailwind E Bikes User Manual FOR YOUR RECORDS TAILWIND WEBSITE AMAZON EBAY OTHER...

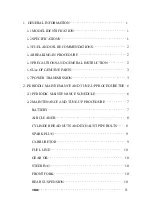
Page 5: ...UCTIONS 10 ASSEMBLY INSTRUCTIONS 16 RECHARGING THE BATTERY 22 BATTERY AND CHARGER CARE 24 GEARS 25 LED DISPLAY KEYS 26 BRAKES 27 TIRES INNER TUBES 28 TROUBLESHOOTING 29 TAILWIND E BIKES FAQS 30 INSPEC...

Page 6: ...ticular attention to the section on battery charging and maintenance It is important for you to understand your new Tailwind E Bike its features and its operation so you get maximum enjoyment with max...

Page 7: ...lity as it helps reduce the risk of injury This manual contains many warnings about the consequences of failure to maintain or inspect your Tailwind E Bike Improper use could result in serious injury...

Page 8: ...ke incorporates many features and functions that you may be unfamiliar with Read this manual thoroughly to understand how those features enhance your riding pleasure and safety C RIDE WITHIN YOUR LIMI...

Page 9: ...X X Head and tail lights X X Controls and displays X Seat post quick release adjustment X X Brake pad wear X X Brake cable tension wear X X X Spoke tension X X Wheel true X X Hub bearings X X X Chain...

Page 10: ...OPERATIONAL INSTRUCTIONS 03...

Page 11: ...11 Tailwind E Bikes User Manual SEAT SEAT POST HEADLIGHT BIKE STEM HEADSET LED DISPLAY FORK TIRE SPOKES MOTOR REAR DERAILLEUR CHAIN CHAINRING CRANK DISC BRAKE FRAME CONTROLLER BATTERY...

Page 12: ...THE OPPOSITE OF A TRADITIONAL BICYCLE B Left Handlebar Grip C Headight Button D Horn Button E Speed Control Button Mode 1 Low Speed Mode 2 Medium Speed Mode 3 High Speed F Front Derailleur Shifter by...

Page 13: ...ing the lever while pedaling you can decrease gears from 7 to 1 The shifter is labeled with the corresponding gear selection C Battery Status Monitor D Twist Throttle Twist this grip to apply power to...

Page 14: ...function about 4MPH while in PAS 0 mode To set a different cruising speed twist the right handlebar throttle setting the speed you want then at the same time press for 3 seconds To cancel cruise func...

Page 15: ...rear wheel The grip is labeled with the corresponding gear selection B Front Brake Lever The front brake is activated by squeezing the right brake lever THIS IS THE OPPOSITE OF A TRADITIONAL BICYCLE...

Page 16: ...ASSEMBLY INSTRUCTIONS 04 IMPORTANT We recommend you use a trusted professional bike technician to assemble your Tailwind E Bike...

Page 17: ...17 Tailwind E Bikes User Manual PART 1 REMOVE PACKAGING 01 Open the box 04 Remove packing materials 02 Remove your Tailwind E Bike 05 Remove front wheel 03 Gather necessary tools...

Page 18: ...04 Remove front 4 bolts from stem cover them remove stem cover 02 Rotate the stem 180 degrees 05 Mount handlebar onto stem then replace stem cover and tighten all 4 bolts 03 Tighten side bolts of stem...

Page 19: ...bolt from headlight then adjust headlight to correct position and tighten bolt 04 Insert front wheel quick release 02 Turn bike upside down 05 Lock front wheel quick release 03 Release quick release s...

Page 20: ...Identify right and left pedals 04 Tighten both right and left pedals with wrench 02 Install left pedal to the crank arm 05 Adjust seat post according to your height making sure it s within the safety...

Page 21: ...INSTALLING AND REMOVING THE BATTERY 01 To install battery insert into housing as shown 04 Use key to remove battery from housing 02 Plug in battery cable Turn cable nut clockwise to tighten 03 To rem...

Page 22: ...ows the approved layouts with the primary elements of the Design Inc stationery system for the front and backside of the letterheads Dimensions 297 x 210mm DIN A4 Weight 120g m Uncoated white Print Of...

Page 23: ...rge a fully depleted battery in 3 6 hours Red light means the battery is charging Green light means the battery is fully charged BATTERY STATUS You can press the button on top of the battery to tell w...

Page 24: ...dors coming from the charger or the battery unplug charger immediately and contact Tailwind customer service Recharge battery after every use Do not disassemble or alter the battery or battery charger...

Page 25: ...l When the chain is around the largest sprocket you are in 1st gear or the lowest gear The high gear will have the derailleur positioned so that the chain is directed around the smallest gear Every po...

Page 26: ...LED diplay to PAS 0 In this mode your speed can be changed by twisting the throttle Maximum speed 20MPH The speeds listed here are only for reference Actual speeds will be affected by rider weight tem...

Page 27: ...t to apply even pressure to both brake levers when slowing or stopping Bicycles equipped with disc brakes will occasionally make a slight scraping noise when the wheels are turning without the brakes...

Page 28: ...the same time inspect tires for excessive wear and cracks Replace tires if necessary TIRES INNER TUBES 11 Periodically clean your Tailwind E Bike with a damp cloth Avoid spraying the Tailwind with a w...

Page 29: ...ck the Quick Disconnect fittings to make sure they did not come loose or unplugged Simply unwrap the black spiral wire covering until the Quick Disconnect fitting is exposed unplug and re plug the Qui...

Page 30: ...ome of the most arduous journeys Q Do I need a driver s license insurance or registration A No you don t According to federal law electric bikes that are under 750 watts are classified as bicycles For...

Page 31: ...affect your range Q What happens if I get a flat tire A The tires on our bikes are the same as conventional bicycles Simply replace the tube with a tube of the right size and inflate it No special tir...

Page 32: ...ed for a long time you should fully charge and remove the battery While not in use keep the battery turned off and recharge every 2 months Make sure to keep the battery and charger away from children...

Page 33: ...r Tailwind E Bike is parked in a stable place and the kickstand is used 1 To ensure that your E Bike is in the best condition maintain and clean regularly 2 Regularly check that the tires are inflated...

Page 34: ...es f Damage or loss caused by another device that is connected to the Product g Damage resulting from accidents misuse abuse tampering or failure of the customer to follow normal operating procedures...

Page 35: ...xample buttons pedals seats tires etc These parts will eventually require replacement at the owner s cost The manufacturers will not be held responsible for damages or monetary losses related to the p...

Page 36: ...TAILWINDEBIKES COM...

Reviews: