TAIYO ELECTRIC IND.CO.,LTD.
14
TAIYO ELECTRIC IND.CO.,LTD.
15
1
2
4
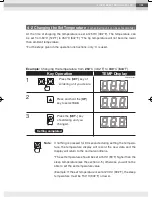
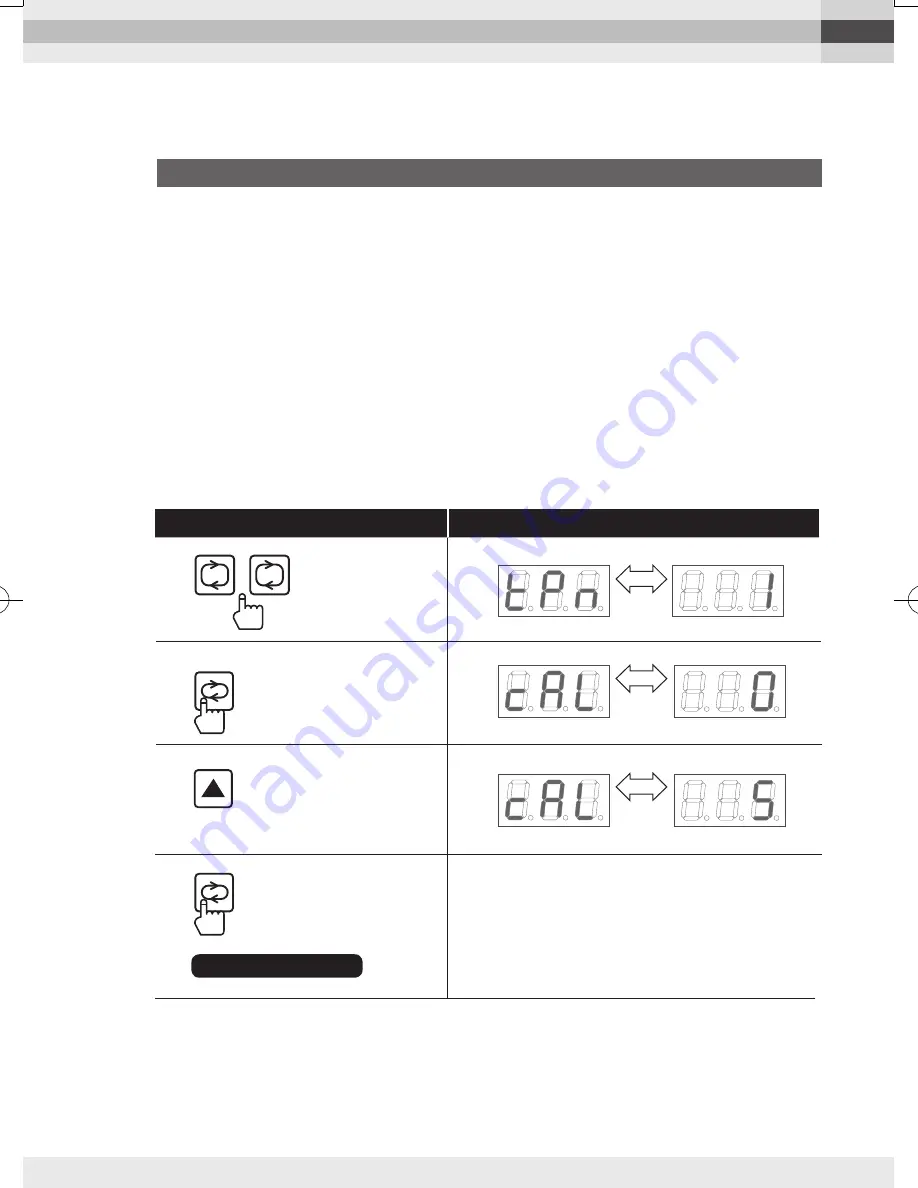
How to Calibrate the Temperature
Press the
[
SET.
]
key to
select [
cAL
].
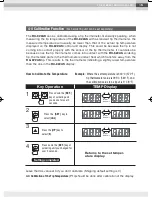
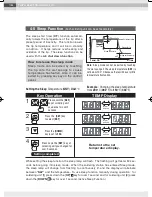
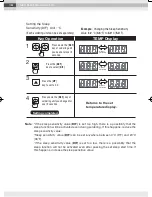
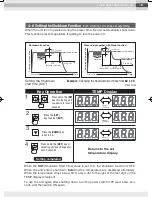
Key Operation
TEMP Display
Press down the [
SET.
] key of
soldering unit you changed for
over 3 seconds.
Returns to the set temper-
ature display.
Example
: Where the set temperature is 300°C (572°F),
tip thermometer value is 295°C (563°F), and
the calibration value to be input is 5°C (9°F).
3
Press the [
UP
] key to
select [
5
].
Leave the CAL value at 0 if you don’t calibrate. (Shipping default setting is 0 )
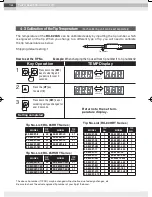
4-3 Calibration of the Tip Temperature (P.14) should be done after calibration of the display.
Press down the
[
SET.
]
key of soldering unit
you desire for over 3
seconds.
2
1
or
The
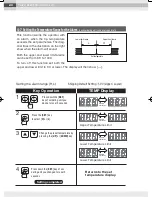
RX-822AS can be calibrated using a tip thermometer. Generally speaking, when
measuring the tip temperature of the
RX-822AS with a standard tip thermometer, the
measured temperature will usually be lower than that of the actual tip temperature
displayed on the
RX-822AS control unit display. This could be because the tip is not
coming into contact properly with the sensor of the tip thermometer. It could also be
because once the tip thermometer comes into contact with the
RX-822AS soldering
tip, the metallic parts in the thermometer conduct heat which transfers away from the
RX-822AS tip. This results in the thermometer indicating a slightly lower temperature
than the one in the
RX-822AS display.
4-4 Calibration Function
(Each soldering unit can be set separately)
Setting completed
Displays
alternately
Displays
alternately
Displays
alternately
RX-822AS英文取説_2015_03.indd 15
2015/03/20 14:45


