background image

14

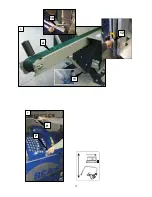
4.4.1 ADJUSTING THE HEIGHT OF THE SPLITTING WEDGE

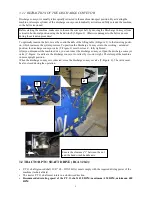
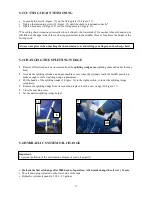
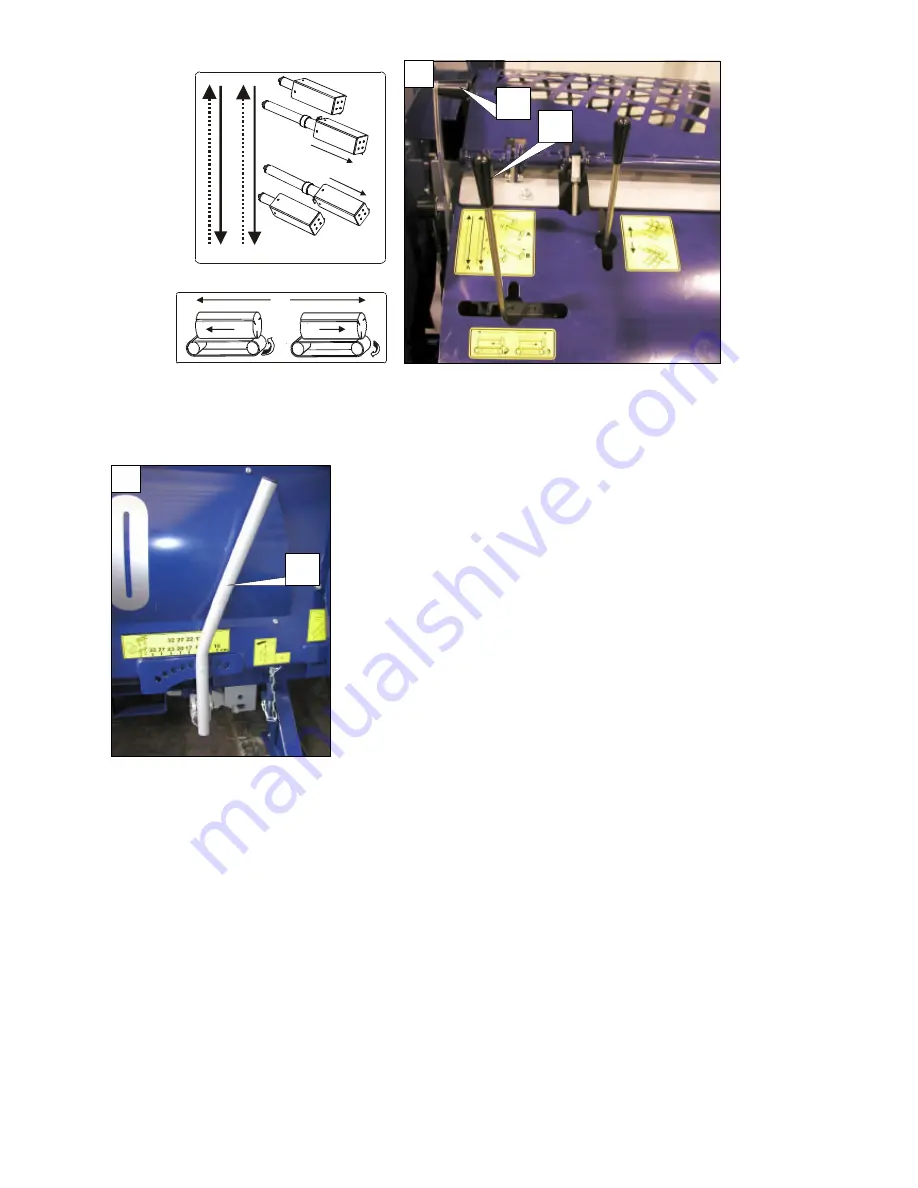
By using a splitting wedge handle (L-Figure: 10), the splitting wedge 
can be gradually lifted or lowered depending on the diameter of the logs 
- so the logs are split in center. 
Splitting wedge adjustment can be performed most easily when the split-
ting chute is empty or at the point when the splitting cylinders start to 
move.

Lifting mechanism of the splitting wedge also allows partial height 
movements of the splitting wedge during the splitting phase. In case the 
wood gets stuck under the splitting wedge it must be removed to prevent 
damage to the lifting mechanism of the splitting wedge (Refer to chapter 
5.11, indications of overload… ).

10

L

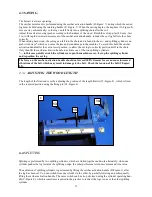
4.4.2MACHINE COVER WITH SAFETY SWITCH

In case of eventual problems during the splitting phase, or in case the log is wrongly positioned in the splitting 
chute, the splitting process must be 

stopped

 immediately. In this case it may be also necessary to switch the 

cylinders, so the splitting cylinder which pushes towards the splitting wedge, moves back (4.4).

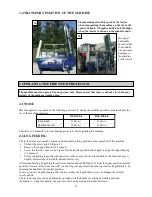
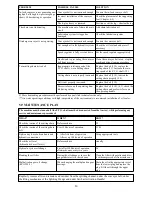
Machine cover (B-Figure: 11) is linked to the safety switch, which disengages all major machine functions 
when the machine cover is lifted: in-feed and discharge conveyors stop, splitting cylinders stop and sawbar is 
withdrawn into the saw shield. Lifting the machine cover therefore acts also as a main safety switch. 
The log can be reached by hand only when the machine cover is opened and machine is stopped. Sawing and 
splitting cannot continue until the machine cover is closed and safety switch disengaged. 

9

S

C

Summary of Contents for RCA 320-2 E

Page 1: ...0 F ax 3 8 6 0 35 7 9 10 1 6 E m ail ex port tajfun si h ttp www tajfun c om 05 2006 GB R RC CA A 3 32 20 0 2 2 Please carefully read the operating instructions before using the machine O OP PE ER RA...

Page 2: ...EWOOD L ENGT H 13 4 4 SPLITTING 13 4 4 1 ADJ US T I NG T HEHEI GHTOFT HES PL I T T I NG WEDGE 14 4 4 2 MACHI NECOVERWI T H S AFET YS WI T CH 14 4 5 DISCHARGE CONVEYOR 15 Chapter 5 M AI NTENANCE AND RE...

Page 3: ...ADDRESS Ta j f u nPl a n i n a d o o Pl a n i n a41a 3225 Pl a n i n ap r i Se v n i c i Sl o v e n i j a Te l 38 6 0 3 746 44 20 Fa x 38 6 0 3 579 1 0 16 E ma i l e x p o r t t a j f u n s i h t t p...

Page 4: ...grated in machine control panel Chain 3 8 Oregon MULTI CUT 32 Number of driving teeth 60 b 0 058 1 5 mm Discharge Conveyor s speed regulator integrated in Dis charge Conveyor Manual Winch Operating In...

Page 5: ...5 EP 11 ELECTRIC POWER UNIT EP 11 Tajfun Motor Power 11 kW Weight 197 kg...

Page 6: ...min 1 RPM Max imum p r es s ur e 250 b ar Oil Res er v oirVol ume 100 l 25 gal Chain Lub r ic ation Oil Res er v oirVol ume 8l 2 gal Op er ating Nois e Max RCA 320 2 92 d B A RCA 320 2 E 96 d B A Wei...

Page 7: ...e Fo ry o u ro wns a f e t yu s eo n l yo r i g i n a l s p a r ep a r t sa n da c c e s s o r i e swh i c ha r ea p p r o v e db yt h ema n u f a c t u r e r Th ema c h i n emu s t b eg r o u n d e d...

Page 8: ...ARGE CONVEYOR ASSEMBLY in case of sep arate d eliv ery Hydraulically driven discharge conveyor is also a component part of the firewood processor Place the discharge conveyor on the ground and move it...

Page 9: ...ng the machine make sure to loosen the conveyor belt by moving the Discharge Conveyor from vertical to horizontal position using the hand winch 3 Figure 3 Otherwise damages to the belt can occur durin...

Page 10: ...O shaft 420 RPM using the manual throttle handle Lower the machine cover RCA 320 2 RCA 320 2 E Examine the machine and equipment for faults and check the chain lubrication Plug the machine to electri...

Page 11: ...supporting leg 11 Figure 6 Set the supporting leg so that the upper rod on the conveyor belt in the middle of the feed conveyor is slightly elevated above the table already factory set Activate the f...

Page 12: ...12 7 H P 6 A 11 12 10...

Page 13: ...uickly switch the cylinders or open the machine cover to stop the splitting cylinder and reposition the cut log 4 3 1 ADJUSTING THE WOOD LENGTH The length of the firewood is set by adjusting the posit...

Page 14: ...f overload 10 L 4 4 2MACHINE COVER WITH SAFETY SWITCH In case of eventual problems during the splitting phase or in case the log is wrongly positioned in the splitting chute the splitting process must...

Page 15: ...A 320 2 E includes besides the main switch also the Start Stop switch S Figure 1 The Start Stop switch is used to turn ON OFF the electric driving motor which powers the cutting chain and whole hydrau...

Page 16: ...tensioning screws 33 Figure 15 Unscrew both nuts 34 Figure 15 on the fixing plate 35 Figure 15 until you can move the sawbar away from the tensioner Remove the worn cutting chain and replace it with...

Page 17: ...nd wood remains from the splitting wedge area splitting chute and under the mac hine Activate the splitting cylinders and open machine cover when the cylinders reach the middle position to make enough...

Page 18: ...ally damaged Bad filter permeability is shown on the filter gauge if the gauge indicator is in the red zone when oil is heated to operating temperature Change the oil filter 5 6LUBRICATION OF THE ANGL...

Page 19: ...s overheating Not enough oil in the reservoir Check the oil level and add more if The machine is overloaded Remove the overloading causes Excessive power consumption during sawing The chain is dull Sh...

Page 20: ...ting Replace the belt 5 10 4 3 check the cutting chain and use lower force on the operating handle Torn cutting chain drive belt The log too heavy or jammed Position or cut the log shorten the log Stu...

Page 21: ...t least every 80 hours of operation Lithium Grease Lubrication Point d At least every 80 hours of operation Lubricating Spray Lubrication Point e At least every 8 hours of operation Lithium Grease Rop...

Page 22: ...2 Remove the belt 46 Figure 22 from the driven pulley 47 Figure 22 Remove the old belt and clean the area Install the new belt Position the belt onto the pulleys Tension the belt and reinstall removed...

Page 23: ...using the notch on the tension indicator The notch must be aligned with the edge of the spring guide Set the tension of the belt as follows Loosen the safety nut 47 Figure 23 Screw or unscrew the spri...

Page 24: ...y modificati ons to the machine 5 12 SUPPLIES The machine incorporates following parts which have to be replaced by the customer as necessary These parts are not covered by the warranty period which i...

Page 25: ...De c l arat i on ofConf ormi t y Manufacturer TAJFUN Planina proizvodnja strojev d o o Planina 41a 3225 Planina pri Sevnici d ecl areswi thful l res p o ns i b i l i tyth at h erei nafter menti o nedp...

Page 26: ...i Sevnici declares with full responsibility that hereinafter mentioned product FIREWOOD PROCESSOR RCA 320 2 E covered by this declaration complies with the requirements of EEC Mashinery Directive 98 3...

Page 27: ...27...

Reviews: