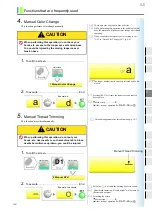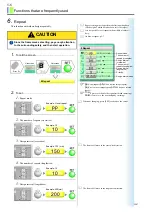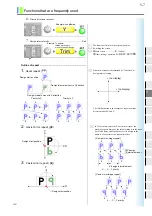
Functions that are frequently used
5-3
1
2
3
4
5
6
7
8
9
10
11
12
13
14
15
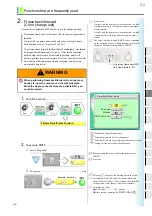
2.
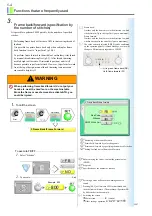
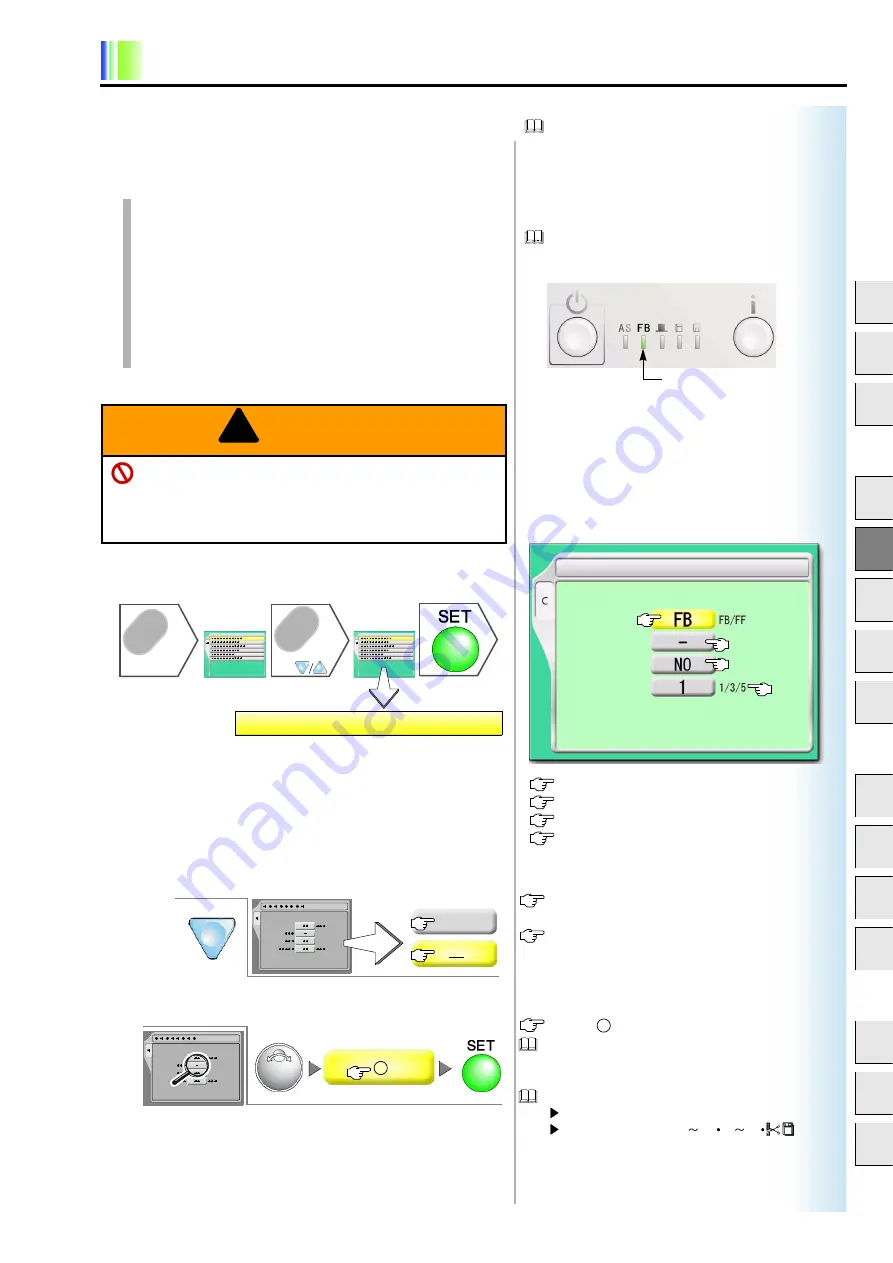
Frame back/forward
(Color change unit)
It is possible to perform FB/FF quickly to a color change position.
Performing frame back will activate ATH to trim sewing thread of
the head.
It is possible to operate frame back only when setting for frame
back function is set to “to perform” (p.10-4).
To perform frame forward in the middle of embroidery, trim thread
by manual thread trimming first (p.5-5). After thread trimming,
needle height will become H (retractable position) and it will
become possible to perform forward. However, to perform forward
from the top of design, manual thread trimming is unnecessary
since needle height is H.
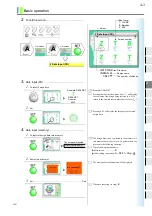
1.
To call the screen......................................................
2.
To execute FB/FF .....................................................
1.
Select “Stop code”.
Before moving the cursor, confirm the present value
(FB/FF).
Stop code
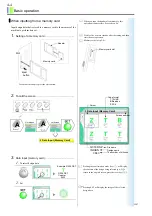
2.
To execute ......................................................................... End
Selecting
will cause the warning buzzer to sound.
Pressing [SET] will activate ATH to trim thread, and
then the frame will move (The machine will perform FB
to the previous color change code in this example).
Switching the screen
Main screen ..................
(twice)
Other setting • operation
WARNING
When performing frame back/forward, do not put your
hands etc. near the needle or on the machine table.
Since the frame or needle moves to activate ATH, you
could be injured.
Frame back:
It makes only the frame move in the direction to which
stitches return (Up to the top of design at a maximum).
Frame forward:
It makes only the frame move in the direction to which
stitches advance (Up to the end of design at a maxi-
mum).
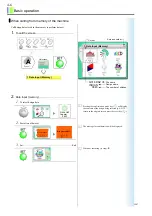
The value currently selected (FB/FF) can be confirmed
on the operation panel. At thread breakage, a value will
change to FB tentatively regardless of FB/FF.
Lit in green: frame back (FB)
Unlit: frame forward (FF)
!
List screen
List screen
Press
C
3 Frame Back/Frame Forward
or
C
Switching of frame back/forward
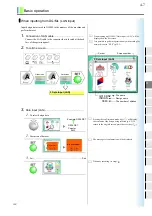
Frame back/forward by color change unit
Frame back/forward by specifying the number of stitches
Setting for feed unit of frame back/forward
1
2
3
4
1
2
4
Stop Code
Stitches
FB/FF Stitch Unit
3
FB
1
2
1
2
Example: Execution
E
A D2 F1 F6
JZ07
Summary of Contents for TCMX 601
Page 1: ...USER S MANUAL TCMX 601 M XL01 E 2006 07 TCMX 601 ...
Page 18: ...Name of each part and function 2 7 1 2 3 4 5 6 7 8 9 10 11 12 13 14 15 ...
Page 19: ...2 8 Name of each part and function ...
Page 41: ...4 14 Basic operation ...
Page 65: ...6 8 Convenient functions ...
Page 105: ...11 12 Software installation and necessary ...
Page 119: ...14 6 Maintenance ...
Page 129: ...15 10 Supplemental documentation ...

