To decide a design to embroider and the color change order
51
1
2
3
4
5
6
7
8
9
10
11
Chapter 4
PT10
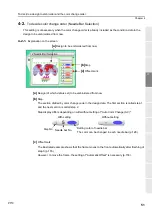
4-2.
To decide color change order (Needle Bar Selection)
This setting is unnecessary when the color change order is already included as the condition data in the
design to be embroidered from now.
4-2-1.
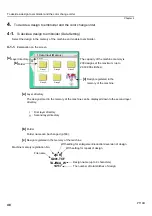
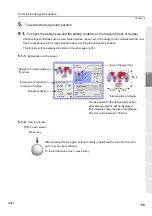
Explanation on the screen
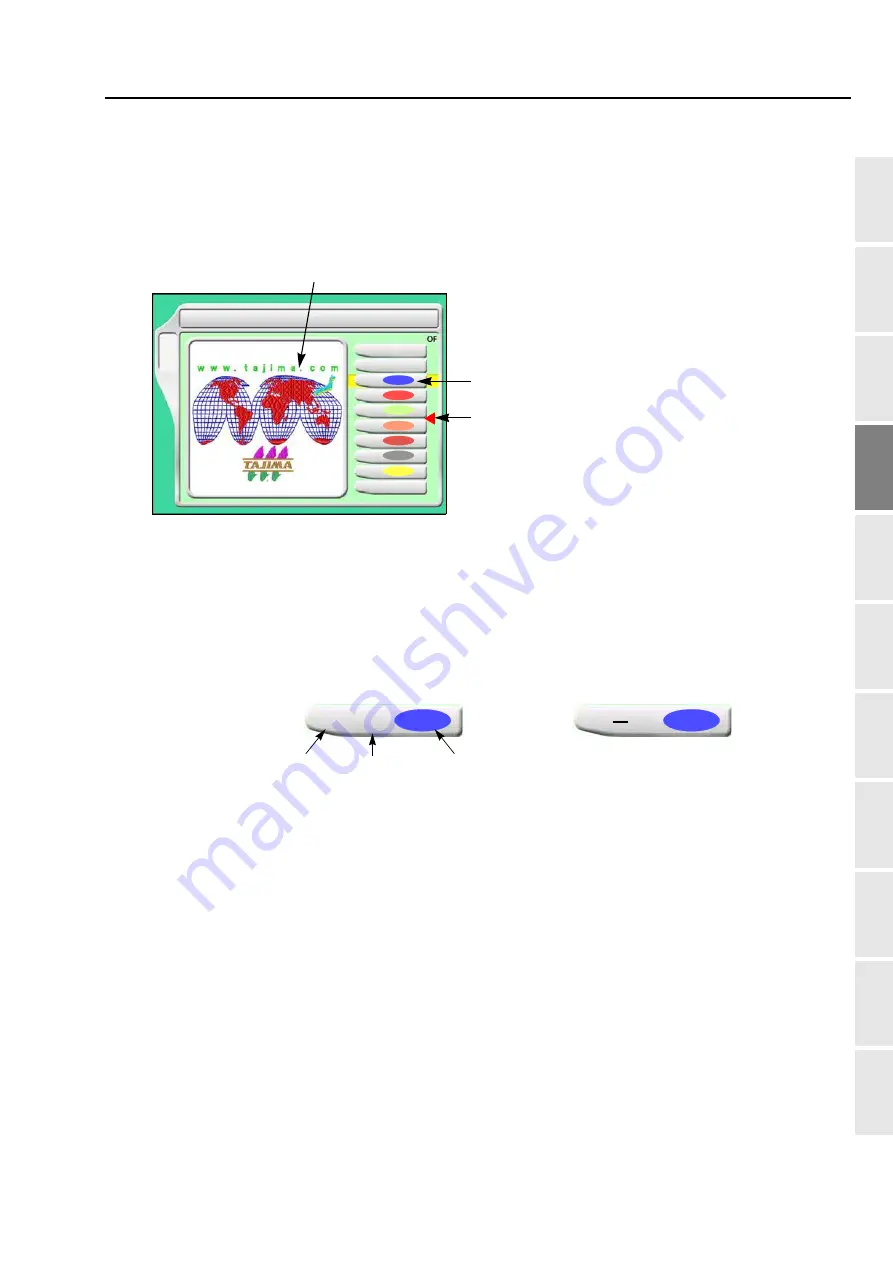
[a]
Design (of which data is set) to be embroidered from now
[b]
Step
The section divided by color change code in the design data. The first section is called step 1,
and the next section is called step 2.
Step display differs depending on with/without setting of "Auto Color Change (AC)".
[c]
Offset mark
The illustrated example shows that the frame moves to the front automatically after finishing of
step 3 (p.155).
However, to move the frame, the setting of "Automatic Offset" is necessary (p.153).
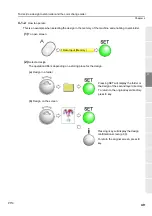
2 Needle Bar Selection
1
2
3
4
5
6
5
B
7
9
1
3
2
6
4
[a]
[c]
Design to be embroidered from now
[b]
Step
Offset mark
1
5
Step No. Needle bar No.
Setting color of needle bar
The color can be changed in each needle bar (p.128).
With setting
Without setting
Summary of Contents for TEMX-C Series
Page 13: ...To search from the menu key ...
Page 25: ...Inspection before starting work 12 Chapter 1 ...
Page 39: ...How to use each part 26 Chapter 2 ...
Page 40: ... E 1 2 3 4 5 6 7 8 9 10 11 27 PT10 Chapter 3 Screen 1 Screen display 28 2 Message display 31 ...
Page 147: ...Other functions that must be remembered 134 Chapter 5 ...
Page 171: ...To move the frame to the position registered 158 Chapter 6 ...

