- 10 -
Attaching the Finder Bracket
ی
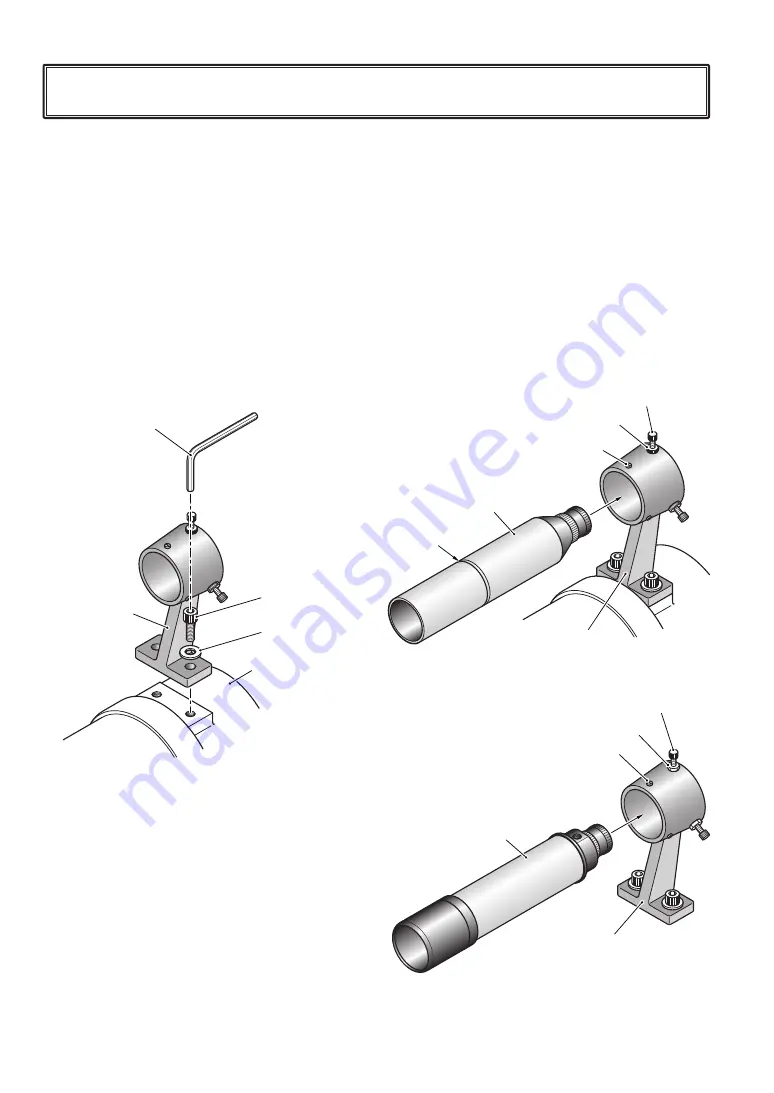
The finder is attached to the telescope
using two 4mm cap bolts and washers
provided with the finder bracket. The finder
attaches to two holes in the telescope
focuser casting. When shipped, these holes
have two Philips head screws inserted for
transport. Please note that if the washers
are not used, the ends of the cap bolts may
contact the drawtube and cause damage.
positioned. Use the small screwdriver to fix
the 3 lock screws making sure to tighten
them equally and that gap between the
finder and the finder bracket is equal. Then
adjust the finder adjusting screw with the
lock nut to align the finder axis with the axis
of the main telescope.
Attaching the Finder
With the FC-100DZ, Takahashi offers a 6x30 or 7x50 finder as an optional accessory.
The following instructions provide information on installing the optional finder.
4mm Hex Wrench
Washer
Finder Bracket
Hex Cap Bolt
Finder Adjusting Screw
Groove
6x30 Finder Scope
Lock Screw
Lock Nut
6x30 Finder Bracket
Attaching the Finder Scope
ی
If the finder adjusting screws and lock
screw protrude too far into the tube of the
finder bracket they may prevent the finder
from being fully inserted. If this is the
case, unscrew slightly until the finder can
be inserted. You can move the lock nut
along the adjustment screw by rotating it.
In order to adjust the finder lock screw a
small screwdriver is necessary. As shown in
the right figure insert the finder in the finder
bracket and move it back and forth until
Focusing Housing
Finder Adjusting Screw
7x50 Finder Scope
Lock Screw
Lock Nut
7x50 Finder Bracket
Attaching the 6x30 Finder
▼
Attaching the 7x50 Finder
▼


