background image

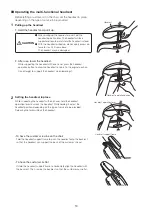
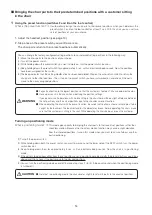
 Bringing the chair parts to their predetermined positions with a customer sitting 


in the chair

1

Using the preset function (switches F and B on the foot control)

What is the preset function?


1. Adjust the headrest position (see page 10).

2. Step once on the preset switch you want to work on.

The chair parts return to their preset positions automatically.

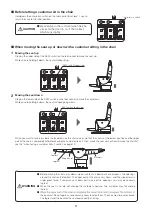
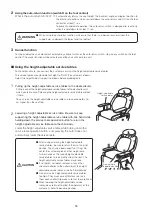
Turning on positioning mode

What is positioning mode?


It automatically brings the chair parts to their preset positions when you hold down the 
preset switch F or B on the foot control for at least 1 sec. With this chair, you can set two 
sets of positions of your own choice.

This mode gives priority to bringing the chair parts to their exact set positions rather than
shockless motion. Because the shockless motion function may cause a slight deviation
from the intended positions, turn on this mode when you want to ensure flatness or other
parts positioning.

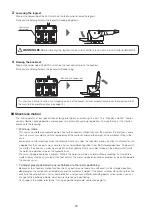
(5) The beep indicates that the setting modification has been completed. Step on the auto-return switch to return the
     chair parts to the initial positions. Then, step on the preset switch you have just worked on and check if the parts
     move to the newly assigned positions.

 Pay extra attention to the legrest position, so that the customer’s feet don’t hit any equipment nearby.

 Have a person sit in the chair when modifying the position settings.

If you perform such operations with no one sitting in the chair, there will be a slight difference between 
the set positions and the actual positions due to the shockless motion function.

 When operating the chair with the preset function, be careful not to allow a stool or other object to be 

caught by the backrest. The backrest and/or the object may break. Before operating the chair, make 
sure that the customer is sitting in the seat. While operating the chair, keep an eye on the customer.

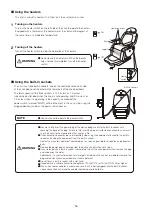
(1) Turn off the power switch.
(2) While holding down both the preset switch you want to work on and the lower side of the SEAT switch, turn the power 

switch back on.

(3) Keep holding down them for approximately 3 sec. until an electronic beep sounds. Now the chair is in positioning 

mode.

(4) If the actual stop positions differ from the set positions even in positioning mode, modify the preset positions again (see 

above) and then check if the parts move to the desired positions.

(5) You can turn the positioning mode on and off by repeating steps (1) to (3). (A beep will sound when the positioning mode 

is turned off.)

 Note that, in positioning mode, the chair vibrates slightly to return its parts to the exact set positions.

CAUTION

WARNING

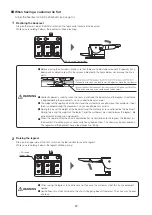
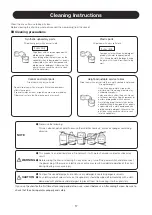
You can change the factory-configured setting positions to your desired setting positions in the following way:
(1) Move the chair parts to the positions of your choice.
(2) Turn off the power switch.
(3) While holding down the preset switch you want to work on, turn the power switch back on.
(4) Keep holding down the preset switch for approximately 3 sec. until an electronic beep sounds. Now the positions
     have been assigned for the switch.

14

Summary of Contents for ESTHE PLACE

Page 1: ...t up or down with a customer sitting in the chair Shockless motion Bringing the chair parts to their predetermined positions with a customer sitting in the chair Using the height adjustable service ta...

Page 2: ...stead when disconnecting it from the socket Pulling the power cord from the socket will damage the power This product is an electrical device Do not wash it with water Failure or an electric shock may...

Page 3: ...objects causing injury or property damage When the backrest is fully reclined never sit on the headrest the height adjustable service tables or the edge of the seat Do not apply an unnecessarily heavy...

Page 4: ...y result Any spillage must be wiped off quickly with a dry soft cloth such as towel Before operating the chair pay careful attention to the surroundings and warn people there about the operation When...

Page 5: ...y deform tear or decay Only a person may sit in the seat Discoloration of resin Resin materials are used in external components of this product Carefully selected materials are used however discolorat...

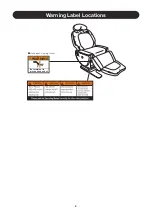
Page 6: ...Hand pinch warning sticker Be careful not to pinch a hand and et WARNING Warning Label Locations 6...

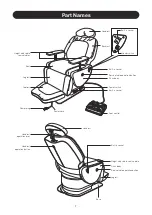
Page 7: ...tables Power plug Headrest operation lever Headrest operation button F B Heater switch Built in socket Built in socket Service table operation button Chair body Power switch Power cord Foot control Bu...

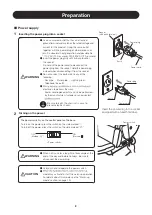
Page 8: ...Insert the power plug fully until its base touches the socket Do not pull the power cord to disconnect the power plug from the socket Hold the power plug instead when disconnecting it from the socket...

Page 9: ...st and the legrest to the preset angles hold down either preset switch F or B for at least 1 sec To return the seat to the lowest position and return the backrest and the legrest to the initially set...

Page 10: ...force to it or hit it from above The headrest may be damaged While supporting the headrest with one hand press the headrest operation button to allow the headrest to return to the original position D...

Page 11: ...ackrest Hold down the auto return switch on the foot control for at least 1 sec to return the chair to the initial position Step on the upper side of the SEAT switch on the foot control to move the se...

Page 12: ...nd the legrest Great force is applied during the movements so you need to be very careful The weight of the upper part of the chair and the customer is used to move the seat down Great force is applie...

Page 13: ...fluid is very cold the shockless motion function is activated to such a degree that the chair parts may come to a halt at very different positions from their intended positions To deal with this matt...

Page 14: ...ing in the chair there will be a slight difference between the set positions and the actual positions due to the shockless motion function When operating the chair with the preset function be careful...

Page 15: ...eight adjustable service tables be sure to return them to the initial position They have a load capacity of 10 kg Do not let the customer place his her weight onto his her hands on the raised height a...

Page 16: ...or heat generation that causes a fire If the connection becomes loose immediately stop using the equipment attached to the built in socket and unplug the equipment from the built in socket Contact you...

Page 17: ...the parts with it and allow them to dry well Do not wipe them with a wet cloth Water and dampness affects these parts If you spill water on them wipe off the moisture immediately Otherwise rust or a...

Page 18: ...of fault Strange noise at the time of start up Daily Inspection Instructions Troubleshooting Breakers For long and safe use of the chair inspect it according to the Daily Inspection Checklist on page...

Page 19: ...to 1 060 hPa Temperature 20 to 70 C Humidity 10 to 95 No condensation Atmospheric pressure 700 to 1 060 hPa Model No Maximum load Weight No of built in sockets Maximum power capacity Operating enviro...

Page 20: ...Disposal Instructions When disposing of the chair or its replaced parts follow the laws and regulations applicable at the time 20...

Page 21: ...air wobbles or produces strange noise during operation contact your nearest dealer or Takara Belmont If the chair parts do not stay where they are for a while and go down by themselves contact your ne...

Page 22: ...NOTE...

Page 23: ...NOTE...

Page 24: ...2 1 1 Higashishinsaibashi Chuo ku Osaka 542 0083 Japan TEL 81 6 6212 3523 FAX 81 6 6211 5745 TAKARA BELMONT CORPORATION MANUFACTURER...

Reviews: