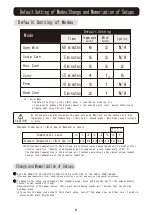


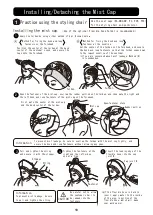
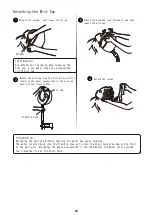
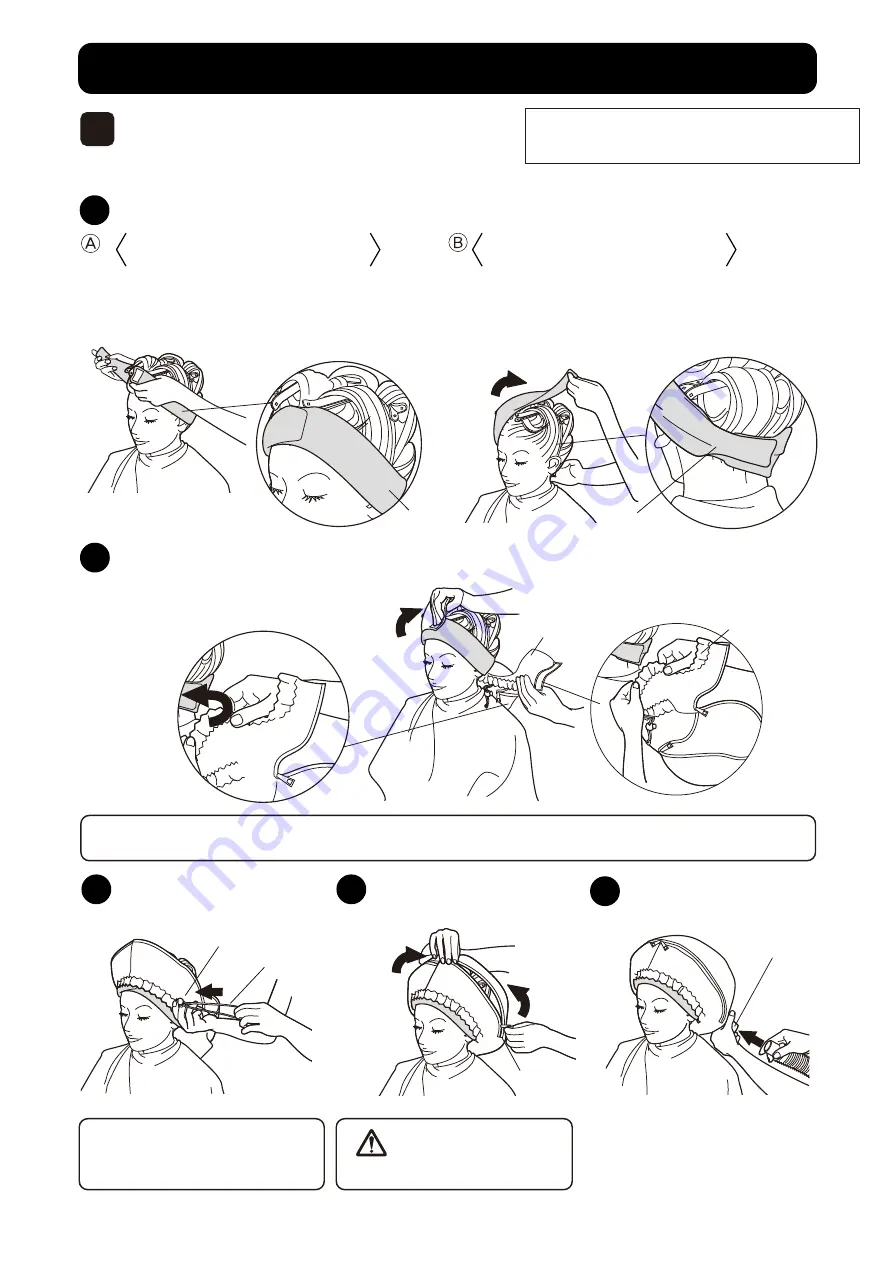
Installing/Detaching the Mist Cap
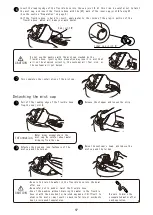
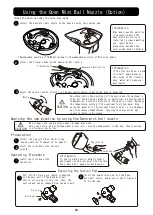
Apply the turban by using either method of A or B shown below.
First, mate the center of the mist cap
and the back center of the turban.
Open‑fastener state
Mist cap
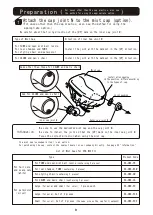
Cap joint N
Rubber portion
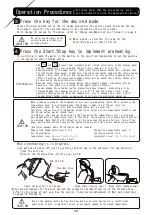
Method for fixing the hook and loop
fastener at the neckline.
Set the center of the turban on the forehead, and secure
the hook and loop fasteners so that the turban comes down
to the lowest neckline of the customer.
*If you are concerned about mist leakage, Method (B)
is recommended.
Use the mist caps (EA‑SMC‑SW, PC, PCB, PCS)
for the styling chair and perm/color.
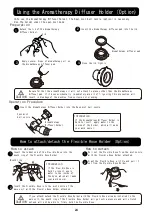
Be careful not to allow
the customer's hair to
be jammed into the
fasteners.
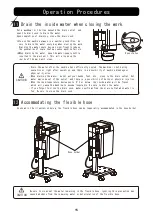
To prevent mist leakage, be sure
to pull and tighten the string.
※If the flexible hose is hard to
insert, apply water to the inside
of the plug‑in portion of the
flexible hose, which will make
your work easier.
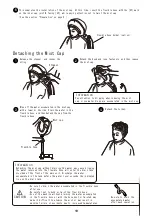
Method for fixing the hook and loop
fasteners on the forehead
Position the center of the turban at the back
center of the customer's neck, and secure the
tape onto the forehead.
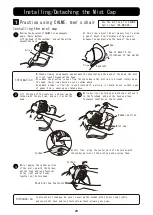
1
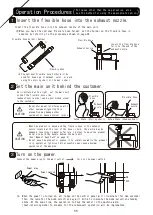
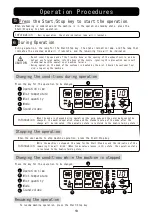
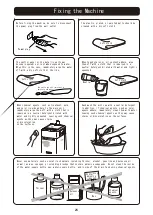
Practice using the styling chair
Installing the mist cap.
(Use of the optional Flexible hose holder is recommended.)
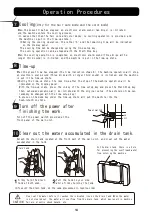
1
Pull and tighten the string
and secure it with the stopper.
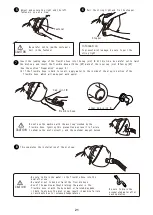
3
Tighten the fasteners at the
right and the left sides,
one at a time.
Insert the leading edge of the
flexible hose into the cap
joint N.
4
5
Open the fastener of the mist cap, overlap the rubber portion on the turban, and then mate the right and
the left hook and loop fasteners of the mist cap on the forehead.
2
Information
CAUTION
To prevent mist leakage, be sure to overlap the turban with the mist cap tightly, and
secure the hook and loop fasteners without allowing any gaps.
Information
Stopper
String
18
Fastener
Turban
Turban
Summary of Contents for SPA MIST II AK-160
Page 2: ......