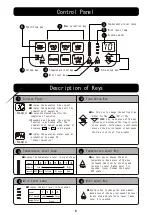
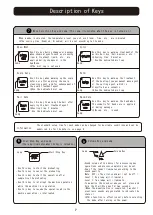


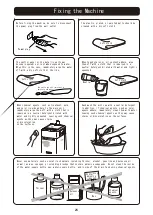
Installing/Detaching the Mist Cap
1
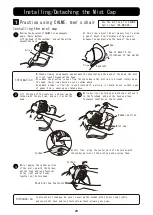
Practice using CALME, men's chair
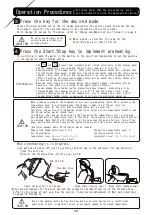
Use the mist cap for CALME,
men's chair (EA‑SMC‑CA).
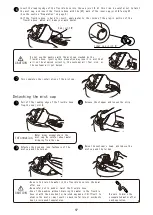
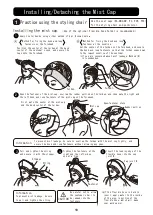
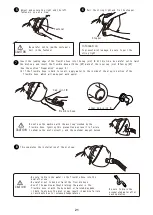
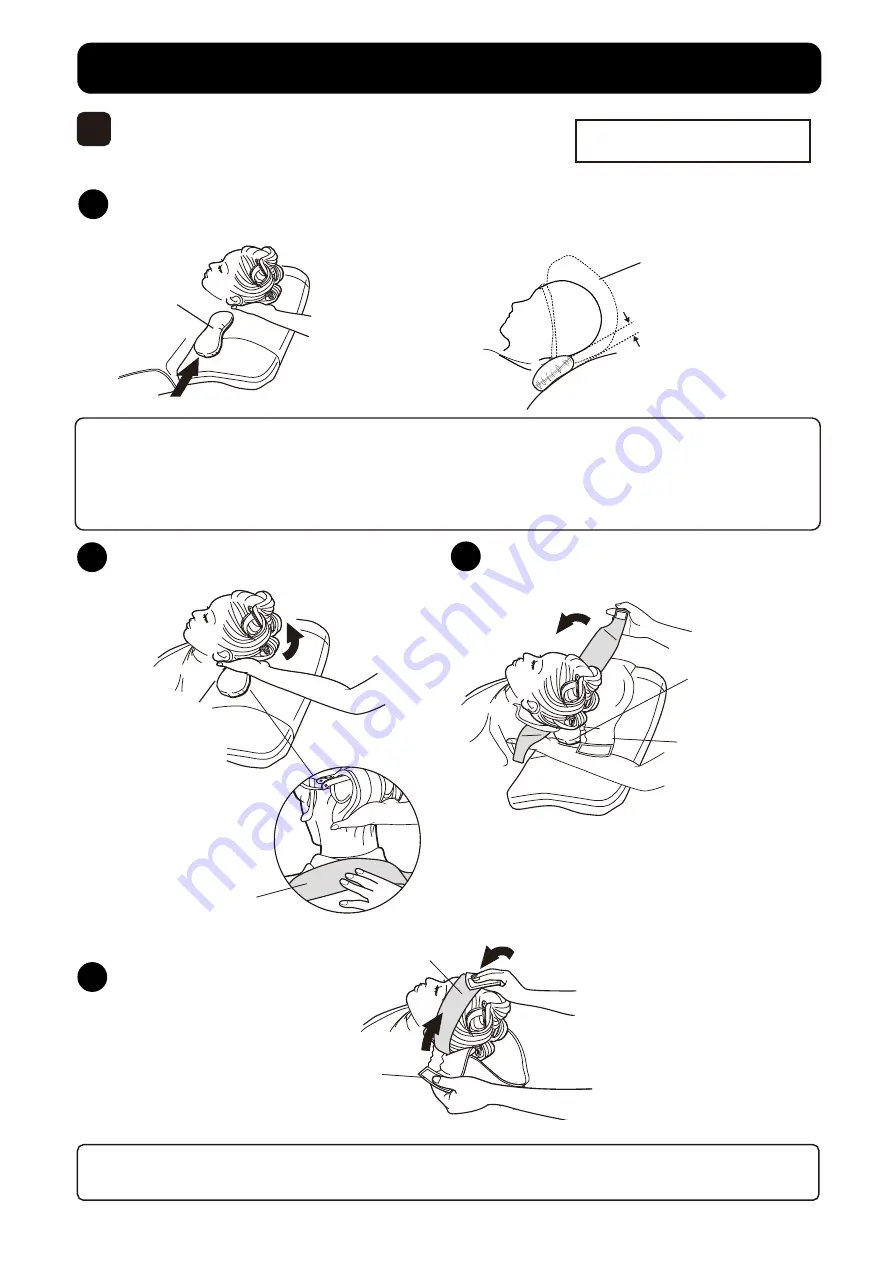
Installing the mist cap
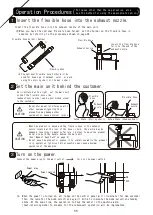
Recline the backrest of CALME for an adequate
angle. (Swing Button)
Lift the head of the customer, and set the pillow
beneath the neck.
Lift the head of the customer, and overlap the
turban with the mist cap, and set it under the
head.
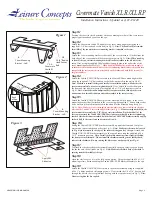
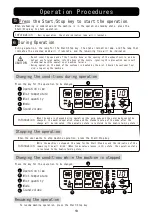
At this time, adjust the pillow position to allow
a gap of about 5 cm (thickness of two palms)
between the backrest and the back of the head.
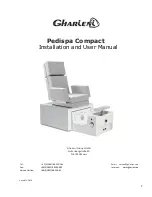
While pulling the turban at both ends, attach it
to the forehead, and put the hook and loop
fasteners together on the forehead.
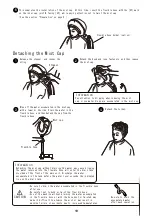
・Without allowing an adequate gap between the backrest and the back of the head, the mist
will not reach throughout the head.
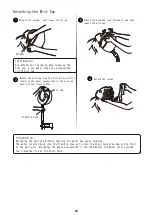
・Even when the practice is done from the state where the mist cap is already installed on
the head, the pillow should be set as shown above.
・Even when a towel or the like is used instead of a pillow, it should be set so that a gap
of about 5 cm is ensured as stated above.
Cap
Gap of about 5 cm
(thickness of two palms)
Pillow
Backrest
Pillow
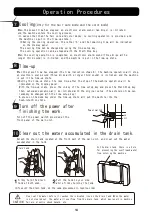
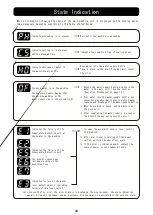
Information
While lapping the rubber portion
of the mist cap with the turban,
put the hook and loop fastener
at the right and left ends
together on the forehead.
At this time, align the center part of the turban with
the rubber portion of the mist cap and overlap them.
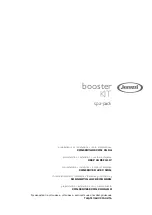
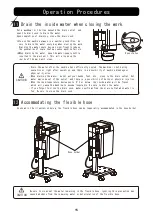
To prevent mist leakage, be sure to overlap the turban with the mist cap tightly,
and secure the hook and loop fasteners without allowing any gaps.
1
2
3
4
Information
Turban
Turban
20
Rubber portion
Mist cap
Hook and loop fasteners
Summary of Contents for SPA MIST II AK-160
Page 2: ......