background image

7

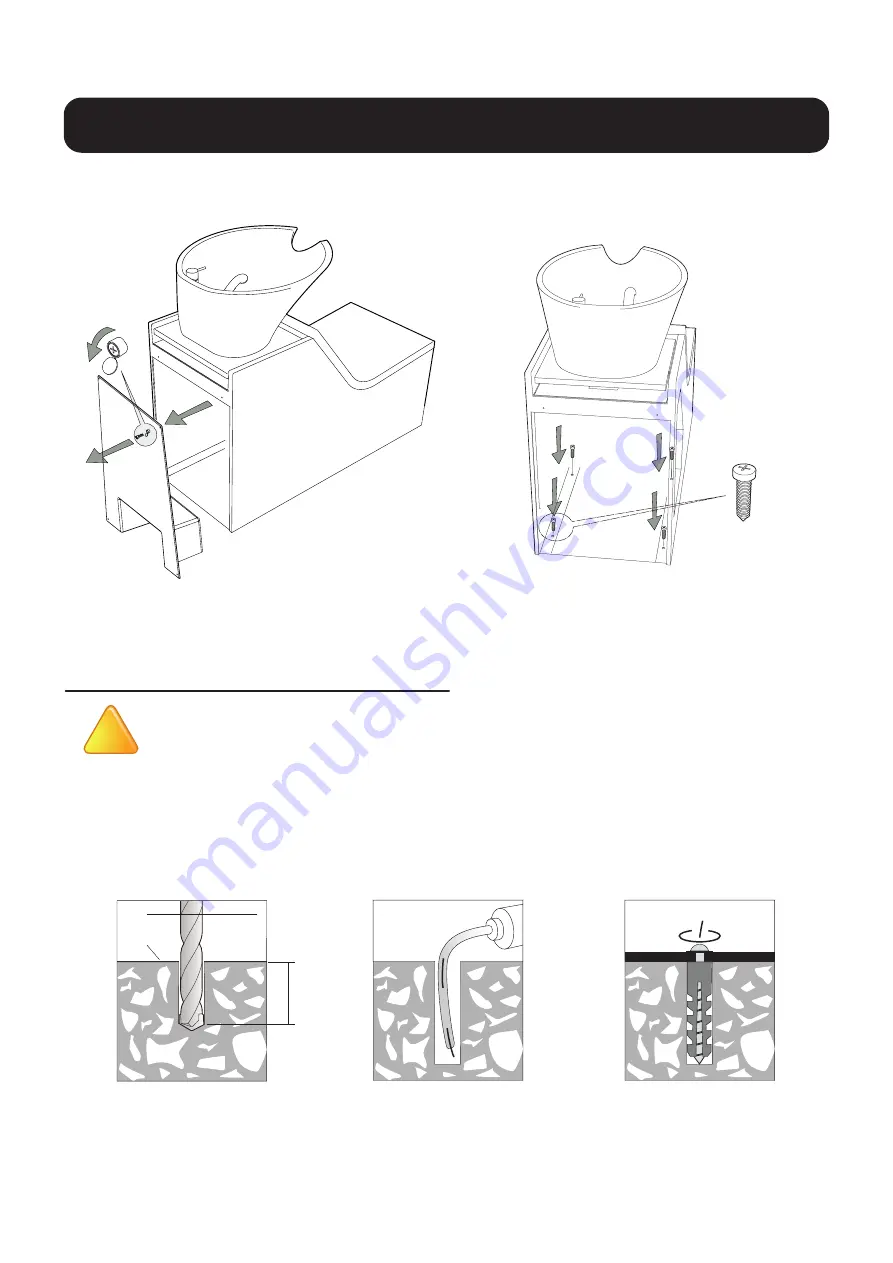
Installation of main body

VACUUM

ANCHOR

SUPPLIED

TEMPLATE

FLOOR

Ø8.5mm

HOLE DEPTH 50mm OR MORE

             Precaution

• The strength of the anchor bolts will be reduced if they are hammered into the hole while touching the bottom. 

  Open up a gap.

• When installing anchor bolts, insert them so that there is 2 to 5 mm of the threaded section of the head protruding. 

  If the bolts are inserted with more than 5 mm protruding, the head may interfere with the cover.

!

4X

Installation process for anchor screws / bolts

Summary of Contents for Swash

Page 1: ...ckaging Carrying the main body Installation of main body Installation process for anchor bolts Attach piping Checks after installation of pipe After installation Note 2 2 3 5 5 6 6 7 7 8 8 9 9 Table o...

Page 2: ...se and Precautions for Handling Synthetic Leather will be responsible for any damage or risk incurred Detailed descriptions of symbols are provided below Read and understand these symbols thoroughly b...

Page 3: ...dimensions listed above may vary slightly from model to model 2 The sample values shown are for a 170 cm tall person lying down Ensure that there is a ample space surrounding the seat for extremely t...

Page 4: ...Dimensions Dimensions in mm Plumbing layout 350 1235 400 50 120 DRAIN 40mm COLD WATER SUPPLY 3 8 H 60mm 588 294 4 HOT WATER SUPPLY 3 8 H 60mm...

Page 5: ...t is designed for indoor installation Always install this product indoors Precautions during installation of pipes Do not use pipes made of materials that may introduce rust for the water supply pipe...

Page 6: ...6 SWASH packing 4X Precaution Carrying the main body 2 Remove screws for transportation 1 Open the back maintenance cover 3 Close the back maintenance cover 4X...

Page 7: ...be reduced if they are hammered into the hole while touching the bottom Open up a gap When installing anchor bolts insert them so that there is 2 to 5 mm of the threaded section of the head protrudin...

Page 8: ...product specifications position pipe height and that it matches the pipe installation diagram and template Do not connect the hot water supply pipe and water supply pipe in reverse Check that water i...

Page 9: ...re there any screws that have not been attached 2 Is there any rattling Check the attachment areas again if there is any rattling 3 Are there any cracks or dirt on the basin 4 Is there any damage or b...

Reviews: