15
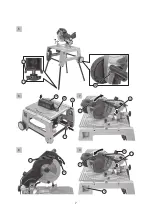
Adjusting the cutting height – page 14).
– Set the saw blade to the desired angle of
inclination (
•
Adjusting saw blade tilting – p.
74).
– Switch on the product = open the flap over
the On/Off switch (22); press the green switch
[1].
– Saw through the workpiece in one work step.
– Switch the device off it you will not be
working with it again immediately. Switch off =
Press red switch [0]; close flap.
Cleaning and maintenance
Cleaning and maintenance at a glance
Changing the saw blade
DANGER!
Risk of death through electric shock!
Disconnect the mains plug before carrying out
any work on the device.
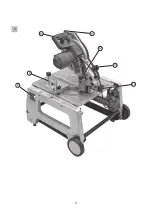
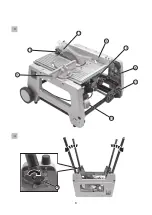
To change the saw blade, the product must be
brought to the crosscut saw position.
•
Turning over into crosscut saw position – p.
71
DANGER!
Risk of burns!
Shortly after commencing sawing, the saw
blade can become very hot. There is a risk of
burning! Let a hot saw blade cool down. Never
clean a hot saw blade using flammable liquids.
Risk of being cut even with a stationary saw
blade! Wear gloves when changing the saw
blade.
Removing the saw blade
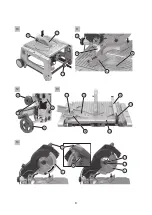
• P. 7, item 14
– Press the release button (11) and carefully
push the reciprocating protective hood (5)
upwards.
– Push and hold down spindle lock (39).
– Undo the tensioning screw (40) clockwise
(Caution! left-hand thread!)
– Carefully pull off the clamping
flang
e (41) and
saw blade (4).
Installing saw blade
DANGER!
Risk of injury!
The tensioning screw should not be tightened
too tight.
NOTICE!
Risk of product damage!
It is imperative to observe the rotational
direction of the saw blade and clamping flange
when fitting!
When
fi
tting, make sure that the saw blade is
positioned correctly on the motor shaft.
– If necessary, clean all parts to be assembled
before installation.
– • Removing the saw blade
Installation in reverse order.
Storage and transport
Storage
WARNING!
Risk of injury!
Store the product so that it cannot be started
up by unauthorised persons. Ensure that
nobody can injure themselves on the product
while it is stationary.
NOTICE!
Summary of Contents for TKFOS-10-A
Page 1: ......
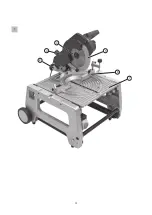
Page 5: ...4 5 3 4 6 2 7 1...
Page 6: ...5 8 9 10 11 12 13 14 2...
Page 7: ...6 15 16 17 18 19 20 21 22 3 25 4...
Page 8: ...7 27 26 28 5 29 8 21 24 6 12 3 7 16 30 8 12 13 3 8 9...
Page 9: ...8 21 17 31 10 6 14 32 33 11 21 34 19 20 12 36 18 15 35 38 37 13 40 41 4 39 5 11 14...
Page 19: ...18 Despiece Modelo TKFOS 10 A...

