background image

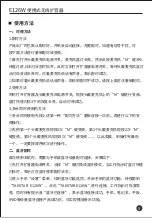
使用方法

一、对频方法

1.

配对方法

产品出厂时已默认配对好,开机会自动连接,无需配对。如遇有信号干扰,可

按下面方法进行重新配对或变频。

①首先打开头戴麦克风电源开关,麦克风蓝灯长亮,然后长按麦克风“

M”

3

秒,

待蓝灯进入快闪状态时松开。此时立刻打开扩音器电源开关,等待头戴麦克风蓝灯

从闪烁变成长亮时,对着麦克风说话有声音,表示配对成功;

②如果对着头戴麦克风说话没声音,即说明配对不成功,请按上面方法重新配对。

2.

变频方法

同时打开扩音器及头戴麦克风电源开关,短按头戴麦克风上的“

M”

键进行变频,

蓝灯快速闪烁

3

下后恢复长亮,自动对频成功。

3.

多台同时使用的方法

①多台同时使用先按上述第一种“配对方法”重新连接一次后,再进行以下的变

频操作;

②先把第一个头戴麦克风短按

1

次“

M”

键变频,第

2

个头戴麦克风短按

2

次“

M”

键变频,第

3

个头戴麦克风短按

3

次“

M”

键变频......,以此类推,到操作完最后

一个,一定要按顺序依次进行操作。

二、蓝牙配对

首次使用本机时,需要与手机或蓝牙设备配对连接,步骤如下:

①先打开扩音器电源开关,点按“

M”

键切换成蓝牙模式,当工作指示灯蓝灯快速

闪烁时,表示正在蓝牙搜索配对状态;

②进入手机“设置”菜单,找到蓝牙功能选项,开启手机的蓝牙功能,待搜索到

TAKSTAR  E126W”

点击“

TAKSTARE126W”

进行连接,工作指示灯恢复常

亮,同时伴有提示音“蓝牙已连接”,表示蓝牙连接成功,手机、笔记本、平板、

IPAD

等设备蓝牙连接产品成功后,可实现播放音乐功能。

5

便携式无线扩音器

E126W

Summary of Contents for E126W

Page 1: ...PORTABLE WIRELESS AMPLIFIER E126W...

Page 2: ...MINI UHF 40 8W 8 Type C E126W 400 6828 333 E126W 1 1 1 Type C Micro USB 1 1 1 E126W 1...

Page 3: ...80Hz 12kHz 8W 4 THD 1 3 5V 4 2V 3 7V 2000mAh DC 5V 800mA 2 5 8 142g 91mm 41mm 119mm 60Hz 16KHz 51 54dB UHF 630MHz 698MHz UHF 40 3 7V 400mAh DC 5V 150mA 2 5 5 39g 2 E126W...

Page 4: ...ON ON OFF MIC IN 3 5mm M M Type C 3 E126W...

Page 5: ...ON OFF M M M M M Micro USB E126W 4...

Page 6: ...1 M 3 2 M 3 3 1 M 2 2 M 3 3 M M TAKSTAR E126W TAKSTARE126W IPAD 5 E126W...

Page 7: ...1 2 CCC 4 5 6 7 3 6 M M E126W...

Page 8: ...7 E126W...

Page 9: ...about device status Wear across shoulder or around waist use at ease Stylish look and ergonomic design Dear Customer Thank you for purchasing Takstar E126W Portable Wireless Amplifier In order to bet...

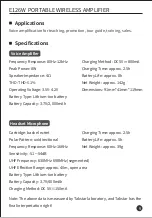
Page 10: ...1mm 119mm Cartridge back electret Polar Pattern unidirectional Frequency Response 60Hz 16KHz Sensitivity 51 54dB UHF Frequency 630MHz 698MHz segmented UHF Effective Range approx 40m open area Battery...

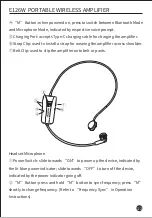
Page 11: ...power off the device slide until a click sound Power Indicator illuminates red during charge turns blue when fully charged flashes red when battery is running low during operation which requires charg...

Page 12: ...plifier across shoulder Belt Clip used to clip the amplifier onto belt or pants Headset Microphone Power Switch slide towards ON to power up the device indicated by the lit blue power indicator slide...

Page 13: ...y Sync 1 Sync Frequency The product is synced by default before shipping out the factory and will automatically connect to each other without extra sync operation In case of signal interference you ca...

Page 14: ...to your phone or Bluetooth device as follows Turn on the amplifier then press M button once to switch to Bluetooth Mode and start Bluetooth discovery and pairing indicated by a flashing blue LED Ente...

Page 15: ...please use a matching power adapter that has obtained CCC certification and meets the standard requirements 4 Do not dissemble impact or squeeze the product or throw into fire Stop using if it is seve...

Page 16: ...e product in places prohibited by laws or regulations to avoid accident 8 Do not disassemble or repair the product by yourself to avoid injury If you have any questions or require any services please...

Page 17: ......

Page 18: ......
Reviews: