background image

12

① 

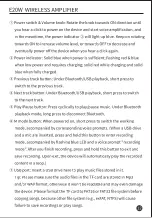
Power switch & Volume knob: Rotate the knob towards ON direction until 

      you hear a click to power on the device and start voice amplification, and 

in the meantime, the power indicator 

② will light up blue. Keep on rotating 

towards ON to increase volume level, or towards OFF to decrease and 

eventually power off the device when you hear a click again.

② Power indicator: Solid blue when power is sufficient; flashing red & blue 

when low power and requires charging; solid red while charging and solid 

blue when fully charged.

③ Previous track button: Under Bluetooth/USB playback, short press to 

switch to the previous track.

④ Next track button: Under Bluetooth/USB playback, short press to switch 

to the next track.

⑤ Play/Pause button: Press cyclically to play/pause music. Under Bluetooth 

playback mode, long press to disconnect Bluetooth.


⑥ M mode button: When powered on, short press to switch the working 


mode, accompanied by corresponding voice prompts. (When a USB drive 


and a mic are inserted, press and hold this button to enter recording 


mode, accompanied by flashing blue LED and a voice prompt "recording 


mode". After you finish recording, press and hold this button to exit and 


save recording. Upon exit, the device will automatically play the recorded 


content in a loop.)

⑦ USB port: Insert a USB drive here to play music files stored in it.

      Tip: Please make sure the audio files in the TF card are stored in Mp3 

      and/or WAV format, otherwise it won't be readable and may even damage 

      the device. Please format the TF card to FAT16 or FAT32 file system before 

      copying songs, because other file system (e.g.,


exFAT, NTFS) will cause 

      failure to save recordings or play songs.

WIRELESS AMPLIFIER

E20W

Summary of Contents for E20W

Page 1: ...User Manual Wireless Amplifier E20W...

Page 2: ...10W LOW THD PAD U AUX 10 UHF 40 E20W 400 6828 333 E20W 1 E20W 1 1 1 1 1...

Page 3: ...KHz 5W 10W 4 UHF 630MHz 698MHZ UHF 40 DC 3 5V 4 2V 3 7V 2500mAh DC 5V 1 5A 2 10 200g 100x90x35 5mm Type C 5 0 60Hz 16KHz 45 3dB 0dB 1V Pa at 1KHz UHF 630MHz 698MHz UHF 40 3 7V 400mA DC 5V 200mA 2 5 39...

Page 4: ...ON ON OFF U U M U 3 E20W...

Page 5: ...4 U U U MP3 WAV TF FAT16 FAT32 exFAT NTFS MIC AUX 3 5mm Type C E20W...

Page 6: ...ON OFF Type C USB M LED 01 40 40 U1 U9 9 3 10 M E0 M E1 10 40 5 E20W...

Page 7: ...1 M 3 10 2 M M 3 M 3 1 M 2 TAKSTAR E20W TAKSTAR E20W 6 E20W...

Page 8: ...1 2 3 CCC 4 5 6 7 7 PAD 3 M M E20W...

Page 9: ...8 WEEE 2012 19 EU WEEE https www takstar com E20W...

Page 10: ...signal input to serve as a portable speaker Built in high capacity eco friendly li ion battery keeps you going for up to 10 hours Utilizes UHF technology with up to 40m range in unobstructed interfer...

Page 11: ...7V 2500mAh Charging Voltage DC 5V 1 5A Charging Time about 2 hours Play Time about 10 hours Weight about 200g Dimensions 100x90x35 5mm Charging Interface Type C Bluetooth Version 5 0 Ampli er Specific...

Page 12: ...Distance about 40m in open areas w o interference Battery Type Li ion battery Battery Capacity 3 7V 400mA Charging Spec DC 5V 200mA Charging Time about 2 hours Play Time about 5 hours Weight about 39g...

Page 13: ...ly to play pause music Under Bluetooth playback mode long press to disconnect Bluetooth M mode button When powered on short press to switch the working mode accompanied by corresponding voice prompts...

Page 14: ...ier as an active speaker Charging interface Connect the Type C charging cable to charge the amplifier Strap clip Used to install the shoulder strap for wearing the amplifier across shoulder Headset Mi...

Page 15: ...default 40 working channels in total 01 40 Volume level is displayed for 3s when you press volume button 9 levels in total U1 U9 LED display goes off automatically after 10s without any operation High...

Page 16: ...rent channels using the frequency changing method When using multiple devices at the same time it is necessary to switch to different channels to avoid interference voice is amplified and if pairing i...

Page 17: ...not store in a humid or dusty area for extended time Keep away from fire rain liquid intrusion bumping throwing vibrating or from blocking any ventilation openings to prevent malfunction 5 The produc...

Page 18: ...alth due to potentially hazardous substances that are generally associated with WEEE At the same time your cooperation in the correct disposal of this product will contribute to the effective usage of...

Page 19: ......

Page 20: ......

Reviews: