5
.
WARNING
FAILURE TO PROPERLY INSTALL LOCKING PIN
AS NOTED IN STEP 5 COULD RESULT IN FAN
LOOSENING AND POSSIBLY FALLING.
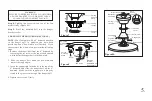
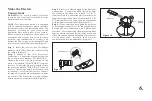
Step 8.
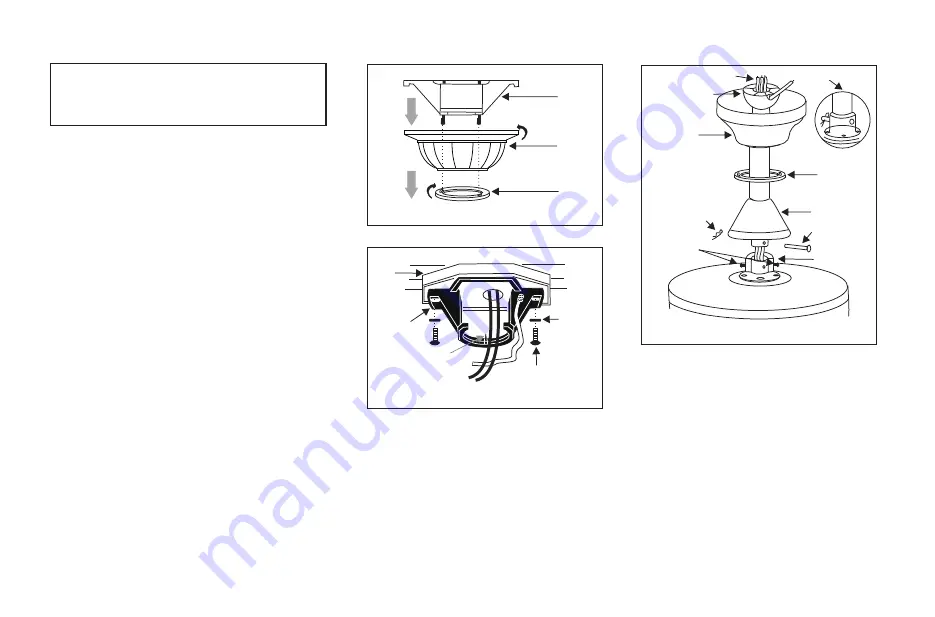
Tighten two set screws on top of the fan
motor firmly (Figure 8A)
Step 9.
Place the downrod ball into the hanger
bracket socket.
CHANGING THE DOWNROD (OPTIONAL)
NOTE:
Your fan comes with a 4" downrod attached
to the hanger ball. In addition you have been
provided with a 6" downrod to use if desired. If you
choose to use the 6" downrod, perform the following
steps:
1. Remove the hanger ball from the 4" downrod by
loosening the set screw at the top of the downrod
which holds the hanger ball to the downrod.
2. Slide the hanger ball down the downrod and
remove the support pin.
3. Insert the support pin in the holes at the top of the
6" downrod and slide the hanger ball up the 6"
downrod. Make sure the suppout pin is properly
seated in the grooves in the top of the hanger ball.
4. Tighten the set screw firmly.
Mounting
screws
(supplied with
electrical box)
Hook
Ceiling
mounting
plate
UL Listed
electrial
box
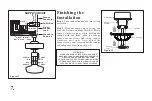
Figure 8
120V Wires
Pin in
locked
position
Motor collar
Motor wires
Ball/downrod
assembly
Ceiling
canopy
Tighten
screws
firmly
Figure 8A
Hanger pin
Locking pin
Collar cover
Canopy
cover
Figure 7
Ceiling
mounting
plate
Ceiling
canopy
Canopy
cover
Washers


