background image

TS-100 Owner’s Manual

AM


8:59    8/24


NEW


06

765-555-1234

JOHN SMITH

RPT

CALL#

AM


8:59    8/24


06

DELETE ALL?

CALL#

DELETING CALLS

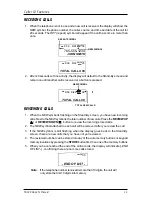
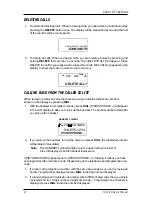
1. To delete an individual call:  When reviewing calls, you can delete an individual call by

pressing the DELETE button once. The display will be erased line by line and the rest
of the records will be renumbered.

2. To delete all calls: When reviewing calls, you can delete all calls by pressing and

holding DELETE for more than 3 seconds. Then [DELETE ALL]’ will appear. Press
DELETE to confirm you really want to erase all records. [-NO CALLS-] appears on the
display to show there are no calls stored in memory.

CALLING BACK FROM THE CALLER ID LIST

When reviewing received calls, there are two ways to dial the telephone numbers
shown on the display by pressing DIAL.

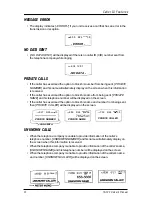
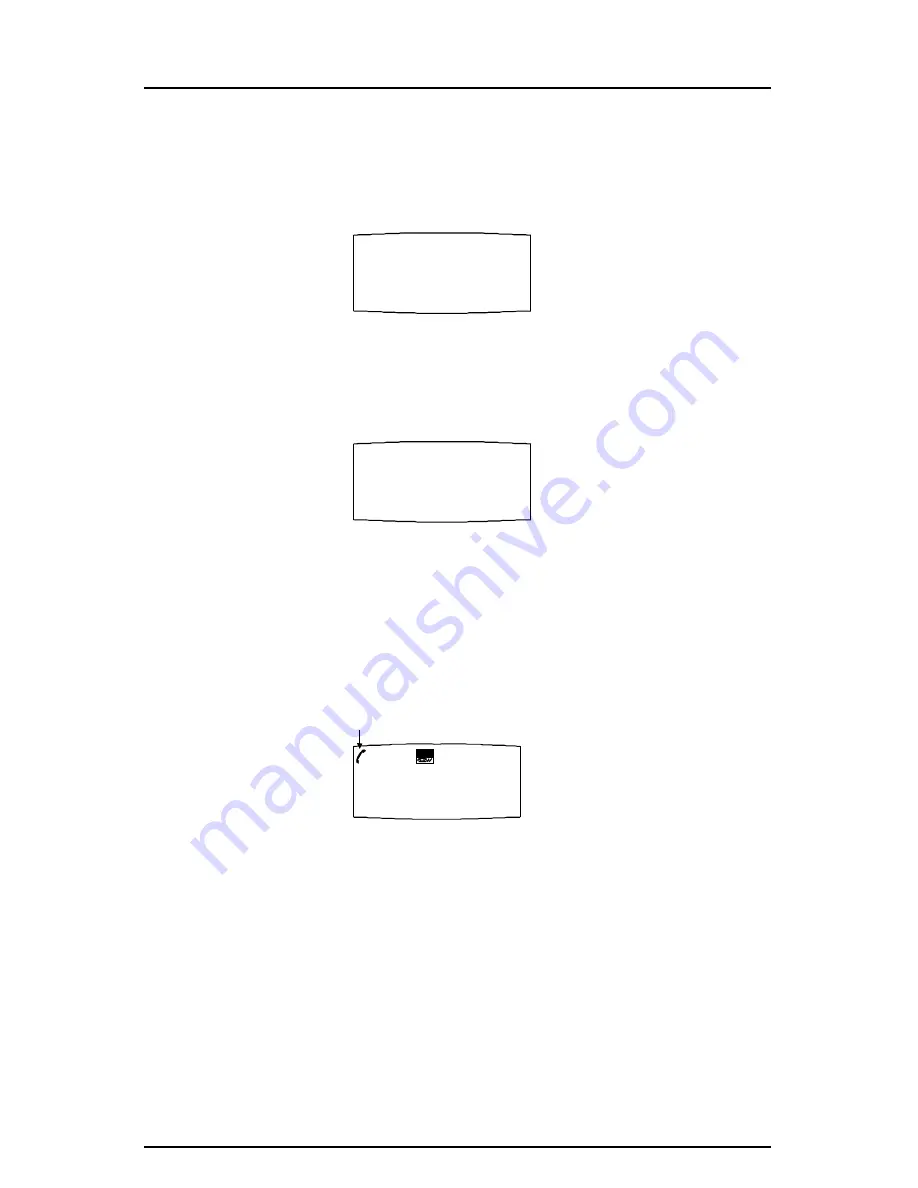
1. With the handset in its cradle (on-hook), press DIAL. [PICKUP PHONE...]” will appear

in the LCD display to ask you to pick up the handset. The number will be dialed after
you pick up the handset.

2. If you pick up the handset, review the calls, and press DIAL, the displayed number

will be dialed immediately.

Note: The HANDSET symbol will light up in the upper left hand corner of

the LCD display when the handset is picked up.

If [SET AREA CODE] appears prior to [PICKUP PHONE...]” or dialing, it means you have
not programmed the local area code. Please hang up the telephone and program the area
code.

1. If a local call (a telephone number with the same area code as you set) is reviewed

and its 7-digit number displayed, press DIAL to dial the number displayed.

2. If a long distance call (a telephone number with a different area code than you set) is

reviewed and its 10-digit number (3-digit area code + 7-digit telephone number) is
displayed, press DIAL to dial the number displayed.

PM


8:59     9/24


NEW


36

914-655-1234

PICKUP PHONE...

CALL#

+9

HANDSET SYMBOL

Caller ID Features

1 3

Summary of Contents for TS-100

Page 1: ...Owner s Instruction Manual TalkSwitch TS 100 Multi Feature Telephone...

Page 2: ...TS 100 Owner s Manual PLEASE READ THIS MANUAL BEFORE INSTALLING OR USING YOUR NEW TELEPHONE EQUIPMENT i...

Page 3: ...hone Usage 1 Telephone Features 4 Using The Telephone With TalkSwitch 8 Customizing The Telephone for Talkswitch 10 Caller ID Features 11 Telephone Service Problems 16 Maintenance Information 16 Telep...

Page 4: ...Button 14 Green Message Extension In Use LED 15 Red New Call LED 16 Dial Button 17 PBX 24 90V Message LED 18 Multi Angle Display 19 Hold Flash Button 20 Options Button 21 Transfer 22 Cancel Transfer...

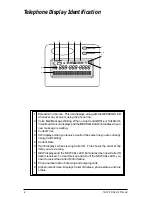
Page 5: ...4 CW displays when you receive a call on the same line you are currently using Call Waiting 5 Current Date 6 Call displays when viewing Caller ID This shows the order of the data you are viewing 7 NEW...

Page 6: ...ion unless proper ventilation is provided 9 Never spill liquid on the telephone or push objects of any kind through ventilation slots Liquid or objects may touch dangerous voltage points or short out...

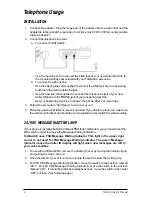
Page 7: ...nit on a flat table or mount it on a wall If you desire to place it on a wall use the wall mount bracket and short line cord supplied to accomplish the wall mounting 24 90V MESSAGE WAITING LAMP If you...

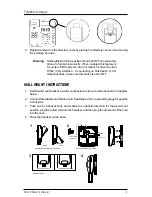
Page 8: ...re is for certain PBX systems and not meant for direct Central Office CO interface If connecting to TalkSwitch or CO telephone lines make sure this switch is set to OFF WALL MOUNT INSTRUCTIONS 1 Insta...

Page 9: ...code REVIEW UP button to change the digit from 0 to 9 REVIEW DOWN button to move to the next digit When you are finished setting the local area code press Dial 4 When SET LDS CODE appears press REVIEW...

Page 10: ...ain PLACING A PHONE CALL 1 Lift the handset or press the SPEAKERPHONE button and wait for a dial tone 2 Dial the telephone number you wish to call The number will appear on the display window SPEAKERP...

Page 11: ...d memory location To store in an auto memory button located on right hand side of base Press 1 2 3 4 5 To store in a keypad memory location Press one of the keypad buttons l 2 3 or 0 5 Use pull out me...

Page 12: ...1 To place a call on hold using TalkSwitch be sure to use the HOLD FLASH button located at the top right NOT the HOLD button located at the bottom left The HOLD button located at the bottom of the ph...

Page 13: ...machine CALL WAITING DISPLAY Call Waiting Caller ID tells you there is another call waiting and lets you know who the caller is before you answer it The call waiting information will be shown on the u...

Page 14: ...ected to the caller 2 Hang up your extension immediately The call is transferred to the office extension immediately upon hanging up the phone Under some situations the call may bounce back to you In...

Page 15: ...inform you of the new mode settings Retrieve Voicemail Access to your voice mailbox We strongly recommend that you password protect your voice mailbox You may wish to pre program your voicemail soft k...

Page 16: ...ur voice mailbox number It is usually the same as your extension and is numbered between 111 and 118 2 Power on your TalkSwitch Phone by plugging it into the AC power 3 Once the phone has powered on p...

Page 17: ...e mailbox service from the phone company the MESSAGE indicator will flash and MESSAGE WAITING will appear on the display for 20 seconds when a message waiting signal on from the Central Office or Talk...

Page 18: ...e NEW symbol is flashing on the Stand By screen you have new incoming calls Next to the NEW symbol is the total number of new calls Press the REVIEW UP or REVIEW DOWN button to review the incoming sto...

Page 19: ...hook press DIAL PICKUP PHONE will appear in the LCD display to ask you to pick up the handset The number will be dialed after you pick up the handset 2 If you pick up the handset review the calls and...

Page 20: ...t number Pressing OPTIONS twice will change it to an 11 digit number 1 your area code 7 digit telephone number Pressing OPTIONS three times will go back to the original 7 digit telephone number For ex...

Page 21: ...exercised the option to block his name and number from being sent then PRIVATE CALLER will be displayed on the screen UNKNOWN CALLS When the telephone company is unable to provide information of the...

Page 22: ...eller for repair or replacement in accordance with our LIMITED WARRANTY If shipped make sure you obtain a WRA number for proper authorization on the repairs Centrepoint Technologies warrants THIS PROD...

Page 23: ...ervice Caller ID and Call Waiting Caller ID from your telephone company If you only subscribed to the Caller ID service this unit will not display the call waiting caller ID information 2 Check if you...

Page 24: ...must not connect your telephone to coin operated lines or party lines INSTALLATION This model telephone must be connected to the telephone company lines through a modular jack The required USOC for t...

Page 25: ...in the event any unauthorized person alters or repairs the unit Telephone companies use different types of equipment and offer various types of services to customers Centrepoint Technologies does not...

Page 26: ...1545 Carling Ave Suite 510 Ottawa ON K1Z 8P9 www TalkSwitch com support...

Reviews: