A D D I N G I P P H O N E S T O T A L K S W I T C H
1 7
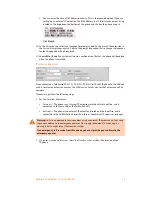
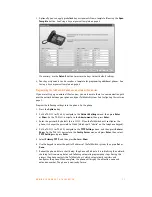
3. Optionally, you can apply predefined key assignments from a template file using the
Open
Template
button. See
Using a key assignment template
on page 8.
If necessary, use the
Default
button to restore the keys to their default settings.
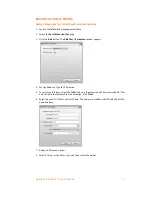
4. Your key assignments can be saved as a template for programming additional phones. See
Saving a key assignment template
on page 8.
Programming the TalkSwitch IP phone as an external IP extension
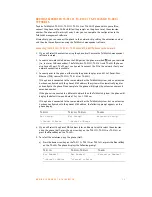
If you are setting up an external IP extension, you must ensure there is a communication path
over the network between your phone and your TalkSwitch system. See
Configuring the router
on
page 2.
Program the following settings into the phone. On the phone:
1. Press the
Options
key.
2. On the TS-9133i or TS-480i, navigate to the
Network Settings
menu, then press
Enter
or
Show
. On the TS-9143i, navigate to the
Admin
menu
, then press
Enter
.
3. Enter the password. By default this is 22222. When the TalkSwitch unit configures the
phone, it changes the password to 23646 (which spells “admin” on the telephone keypad).
4. On the TS-9133i or TS-480i, navigate to the
TFTP Settings
menu, and then press
Enter
or
Show
. On the TS-9143i, navigate to the
Config Server
menu and press
Enter
, then select
TFTP Settings
and press
Enter
.
5. Select
Primary TFTP
, and then press
Enter
or
Show
.
6. Use the keypad to enter the public IP address of the TalkSwitch system, then press
Set
or
Done
.
7. Reboot the phone. After a short delay, the phone will indicate it is initializing the network,
checking for firmware updates, and following automatic programming steps. During this
process the phone contacts the TalkSwitch unit, which automatically registers and
configures the phone. When complete, the phone will display the extension name and
extension number. The phone is now ready for use.


