


Tally Dascom DT-210/230 User Guide V1.3
68
6.5
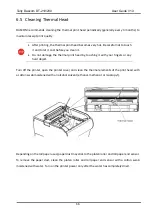
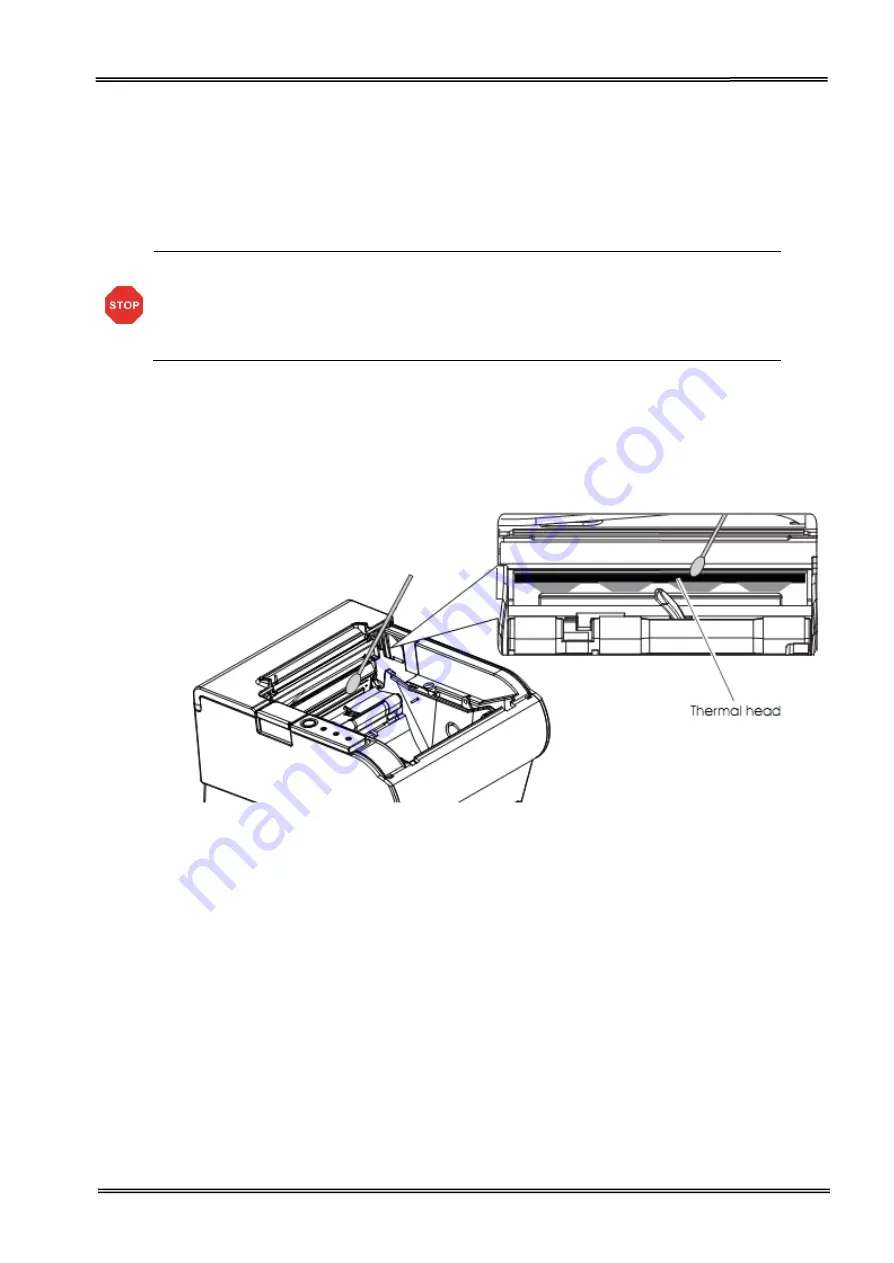
Cleaning Thermal Head
DASCOM recommends cleaning the thermal print head periodically (generally every 3 months) to
maintain receipt print quality.
After printing, the thermal print head becomes very hot. Be careful not to touch
it and to let it cool before you clean it.
Do not damage the thermal print head by touching it with your fingers or any
hard object.
Turn off the printer, open the printer cover, and clean the thermal elements of the print head with
a cotton swab moistened with an alcohol solvent (ethanol, methanol, or isopropyl).
Depending on the roll paper used, paper dust may stick to the platen roller and roll paper end sensor.
To remove the paper dust, clean the platen roller and roll paper end sensor with a cotton swab
moistened with water. Turn on the printer power only after the water has completely dried.
Summary of Contents for DT-210
Page 1: ...User Guide DT 210 230 Thermal Receipt Printer ...
Page 15: ...Tally Dascom DT 210 230 User Guide V1 3 DASCOM REPRESENTATIVES 96 ...
Page 45: ...Tally Dascom DT 210 230 User Guide V1 3 30 5 Click Install 6 Wait for a sec ...
Page 46: ...Tally Dascom DT 210 230 User Guide V1 3 31 7 Installation complete Click Finish ...
Page 48: ...Tally Dascom DT 210 230 User Guide V1 3 33 Enable the Black Mark ...


