


C-6
User's Manual
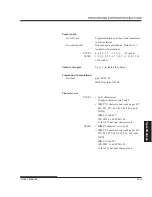
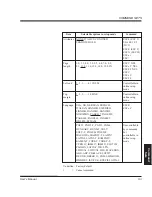
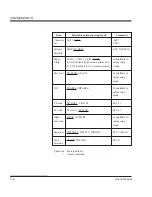
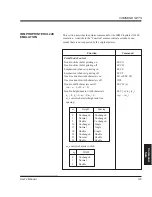
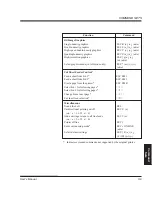
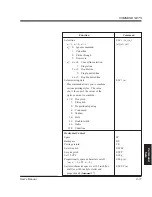
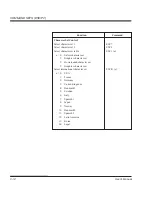
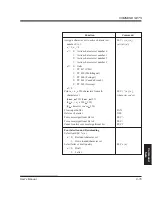
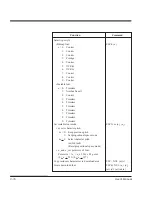
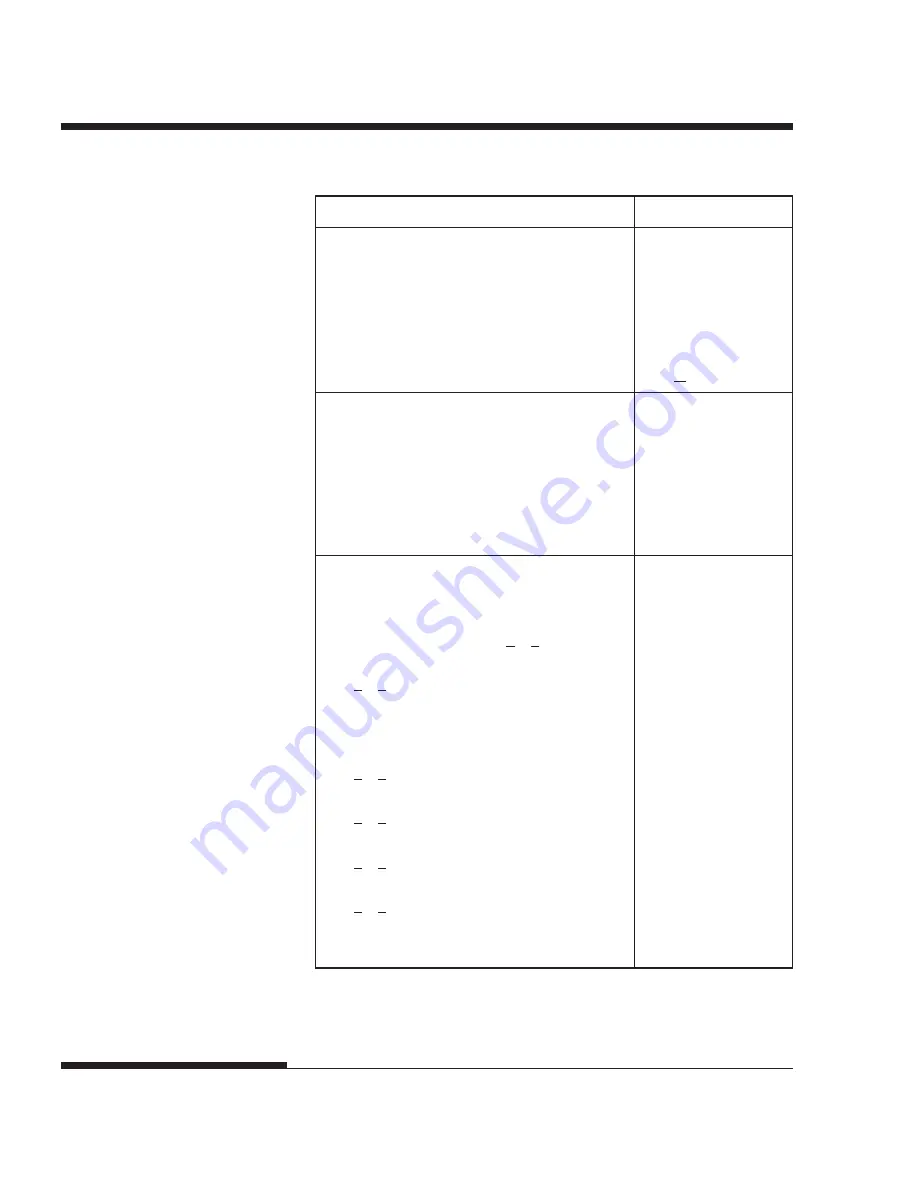
COMMAND SETS (IBM XL24E )
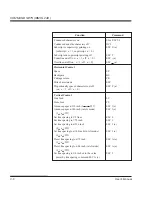
Function
Command
Condensed characters on
SI or ESC SI
Condensed and elite characters off
DC2
Subscript or superscript printing on
ESC S (
n
)
(subscript:
n
= 1, superscript:
n
= 0)
Subscript and superscript printing off
ESC T
Underline on/off (on:
n
= 1, off:
n
= 0)
ESC - (
n
)
Overline on/off (on:
n
= 1, off:
n
= 0)
ESC (
n
)
Horizontal Control
Space
SP
Backspace
BS
Carriage return
CR
Elite characters on
ESC :
Proportionally spaced characters on/off
ESC P (
n
)
(on:
n
= 1, off:
n
= 0)
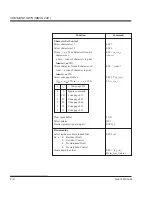
Vertical Control
Line feed
LF
Form feed
FF
Advance paper
n/216 inch (1 <
n
< 255)
ESC J (
n
)
Advance paper
n/180 inch (in AG mode)
ESC J (
n
)
(1 <
n
< 255)
Set line spacing to 1/8 lines
ESC 0
Set line spacing to 7/72 inch
ESC 1
Set line spacing to
n/216 inch
ESC 3 (
n
)
(0 <
n
< 255)
Set line spacing to n/180 inch (in AG mode)
ESC 3 (
n
)
(0 <
n
< 255)
Preset line spacing to n/72 inch
ESC A (
n
)
(1 <
n
< 255)
Preset line spacing to n/60 inch (in AG mode)
ESC A (
n
)
(1 <
n
< 255)
Set line spacing to 1/6 inch or to the value
ESC 2
preset by line spacing command ESC A (
n
)
Summary of Contents for 2248
Page 1: ...User Guide Matrix Printer ...
Page 14: ...User s Manual xii ...
Page 46: ...SETTING UP 2 28 User s Manual ...
Page 66: ...PAPERHANDLING User s Manual 3 20 ...
Page 134: ...USING SETUP MODE User s Manual 5 60 ...
Page 136: ...USING SETUP MODE User s Manual 5 62 ...
Page 158: ...INSTALLING OPTIONS 8 2 User s Manual ...
Page 160: ...SUPPLIES AND OPTIONS A 2 User s Manual ...
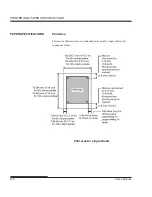
Page 170: ...PRINTER AND PAPER SPECIFICATIONS B 10 User s Manual ...
Page 188: ...C 18 User s Manual COMMAND SETS ESC P2 ...
Page 203: ...User s Manual E 3 CHARACTER SETS Character Sets Graphics Character Set 2 ...
Page 211: ...User s Manual E 11 CHARACTER SETS Character Sets MIK MACEDON Macedonian ABG ABY ...
Page 212: ...E 12 User s Manual CHARACTER SETS DECGR GREEK 11 PG MAC ELOT927 ...
Page 213: ...User s Manual E 13 CHARACTER SETS Character Sets PAGE862 HBR OLD HBR DEC ISO TUK ...
Page 214: ...E 14 User s Manual CHARACTER SETS LATIN 9 RUSCII ...
Page 218: ...E 18 User s Manual CHARACTER SETS NORWEGN Norwegian FRENCH French DANISH2 Danish2 KOREA Korea ...
Page 219: ...User s Manual E 19 CHARACTER SETS Character Sets LEGAL Legal ...
Page 222: ......