Loading optional firmware
Testmodes and Troubleshooting
4-29
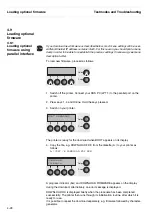
Loading the operating system for the first time
Connect your DOS PC (LPT1:) to the parallel port on the printer. Start from no. 3 in
the description above.
Troubleshooting
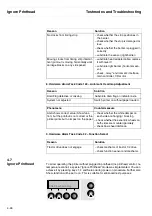
It is necessary to repeat the entire procedure if an error occurs during the download.
This is indicated by a corresponding message on the display. It may be that not all
fault messages can be shown on the display. In this case, the operating system of
your PC displays an error message such as “Write error on device”.
“Download.fdf” stands for any firmware identification number (i.e. 4
8
042X.FDF).
4.9.2
Loading optional
firmware using remote
printer
To update a remotely connected printer, the firmware has to be uploaded via FTP:
– Put the printer into “boot-mode” by pressing the
keys 1
,
4
and
Setup
while
switching the printer on.
– Unpack the archive containing the firmware.
– Open a DOS prompt in the directory where you have unpacked the archive.
– Start the FTP client by typing "ftp" and execute the following commands:
1. Open <ip-address> (no login required)
2. binary
3. put <firmware>
Description:
<ip address>: the IP address asssigned to the print server
<firmware>: the firmware file e.g. 70319.fdf
– The printer is displaying the progress of the update and initializes when finished.
– Quit the FTP client by typing "bye".
You may use any FTP client of your choice, just ensure that the transfer mode is set
to "binary".
This description applies to TallyGenicom printer servers. Depending on the used print
server the above procedure may vary or don't work at all.
Alternatively you may use tools like PFD.EXE to update the firmware. This program
can be found at the manufacturers web site.
Summary of Contents for 2365
Page 1: ...Maintenance manual Matrix printer 2365 2380...
Page 2: ...This page intentionally left blank...
Page 8: ...This page intentionally left blank...
Page 10: ...This page intentionally left blank...
Page 20: ...This page intentionally left blank...
Page 32: ...Mechanical Functions Functional Description 3 12 right mark mark mark...
Page 35: ...Functional Description Electronic Functions 3 15 2365 2380 Electronic groups...
Page 128: ...This page intentionally left blank...
Page 134: ...Mechanical Adjustments Adjustments 6 6...
Page 136: ...Electrical Adjustments Adjustments 6 8...
Page 142: ...Housing Spare Parts and Schematics 7 2 7 1 Housing 7 1 1...
Page 144: ...Basic Printer Spare Parts and Schematics 7 4 7 2 1 Basic Printer 1 3 36...
Page 145: ...Spare Parts and Schematics Basic Printer 7 5 Basic Printer 2 3 462646...
Page 146: ...Basic Printer Spare Parts and Schematics 7 6 Basic Printer 3 3...
Page 151: ...This page intentionally left blank...
Page 164: ...Option Recognition Spare Parts and Schematics 7 24 7 10 Option Recognition...
Page 168: ...This page intentionally left blank...
Page 170: ...Tractor Complete Rear Tractor 2T Model 8 2 8 2 Tractor Complete 4 1...
Page 172: ...This page intentionally left blank...
Page 174: ...Cutting Device Option Specifications 9 2 14 6 4 12 1 5 6 11 7 13 7 8 17 2 9 3 16 15 4...
Page 176: ...This page intentionally left blank...
Page 177: ...2nd Front Tractor option 10 1 10 2nd Front Tractor option...
Page 179: ...Printer Stand Overview 11 1 11 Printer Stand 11 1 Overview...
Page 180: ...Installing the Printer Stand Printer Stand 11 2 11 2 Installing the Printer Stand 1 2 3 4...
Page 181: ...Printer Stand Installing the Printer Stand 11 3 6 8 7 5...
Page 182: ...Installing the Printer Stand Printer Stand 11 4 9 10...

