Adjustments
Mechanical Adjustments
6-3
6.1.2
Adjustment of Head /
Platen Gap
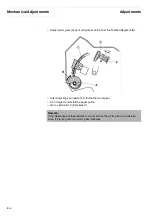
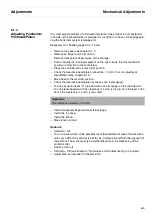
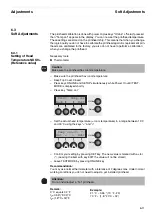
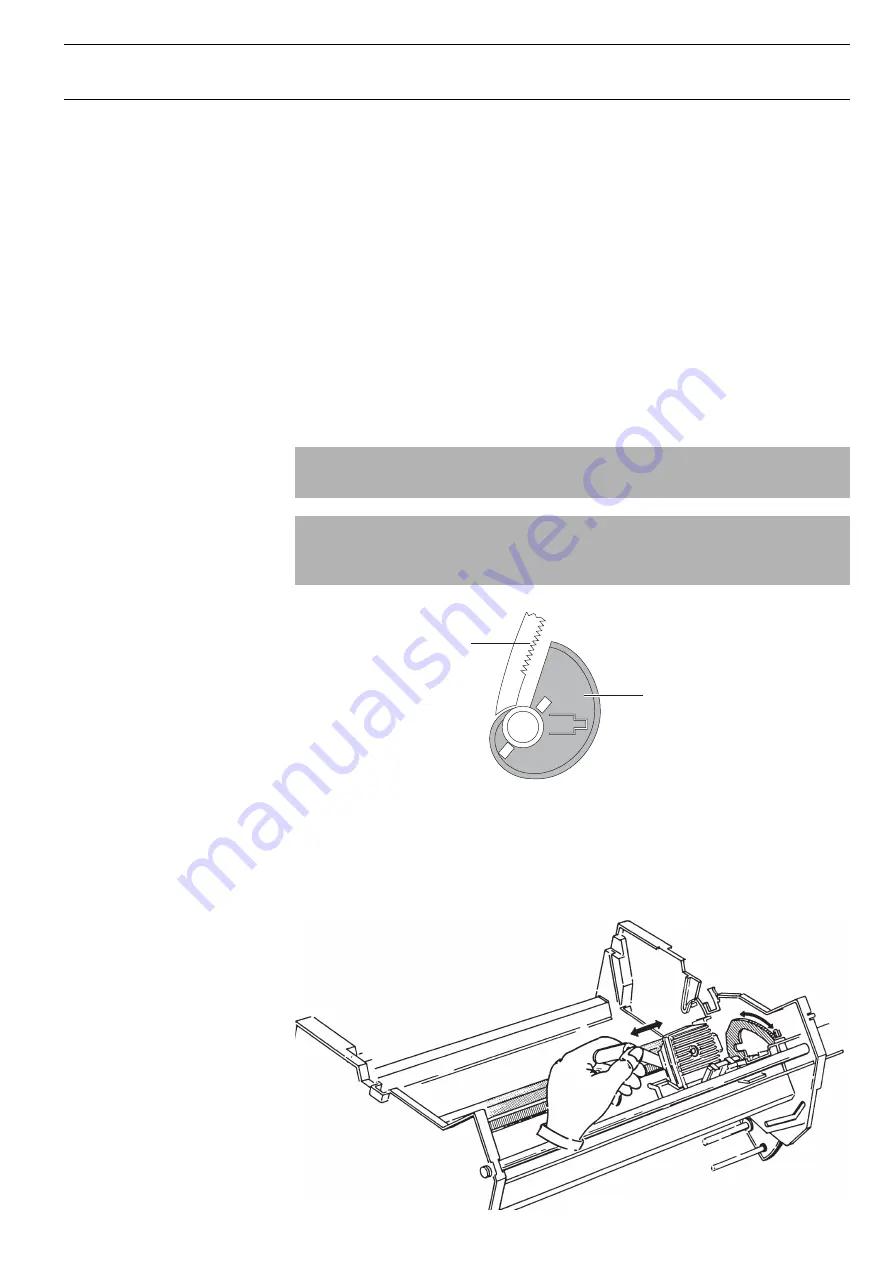
The adjustment of the Head/Platen gap can be made by means of a worm gear
(053217) at the right side wall. It is only necessary to do this adjustment when repla-
cing a part of the horizontal system (e.g. carriage, shaft etc.).
– Remove the housing as described in chapter 5.1.
Necessary tools:
Feeler Gauge 0.05 - 1.5 mm
Data:
Relative head position
18*
Corresponding clearance
0.28 mm
Notch (worm gear accuracy)
1/100 mm
Setting Range (worm gear)
76 notches
* Standard head distance relative (see User Guide)
– Remove the transparent Paper Guide from carriage.
– Adjust a clearance printhead (D)/Platen (E) of x = 1.4 mm by means of a feeler
gauge.
Use your hand to move the Toothed Segment (C).
Attention:
Reassemble all parts with exception of the housing, AGA and color ribbon.
Caution:
Position the worm gear as shown in the picture.
(= greatest possible distance).
Toothed Segment
View from the right
Worm Gear
Summary of Contents for 2365
Page 1: ...Maintenance manual Matrix printer 2365 2380...
Page 2: ...This page intentionally left blank...
Page 8: ...This page intentionally left blank...
Page 10: ...This page intentionally left blank...
Page 20: ...This page intentionally left blank...
Page 32: ...Mechanical Functions Functional Description 3 12 right mark mark mark...
Page 35: ...Functional Description Electronic Functions 3 15 2365 2380 Electronic groups...
Page 128: ...This page intentionally left blank...
Page 134: ...Mechanical Adjustments Adjustments 6 6...
Page 136: ...Electrical Adjustments Adjustments 6 8...
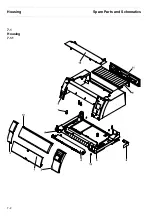
Page 142: ...Housing Spare Parts and Schematics 7 2 7 1 Housing 7 1 1...
Page 144: ...Basic Printer Spare Parts and Schematics 7 4 7 2 1 Basic Printer 1 3 36...
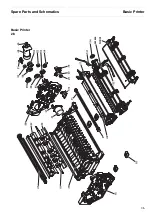
Page 145: ...Spare Parts and Schematics Basic Printer 7 5 Basic Printer 2 3 462646...
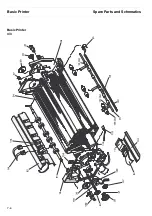
Page 146: ...Basic Printer Spare Parts and Schematics 7 6 Basic Printer 3 3...
Page 151: ...This page intentionally left blank...
Page 164: ...Option Recognition Spare Parts and Schematics 7 24 7 10 Option Recognition...
Page 168: ...This page intentionally left blank...
Page 170: ...Tractor Complete Rear Tractor 2T Model 8 2 8 2 Tractor Complete 4 1...
Page 172: ...This page intentionally left blank...
Page 174: ...Cutting Device Option Specifications 9 2 14 6 4 12 1 5 6 11 7 13 7 8 17 2 9 3 16 15 4...
Page 176: ...This page intentionally left blank...
Page 177: ...2nd Front Tractor option 10 1 10 2nd Front Tractor option...
Page 179: ...Printer Stand Overview 11 1 11 Printer Stand 11 1 Overview...
Page 180: ...Installing the Printer Stand Printer Stand 11 2 11 2 Installing the Printer Stand 1 2 3 4...
Page 181: ...Printer Stand Installing the Printer Stand 11 3 6 8 7 5...
Page 182: ...Installing the Printer Stand Printer Stand 11 4 9 10...


