1 – 3
Chapter 1 Troubleshooting
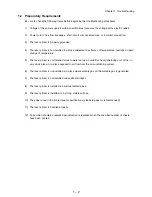
1.3 Cautions for Service Operations
1) When servicing the printer, be sure to remove the power cord from the power outlet except when
absolutely necessary.
Unless specifically indicated, whenever the printer power is ON, never touch any of
the electrical components.
The power switch/inlet of the LVPS has voltage present even while the power
supply is cut off. Never touch any of the electrical components.
2) When it is necessary to check a component(s) with covers removed and with the interlock and
safety and power switches ON, remove the connector (P/J140) on the ROS ASSY.
When checking some parts with covers removed and with the interlock and safety
and power switches ON, laser beams may be emitted from the ROS ASSY. Since it
is dangerous, be sure to remove the connector (P/J140) while performing service.
3) When it is necessary to check a component(s) with the left cover removed and power ON, be sure
to remove the HVPS connector (P/J31) while servicing the printer.
When checking some parts with the left cover removed and power ON, high voltage
may be applied by the HVPS. Be sure to remove the connector (P/J31) on the HVPS.
When connecting the connector (P/J31) on the HVPS according to the instructions
of the FIP, never touch the HVPS or any of its parts.
4) When using Diagnostic tools or a meter to measure high voltage, be sure to keep the components
covered unless specified.
When using Diagnostic Tool or a meter to measure high voltage, never touch parts
of high voltage.
Be sure to follow the procedures in this manual.
5) When operating a drive unit using the Diagnostic or other tools, be sure to keep them covered
unless otherwise specified.
Never touch the drive units when operating them using the Diagnostic or other
tools. Be sure to observe the procedures in this manual.
6) Avoid burns by not touching any fusing components until they have had sufficient time to cool
down.
7) Damage to sensitive electronic components should be avoided by grounding the body using a wrist
band or other suitable Electrostatic Discharge (ESD) tools.
Summary of Contents for 9045N
Page 1: ...Laser Printer TallyGenicom 9045N Service Manual J20006AA ...
Page 16: ...xv Blank Page ...
Page 20: ...Chapter 1 Troubleshooting Chapter 1 Troubleshooting CONTENTS Blank Page ...
Page 88: ...1 68 Chapter 1 Troubleshooting Blank Page ...
Page 160: ...1 140 Chapter 1 Troubleshooting Blank Page ...
Page 162: ...1 142 Chapter 1 Troubleshooting Blank Page ...
Page 164: ...Chapter 2 Printer Diagnostics Chapter 2 Diagnostics CONTENTS 11 Print Summary 2 16 ...
Page 194: ...1 10 Chapter 3 Removal and Replacement Procedures RRPs RRP2 150 PAPER CASSETTE ...
Page 213: ...1 29 Chapter 3 Removal and Replacement Procedures RRPs RRP3 550 PAPER CASSETTE ...
Page 240: ...1 56 Chapter 3 Removal and Replacement Procedures RRPs RRP4 150 paper Feeder ...
Page 257: ...1 73 Chapter 3 Removal and Replacement Procedures RRPs RRP5 550 Paper Feeder ...
Page 277: ...1 93 Chapter 3 Removal and Replacement Procedures RRPs RRP6 Xerographics ...
Page 302: ...1 118 Chapter 3 Removal and Replacement Procedures RRPs RRP7 500 Paper Exit ...
Page 322: ...1 138 Chapter 3 Removal and Replacement Procedures RRPs RRP8 Frame Drive ...
Page 331: ...1 147 Chapter 3 Removal and Replacement Procedures RRPs RRP9 Electrical ...
Page 394: ...1 210 Chapter 3 Removal and Replacement Procedures RRPs ...
Page 454: ...1 270 Chapter 3 Removal and Replacement Procedures RRPs Blank Page ...
Page 459: ...4 3 Chapter 4 Plug Jack P J Connector Locations Blank Page ...
Page 465: ...4 9 Chapter 4 Plug Jack P J Connector Locations 3 2 OCT Option P J Diagram ...
Page 468: ...4 12 Chapter 4 Plug Jack P J Connector Locations Blank Page ...
Page 470: ...Chapter 5 Parts Lists Chapter 5 Parts Lists CONTENTS Blank Page ...
Page 479: ...5 9 Chapter 5 Parts List Blank Page ...
Page 483: ...5 13 Chapter 5 Parts List Blank Page ...
Page 490: ...5 20 Chapter 5 Parts List PL 7 2 500 PAPER EXIT 2 2 OPTION FACE UP TRAY ILLUSTRA TION ...
Page 496: ...5 26 Chapter 5 Parts List OPTIONS PL 10 1 OPTION DUPLEX ILLUSTRATION ...
Page 501: ...5 31 Chapter 5 Parts List Blank Page ...
Page 529: ...6 19 Chapter 6 Principles of Operation J26119AA EP CARTRIDGE BTR ASSY ...
Page 531: ...6 21 Chapter 6 Principles of Operation LD Assembly JG6121AA SOS PWB Scanner Assembly ...
Page 535: ...6 25 Chapter 6 Principles of Operation ...
Page 558: ...6 48 Chapter 6 Principles of Operation Blank Page ...
Page 584: ...7 24 Chapter 7 Wiring Diagrams and Signal Information Blank Page ...
Page 608: ...Chapter 9 ESS Options Chapter 9 Controller ESS Options Contents Blank Page ...


