8
button. Soon you should see the Amicus logo appear and then the Exercise List screen should appear.
Touch at bottom to go to the Home Screen. In the resulting screen, touch . The first setting is Wi-Fi,
press it. Then click on your preferred Wi-Fi network. Type in your password (if required), and press Con-
nect. You should see Connected in the Wi-Fi list underneath your preferred network.
Go back to the Settings list by pressing ← at the top left of the screen, next to Wi-Fi. Now select Date
& Time. Press Select time zone and in the resulting list, select your time zone. Lastly, verify that Auto-
matic date & time is set to On (if you don’t have internet access, you can set time manually). Touch at
bottom right and then tap the Amicus app window to return to that app.
Next, verify you have the latest version of the Amicus app by touching Info ( ) at bottom right. At top of
resulting screen, touch Check For Updates. If an update is available, it will start downloading automati-
cally. If already up to date, the message, “Is currently the latest version”, is displayed at the bottom.
Lastly, connect your robot to your tablet using its Bluetooth connection. At the bottom of the Amicus
app, verify that the Robot icon shows it is connected to your robot ( ). If it shows Unconnected ( ),
click on that icon, and look for your robot in the Connection Manager list. Then touch Connect to es-
tablish a connection between robot and tablet. Once connected, return to the Exercise List by pressing
Exercises ( ) at the bottom.
Orienting The Robot To The Centerline
After completing Step 5 on page 4, place about 50 or more 40 or 40+ balls into the Ball Collection
Tray. Grab your racket and prepare to return balls from your robot. In the Exercise List of the Amicus
app, press Default game, and then Play Exercise. Basic Balls should be delivered along the centerline.
Observe where the balls land in relation to the centerline. Press Stop Exercise after seeing where balls
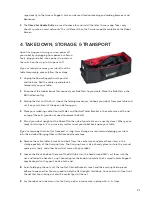
are delivered. If balls are not delivered on or very close to the centerline, loosen the large Black Knob
on the rear of the Ball Tube (see Photo 7) and rotate the head in the direction necessary for balls to land
closer to the centerline. Repeat until all balls are landing very close to or on the centerline, then stop
ball delivery.
Ball Screen
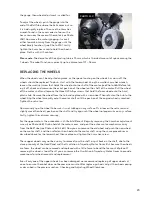
Staying in the Default game Exercise, press (see Photo 8). It turns yellow and opens the Ball Screen
where you can adjust the settings for that Ball (see Photo 9). You will notice 7 settings that you can
adjust:
Place
determines the left to right placement of the Ball. Hold down the slider handle and move it back
and forth. Notice that the Ball’s position on the diagram at the top moves left and right across the table
diagram in response to this setting. “0” corresponds with a centerline placement, -8 with an extreme
angle off the left side of the table, and 8 with an extreme angle off the right side of the table.
Ball/min %
(aka, Individual Frequency Control, or IFC) delays or accelerates the timing between Balls
of an Exercise. Use this control whenever an Exercise has 2 or more Balls, and after setting Ball/min to
your liking, the timing between any two shots seems too little or too much. For example, when you start
with a slow, short backspin serve followed by a fast topspin shot. Or you have several fast topspins
followed by a slow, high no-spin pop-up. A “0” setting would mean that the timing between shots would
be as set for Ball/min. Add more time after a shot by using negative settings (this effectively reduces


