5
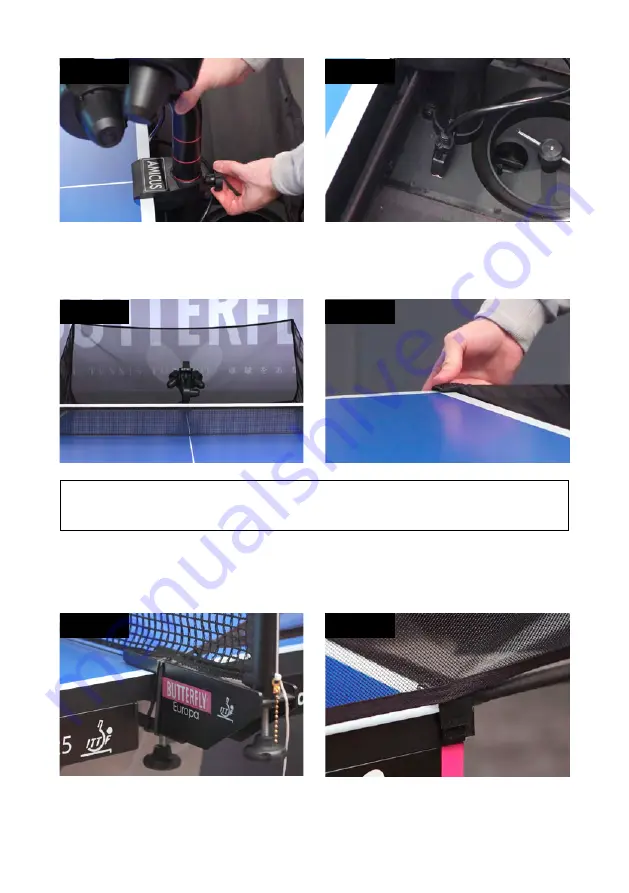
Photo 3A
Photo 3B
4.
Standing behind the robot, grip the top points of the net and fold the net down on both sides until
the net fully opens (as seen in Photo 4A). Fit the plastic
Corner Brackets
of the net around the
corners of your table as seen in Photo 4B.
Photo 4A
Photo 4B
NOTE:
You may attach the two shortest Velcro strips to the corners of your table underneath the
Corner Brackets
to help the brackets stay down and stabilize the entire net.
5.
Pull a Side Net along the side line of the table and pass its thick rubber band over the top of the
table’s net standard (see Photo 5A). Then loop the rubber band around the Clamp Screw that holds
the net onto the table. Attach the Side Net’s Velcro tab to its matching piece located on the Corner
Bracket as seen in Photo 5B.
Photo 5A
Photo 5B
6.
Plug your Power Supply into a power outlet and then into the power jack on the side of the Base.
Connect the Control Panel Cable into the jack plug (looks like a headphone jack) on the side of the
Summary of Contents for AMICUS START
Page 1: ...1 AMICUS START Table Tennis Robot Owner s Manual Bedienungsanleitung Manuel d utilisation ...
Page 19: ...19 ...
Page 21: ...21 Owner s Manual Bedienungsanleitung Manuel d utilisation AMICUS START Tischtennis Roboter ...
Page 40: ...40 ...
Page 42: ...42 ...
Page 62: ...62 ...


