5
6
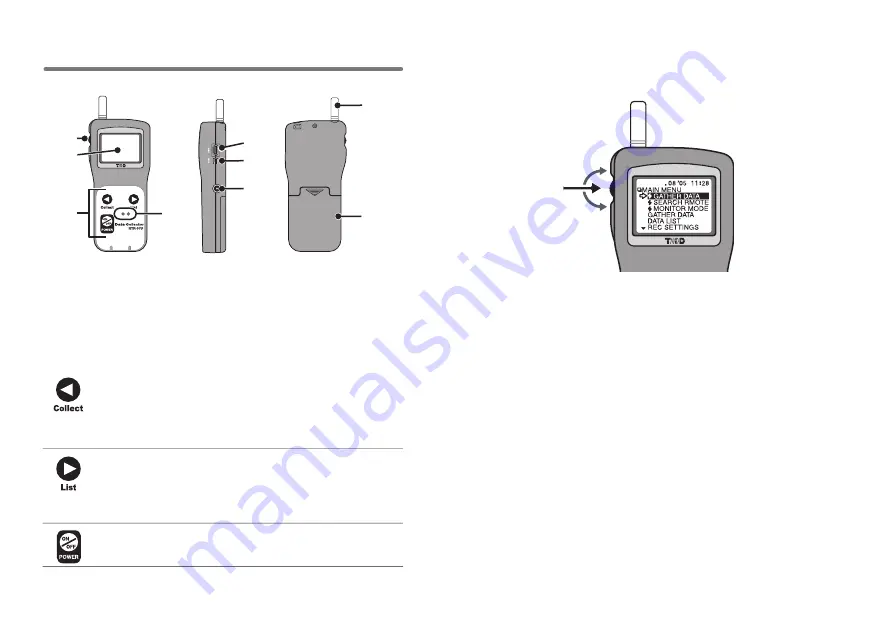
Part Names and Functions
①
Operation Dial
②
LCD Display
③
Operation Buttons
④
Optical Communication Port
⑤
USB cable connection jack
⑥
Serial Communication cable
connection jack
⑦
AC adaptor connection jack
⑧
Antenna
⑨
Battery Compartment
①
②
③
⑤
⑥
④
⑧
⑨
⑦
◆
Explanation of the Button Functions
・
When downloading via wireless communication
the [Select Group] display will appear.
・
Allows you to swift-scroll across data when
viewing a graph or an event list.
・
Allows you to swiftly make changes to the
upper and lower limit value settings.
・
The downloaded data list will be displayed.
・
Allows you to swift-scroll across data when
viewing a graph or an event list.
・
Allows you to swiftly make changes to the
upper and lower limit value settings.
・
Switch Power ON/OFF.
◆
How to Use the Operation Dial
��
Press in
Move the dial up
Move the dial down
〔
Moving the dial up and down
〕
・
By moving the dial up or down the arrow will move to allow you to choose
the desired item. The selected part will be displayed in an easy-to-see
inversed shade.
・
When setting a numerical value, by moving the dial up the value will
become larger and by moving the dial down the value will become
smaller.
〔
Pressing in on the dial
〕
・
Switching the Power On (See p.
9
)
・
You cannot switch the power OFF with the operation dial. Press in on the
POWER button.
・
By pressing in on the dial, you can make a desired menu selection or
complete and activate a setting.
・
Keeping the dial pressed in (
1
.
5
seconds) will activate different functions
depending on the display being viewed.
・
If you keep it pressed in while viewing the graph display, you can change the
display channel.
・
If you keep it pressed in while viewing a menu, a setting display, or the event
list display, you will be returned back to the main menu display.


