5
If the screen does not change after connecting the Remote Unit:
•Make sure to place the Remote Unit on the right side of the dock as shown above. The left side is for
charging only.
•The USB driver may not have been installed correctly. Please see [
Help for Unit Recognition Failure
] in
the launcher or Start menu, and check the USB driver.
.1
The [Remote Unit Registration] window will appear. Enter the desired Remote Unit Name
and click [Register].
.1
Follow the on-screen instructions and reconnect the USB cable to the Base Unit.
A success message will appear when the registration is complete.
*
If you wish to register other Remote Units, repeat procedures
to
.
Installing the Device
Make sure not to place the Remote Unit on the battery charge dock except when setting or
registering via USB. Otherwise wireless communication may not be possible due to noise.
.1
Connect the Base Unit to the wired or wireless LAN.
*
If the target Base Unit is connected to a PC, disconnect the USB cable.
.1
Connect to the power supply using the supplied AC adaptor.
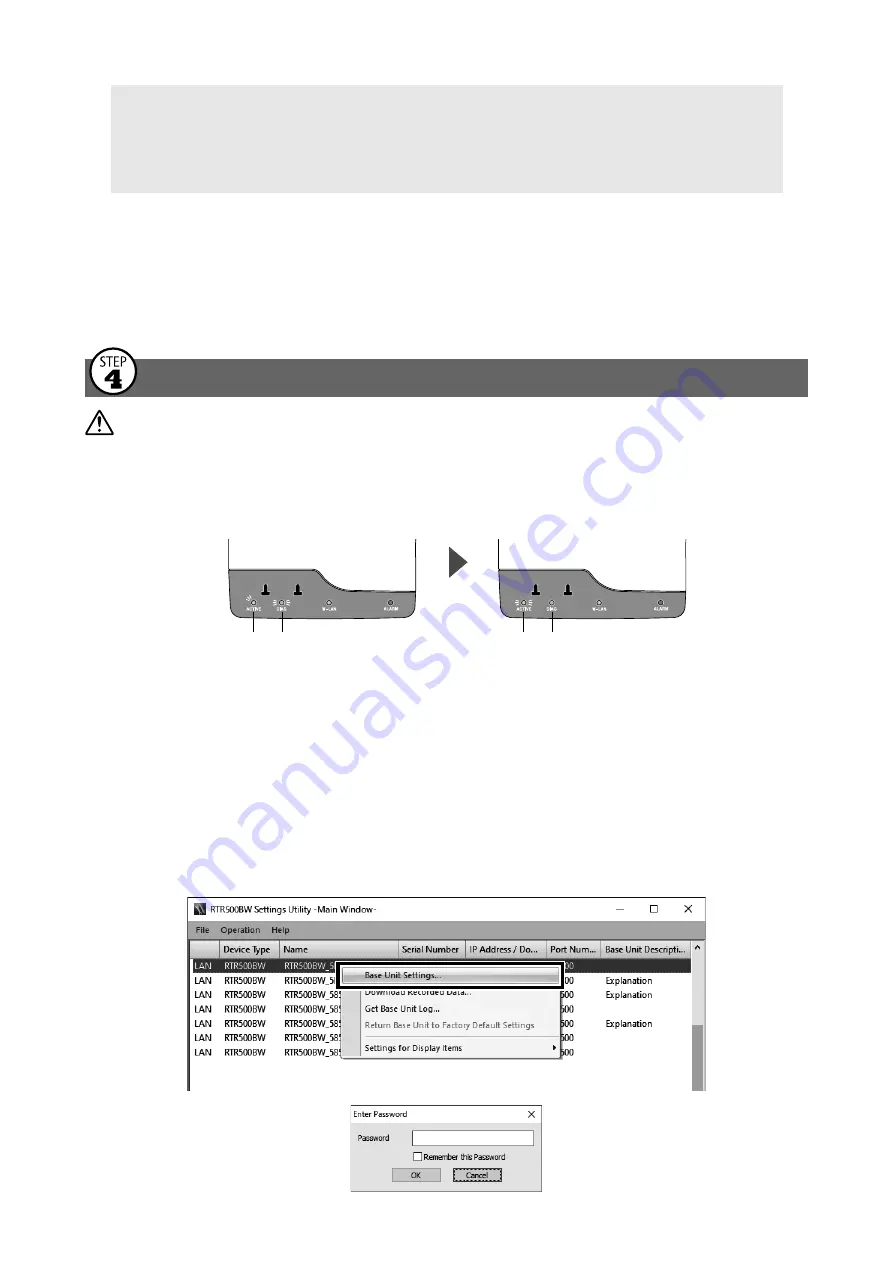
BLINKING ON
ON OFF
in about
30 sec...
*
You will know network connection was established when <ACTIVE> on the LED changes from blinking to lit.
*
If <ACTIVE> and <DIAG> are both blinking, network connection has failed; so please recheck the settings.
.1
Deploy the Base Unit and Remote Unit(s) in the desired locations.
*
The wireless communication range, if unobstructed and direct, is about 50 meters.
.1
To check the signal strength between the Base Unit and Remote Unit, from the main
window of
RTR500BW Settings Utility
, select [Operation] - [Search Network].
.1
In a few seconds, a list of Base Units on the network will appear.
.1
Right click the target Base Unit, and select [Base Unit Settings] in the pop-up menu.
Enter the password and click [OK].


