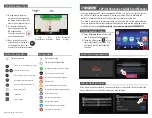
How to Install the USB Driver
If you are using Windows XP, the "Found New Hardware Wizard" window
will automatically open when a USB device is connected. Please follow
the directions to install the USB driver.
11
Select "No, not this time".
21
Select "Install the software
automatically
(Recommended)".
31
When the completion message appears, please click the [Finish]
button.
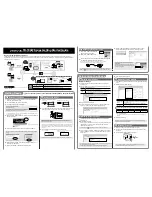
Monitoring Current Readings via Web Browser
When setting DHCP to "ON" in of
:
11
Open the TR-700W Settings Utility, and select the [Settings via Network]
tab. The device set in the of
will appear in the
address list.
If the IP address does not appear in the address list, right click on the target device name
and click [Update Address List]. If that does not work, see [Operation Guide] -
[Troubleshooting] - [Q&A about Settings].
If the [Windows Security Alert] window pops up:
Select either [Permit Access] or [Unblock].
21
Right click on the device in the address list, and select [Browser Display].
31
The browser will be opened and a graph displayed.
[Refresh] button
[Current] button
When setting a static IP address in of
:
11
Open your web browser, and in the address bar enter the IP address of
the device you wish to view.
21
A graph will be displayed.
• Up to three simultaneous web browser connections are allowed for each device. To share
current readings with many users or for monitoring over the Internet, please use our T&D
WebStorage Service.
• The maximum number of readings that can be displayed in one graph is 736.
• The interval for uploading current readings into the graph can be changed from the [Basic
Operation Settings] tab in the [Web Viewer Settings] menu.
• Although current readings are continually gathered at the set interval, in order to view the
latest data in the graph area, it is necessary to manually refresh the display using the Web
Viewer [Refresh] button.
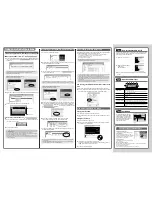
Monitoring Current Readings with the Software
11
Open the Current Readings Monitor.
21
Go to [Settings] - [Settings for Gathering Current Readings], and in the
window that appears select [TR-700W].
31
In a few seconds, the device set in the
of
will
appear in the address list.
The TR-700W Series devices need to be connected to the same network. If your device does
not appear in the address list, see [Operation Guide]—[Troubleshooting]—[Q&A about Settings].
If the [Windows Security Alert] window pops up:
Select either [Permit Access] or [Unblock].
41
Double click on the target device to open the [Detailed Settings] window.
51
Check [Get Current Readings] and enter the LAN password set in the
of
. After entering, confirm with the [OK] button.
The default password is "password". You can change the password in the
of
.
61
Right click on the target TR-700W Series device and select
[Communication Test]. Check the communication status.
71
The current readings of the selected device will appear in the [Current
Readings Monitor] window.
• When using the software for the first time, it will take up to one minute or so to display the
current readings.
• The interval for uploading current readings into the graph can be changed from the [Basic
Operation Settings] tab in the [Web Viewer Settings] menu.
Downloading Recorded Data to a PC
When the following conditions are met, the recorded data will be downloaded
and stored automatically in the folder as shown below.
• A check has been placed next to the "Get Recorded Data" option in the [Settings for
Gathering Current Readings] menu of the Current Readings Monitor.
• The Current Readings Monitor is running.
• A recording session is in progress.
The Default Destination Folder for Recorded Data: "Documents (or My Documents)\TandD
Corp\Current Readings Monitor\TR-700W\Archive".
• A file will be created for each month and updated at the recording interval. (If the recording
interval is less than one minute, the data file will be updated every minute.)
• The recorded data for the period when the Current Readings Monitor was not running will
automatically be downloaded at the next startup of the application. Note, if the recording
interval setting is short, there may be data which has been overwritten and can no longer
be downloaded.
• It is also possible to automatically send recorded data without running a computer. For
details, see [Operation Guide]—[Useful Functions].
How to Change the Default Destination Folder for Recorded
Data:
11
Start the Current Readings Monitor, and select [Settings] - [Options].
21
Click on the [Browse] button and assign a new storage location for data
files. After having completed all the entries, click the [OK] button.
Viewing Recorded Data in a Graph
Opening Recorded Data
11
Double click on the desired recorded data file.
21
Temperature/Humidity Graph will open with the selected data in graph
form.
Printing Recorded Data
11
Open recorded data in graph form.
21
Make any desired adjustments to the window size and aspect ratio to
be reflected in the printed graph.
31
In the [File] menu, select [Graph Print Preview].
Check the preview image of the printed page. If necessary, go back to
step
2
and change the aspect ratio again.
41
To start printing, select [Print].
Troubleshooting and Detailed Info
Getting Started Guide (pdf):
This document is available in PDF file format.
Operation Guide:
This contains detailed operations not in this
manual, including easy-to-understand descriptions
with screenshots and/or illustrations, as well as
frequently asked questions (FAQ's).
Update Information:
Information about software and firmware updates
can be found here.
How can I get product support?
All product support is handled directly by our distributors. Please contact the distributor
from which you purchased the product.
T&D Authorized Sales Distributors
http://www.tandd.com/about_tandd/contactus/north_america.html
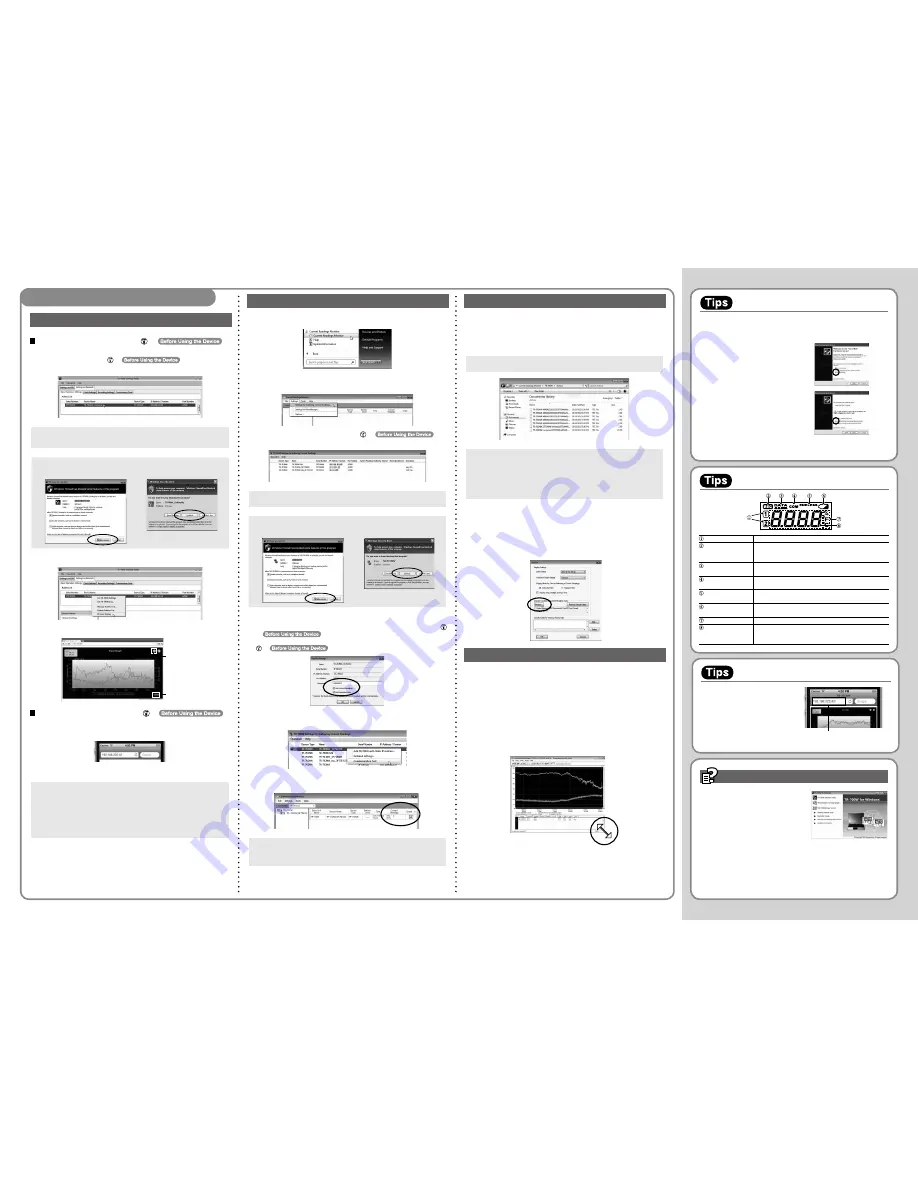
About the LCD Display
Channel
Shows the channel number of the measurement being displayed.
[REC] Mark
Shows the recording status.
ON : Recording in progress, BLINKING : Waiting for programmed
start, OFF : Recording stopped
Data Capacity Scale At the beginning of every 2,000 readings the scale will be marked
from left to right.
[COM] Mark
This appears when the device is in communication via USB or
network.
Recording Mode
TR-700W Series devices are designed with only Endless Mode
(Overwrite oldest data when capacity is full).
Power Warning Mark Shows that the device is running on the backup battery only (such as
when the AC adaptor cannot be used due to a power outage).
Unit of Measurement Shows the unit of measurement.
Measurement Area
Shows the current readings.
This area is also used to display messages about the status of the
device.
Trying some Basic Operations
About DHCP
When using DHCP (the automatic
assignment of IP addresses), the IP
address assigned to a device may
change. When monitoring current
readings chiefly by web browser, we
recommend setting a static IP
address for the device.
An IP address for the device to be monitored is
necessary.