36
3.
From the displayed list, select the TR7-W to which you wish to
make settings by either double clicking on that address or select
and click on the [Change Settings] button.
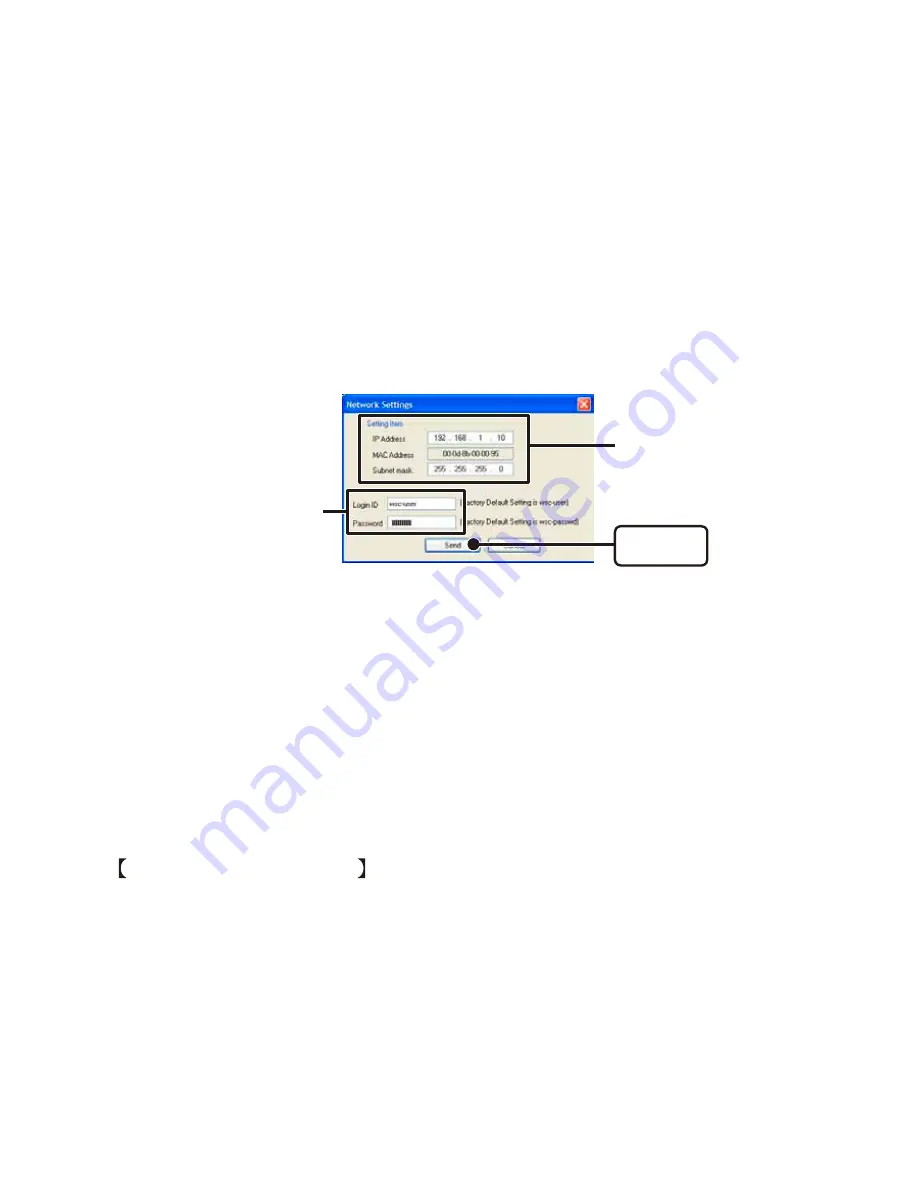
The "Network Settings" window will then appear.
4.
Enter an IP Address and Subnet Mask.
Enter an IP address and subnet mask that is appropriate for your network.
NOTE :
- Do not use the same IP address for two different units. It may cause abnormalities to the entire network
system.
Enter the IP address
and subnet mask
Enter the Login ID and
Password
[Send]
button
5.
After entering the above, next, enter the login ID and password.
The TR-7W factory default login ID is "wsc-user" and the password is "wsc-passwd".
Make any necessary changes to the login ID and password at "Detailed Network
Settings". See page 37-39 for details.
6.
After checking for entry errors, click the [Send] button. After
transmission has been completed a message will appear.
Click the [OK] button to finish.
After settings are completed the TR-7W will automatically restart. During the restarting
process, a search cannot be performed, even if you click the [Search] button. Please
try again after 30 seconds.
If no units are detected
- The TR-7W and your computer are not properly connected.
- Check the hub power switch and the network cable type.
- In some network environments, it may be necessary to make changes to the IP address and
subnet mask at the computer side in order to carry out a search. For details, see page 82-88
[Checking and Making Changes to Computer Network Settings].
- Do not use a LAN card which has not been formatted.


