II) Connecting to a Wireless LAN
Note: If your Wireless Router has a WPS function it is possible to use this to connect a TR-7wf
logger to your LAN without using the T&D Thermo App. Instructions for using this method of
connection can be found in the Introductory Manual packed in the box with your logger.
1.
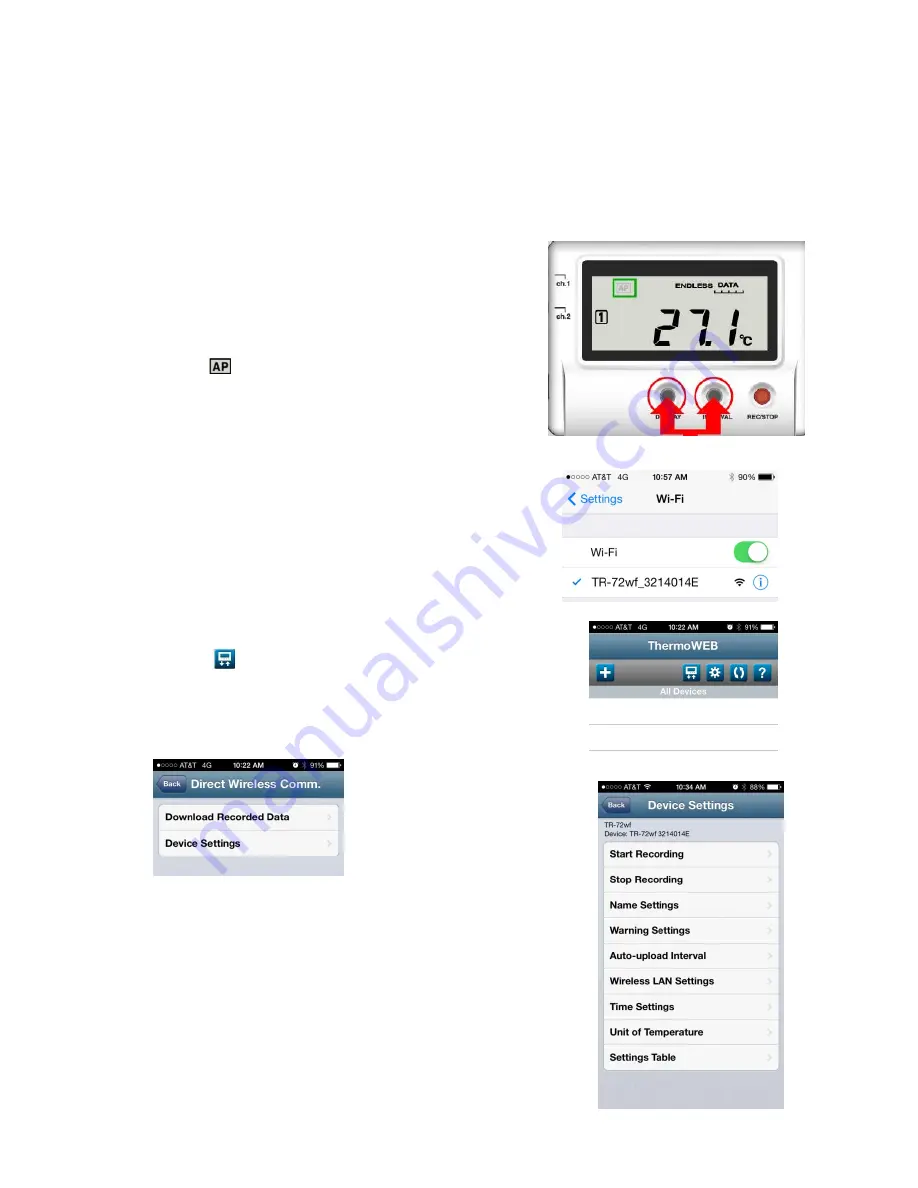
In order to use the T&D Thermo App with a
logger it is first necessary to activate the devices
Access Point Mode. This is done by
simultaneously pressing the Display and Interval
buttons. The AP Icon will start to blink
rapidly. After about two seconds it will stay on
solid. The unit is now in AP mode and ready for
direct log on from a smart device.
2.
Next go to Settings > Wi-Fi on your Smart Phone or
Tablet. Select the TR-7wf from the list of available
networks to log directly onto the unit. Once the
connection is established it will then be possible to
use the T&D Thermo App to access the logger.
3.
Open the App on your smart device and tap the Device
Icon.
This will open the Direct Wireless
Communication screen.
4.
In the Direct Wireless
Communication screen tap
Device Settings.
5.
From the Device Settings screen you can set most all of
the Data Logger parameters for Recording Start and Stop,
the Units of Display, the Time in your area and so on. We
will return to this screen a little later as you will want to
make all of these settings. For normal now, however, we
want the device to connect to a local Wireless LAN, so tap
Wireless LAN Settings.


