background image

Installation and 

Maintenance

Instructions

Limited One Year Warranty

  T&S warrants to the original purchaser (other 
than for purposes of resale) that such product is 
free from defects in material and workmanship 
for a period of one (1) year from the date of 
purchase.  During this one-year warranty period, 
if the product is found to be defective, T&S shall, 
at its options, repair and/or replace it.  To obtain 
warranty service, products must be returned 
to...

T&S Brass and Bronze Works, Inc.
Attn:  Warranty Repair Department

2 Saddleback Cove

Travelers Rest, SC  29690

  Shipping, freight, insurance, and other 
transportation charges of the product to T&S 
and the return of repaired or replaced product 
to the purchaser are the responsibility of the 
purchaser.  Repair and/or replacement shall be 
made within a reasonable time after receipt by 
T&S of the returned product.  This warranty does 
not cover Items which have received secondary 

fi

 nishing or have been altered or modi

fi

 ed after 

purchase, or for defects caused by physical 
abuse to or misuse of the product, or shipment 
of the products.
  Any express warranty not provided herein, and 
any remedy for Breach of Contract which might 
arise, is hereby excluded and disclaimed.  Any 
implied warranties of merchantability or 

fi

 tness 

for a particular purpose are limited to one year in 
duration.  Under no circumstances shall T&S be 
liable for loss of use or any special consequential 
costs, expenses or damages.
  Some states do not allow limitations on how 
long and implied warranty lasts or the exclusion 
or limitation of incidental or consequential dam-
ages, so the above limitations or exclusions may 
not apply to you.  Speci

fi

 c rights under this war-

ranty and other rights vary from state to state.


P/N:  098-009518-45  Rev.2  

 Date: 

05-15-06

 Drawn: 

TEH

 Checked: DHL 

07-13-06

 Approved: JHB 

07-13-06

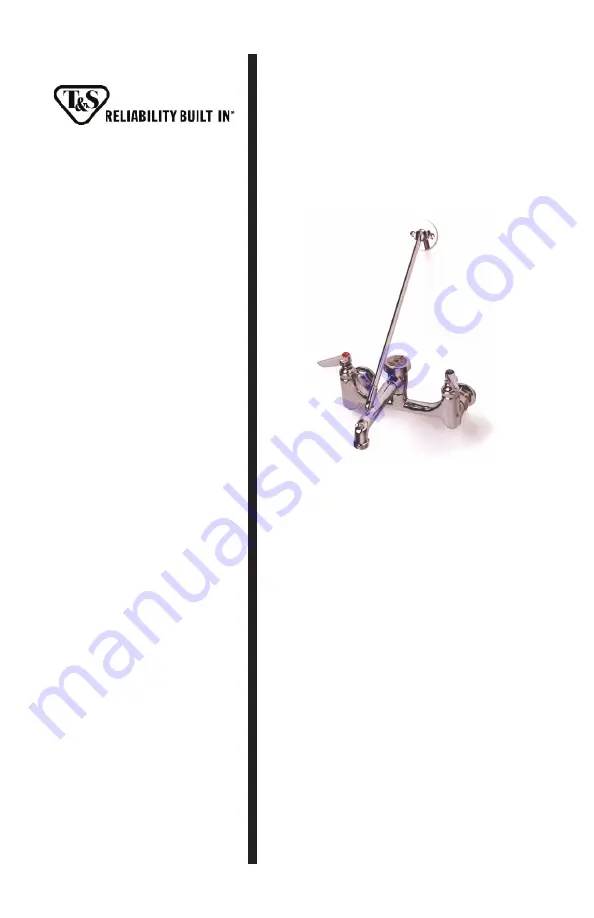
Surgical Sink and
Service Sink Faucets 
with Built-In Stops
B-0665-BST Series

 Deutsch:


Installations- und 
Wartungsanleitun-
gen

 Español: 

la Instalación y las


Instrucciones de   
Mantenimiento

 Français: 

les Instructions 
d’Installation et 
d’Entretien

Summary of Contents for B-0665-BST Series

Page 1: ...ing or have been altered or modified after purchase or for defects caused by physical abuse to or misuse of the product or shipment of the products Anyexpresswarrantynotprovidedherein and any remedy for Breach of Contract which might arise is hereby excluded and disclaimed Any implied warranties of merchantability or fitness for a particular purpose are limited to one year in duration Under no cir...

Page 2: ...Exploded View Some items are listed for instructional purposes and may not be sold as separate parts 2 ...

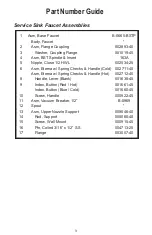
Page 3: ... Spring Checks Handle Cold Asm Eterna w Spring Checks Handle Hot Handle Lever Blank Index Button Red Hot Index Button Blue Cold Screw Handle Asm Vacuum Breaker 1 2 Spout Asm Upper Nozzle Support Rod Support Screw Wall Mount Pin Coiled 3 16 x 1 2 S S Flange B 0665 BSTP 002893 40 001019 45 163A 002534 25 002711 40 002712 40 001638 45 001661 45 001660 45 000922 45 B 0969 009546 40 005060 40 000915 45...

Page 4: ...neck lever handles Combo sink faucet w swivel gooseneck lever handles Surgical sink fct w rigid gooseneck 6 WH rosespray Surgical sink fct w rigid gooseneck 6 WH stream reg Surgical sink fct w rigid GN 6 4 WH rosespray Surgical sink fct w rigid GN 6 4 WH stream reg Service sink fct w VB nozzle 6 WH bottom brace Service sink fct w pail hook nzl btm brace polished Service sink fct w pail hook nzl bt...

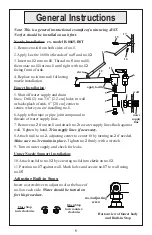
Page 5: ...ation General Instructions 17 7 Remove no 2 from no 1 and attach no 2 to water supply lines flush against wall Tighten by hand Trim supply lines if necessary 8 Attach no 1 to no 2 adjusting center to center fit by turning no 2 if needed Make sure no 3 remains in place Tighten no 2 firmly with a wrench 9 Turn on water supply and check for leaks Upper Nozzle Support Installation 10 Attach no 14 to n...

Page 6: ...espaldar del lavatorio con 20 cm de centro a centro donde la parte No 1 será instalada 6 Aplique cinta de Teflon o compuesto de coyuntura a las roscas de las lineas de surtido 7 Remuéva la parte No 2 de la parte No 1 y conecte la parte No 2 a las lineas de surtido pareja con la pared Aprete a mano Si es necesario recorte las lineas de surtido 8 Conecte la parte No 1 a la parte No 2 ajustando la me...

Page 7: ...ur ou le garde boue de l évier 20cm de centre à centre où vous aller installer Nº 1 6 Appliquer le ruban en Téflon ou le composé pour les tuyaux aux tuyaux qui fournir l eau 7 Enlever Nº 2 de Nº 1 et attacher Nº 2 aux tuyaux qui fournir l eau au même niveau du mur Resserrer par le main Couper les tuyaux qui fournir l eau si nécessaire 8 Attacher Nº 1 à Nº 2 en réglant l ajustement centre à centre ...

Page 8: ...nachdem wo Nr 1 installiert werden soll mit einem Mittenabstand von 20 cm bohren 6 Für die Gewinde der Wasserzuleitungen Teflonband oder Rohrdichtungsmasse verwenden 7 Nr 2 von Nr 1 entfernen und Nr 2 bündig zur Wand auf die Wasserzulaufleitungen aufdrehen Mit der Hand festziehen Zulaufleitungen bei Bedarf kürzen 8 Nr 1 an Nr 2 befestigen wobei auf mittigen Sitz zu achten ist und bei Bedarf Nr 2 g...

Page 9: ...ts 2 Saddleback Cove P O Box 1088 T S Brass Europe Travelers Rest SC 29690 De Veenhoeve Phone 864 834 4102 Oude Nieuwveenseweg 84 Fax 864 834 3518 2441 CW Nieuwveen E mail tsbrass tsbrass com The Netherlands RELATED T S BRASS PRODUCT LINE B 0669 Service Sink Faucet B 0657 Service Sink Faucet ...

Reviews: