6
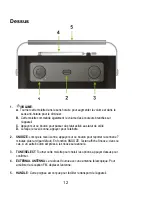
Rear panel
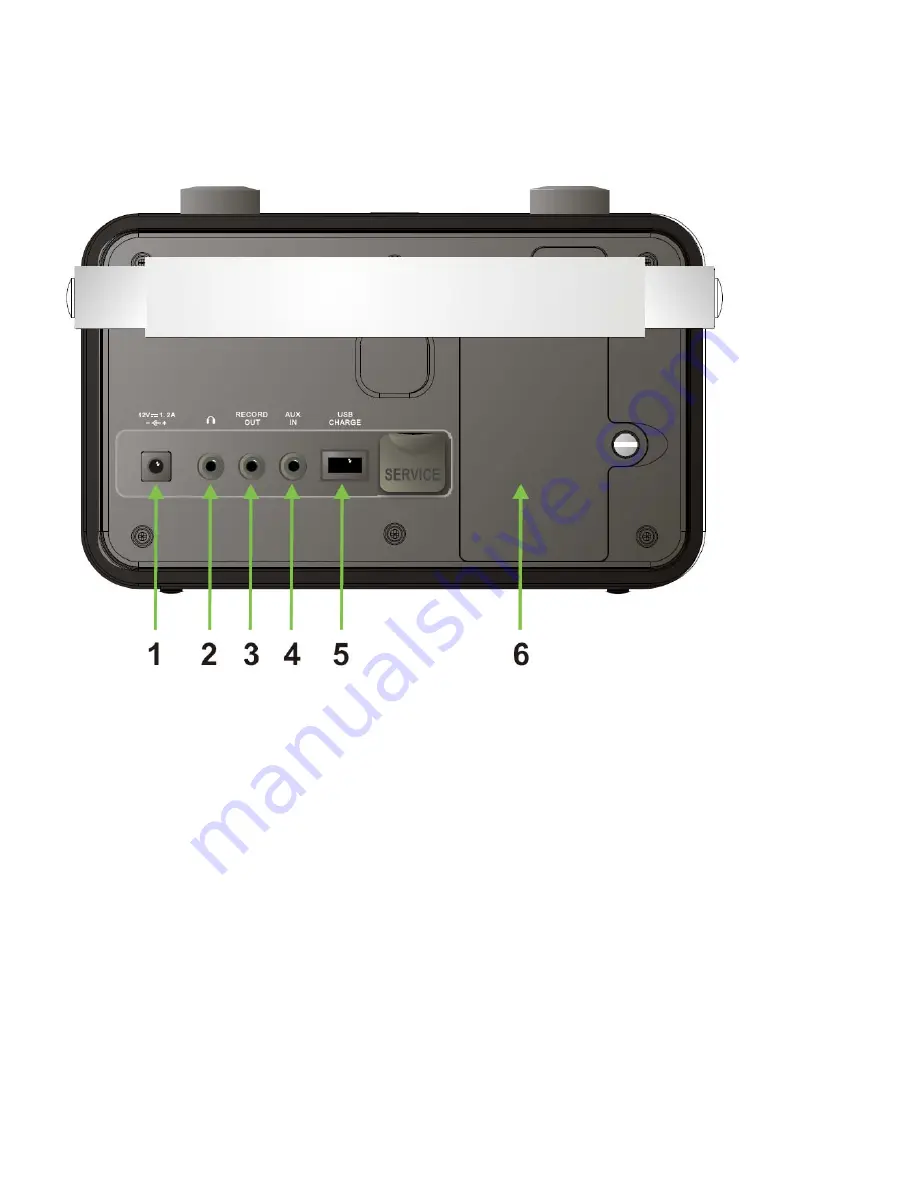
1. 12V/1.2A: Use this input to connect the radio’s DC power supply.
2. HEADPHONE: Inserting a headset plug will turn off the internal speaker. The output for
the headset is controlled by the volume knob.
3. RECORD OUT: The radio can be used as a tuner by connecting it to an amplifier.
4. AUX IN: Connect any stereo or mono audio source to this stereo input.
5. USB CHARGE: Designed for charging USB devices including iPods.
6. BATTERY COMPARTMENT: Loosen the big screw on the right side of the battery lit
using e.g. a coin. Install 6 pcs AA sized batteries in the compartment.
Note: remember to install the battery correctly in the compartment. The negative end
(-) of the battery must be placed with the end of the battery compartment with a spring.
The positive end (+) of the battery must be placed with the end of the battery
compartment without a spring.
Summary of Contents for DAB 2 GO
Page 1: ...D A B D A B a n d F M P o r t a b l e R a d i o...
Page 9: ...8 Menu Description...
Page 17: ...16 Description du Menu...
Page 25: ...24 Menu Beschreibung...
Page 33: ...32 Menu Beschrijving...
Page 41: ...40 Menu Beskrivelse...
Page 49: ...48 Menu beskrivning...
Page 57: ...56 Menu kuvaus...
Page 65: ...64 Descrizione Menu...
Page 73: ...72 Descripci n del Menu...
Page 81: ...80 Descri o do Menu...
Page 83: ......
Page 84: ...60 Item no 40629 01...

