Eng
5
Eng
4
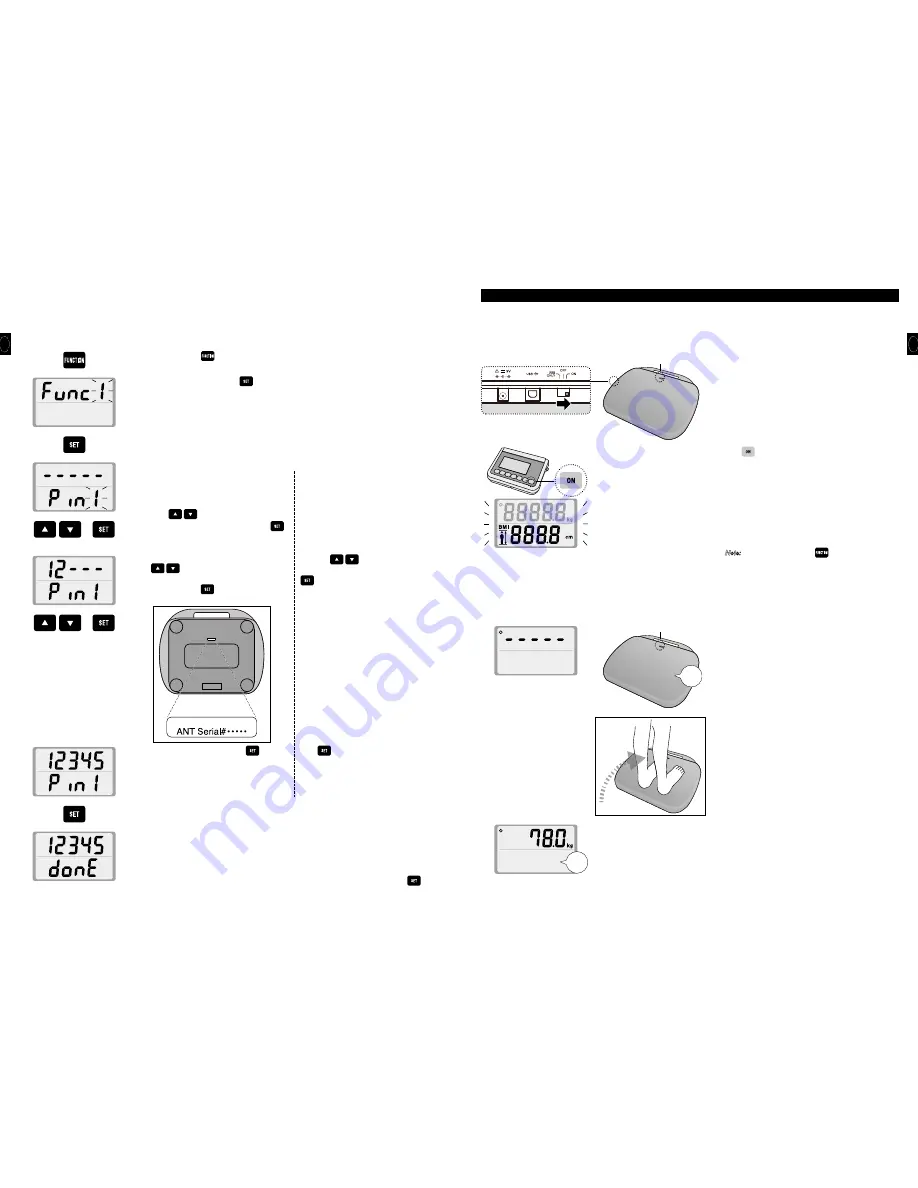
2. Setting the Serial Number
Before proceeding, make sure that the WB
8000RW and D
8000 are within 17 feet (5m) of each other.
The serial number must be set in order for the WB-8000RW and the D-8000 to communicate.
The same assigned serial number should be set for the WB-8000RW as for its corresponding D-8000.
This must be performed when using the device for the first time, or when using the D-8000 with a different WB-8000RW. If it is not performed,
measurement values will not be displayed on the D-8000.
1. Press the D-8000
.
2. When “Func1” appears, press
.
3
.
“Pin1” will be displayed.
[When configuring the WB-8000RW for the first
time]
You can register up to 4 WB-8000RWs in
advance.
Press
to select the Pin* number you
wish to register (Pin1 to Pin4), and press
.
*Pin : Preset Input Number
[When configuring a WB-8000RW which has
previously been registered]
When the Pin number of a WB-8000RW whose
serial number has previously been registered
is displayed, the top half of the LCD will show
the registered serial number.
4
.
When the top half of the LCD blinks, press
to enter the 5 digit number printed
on the bottom of the WB-8000RW (see figure
below). Press
to move to the next
number.
Press the
keys to select the desired
Pin number (5 digit serial number), and press
.
5. After entering every digit, press
.
Press
.
6
.
When “donE” appears, the configuration process is complete.
* To register a different serial number with a different Pin, repeat the process from step 1.
* The D-8000 cannot be connected simultaneously to multiple WB-8000RWs. To measure using a
different WB-8000RW, set the correct Pin and then perform the measurement.
* To register a different serial number for a Pin to which a serial number has already been
assigned, overwrite the existing serial number with the new serial number, and press
.
d
d
d
d
d
d
d
d
d
5. Operation
1. Standard Weighing Procedures <weight mode>
1) Place the WB-8000RW on a hard, flat surface where there is
minimal vibration to ensure safe and accurate measurement.
2) Set the WB-8000RW switch to the ON position.
The unit will go into standby mode, and the LED will blink
green every 4 seconds.
3) Press
on the D-8000.
The unit will start using the Pin which has been previously
set, and will begin communicating with the corresponding
WB-8000RW.
After the unit indicates it is in standby mode, when
communication between the two devices is established,
“-----” will be displayed on the top half of the LCD. The
WB-8000RW will start, and it will beep and switch to
measurement mode (the LED will blink green in 1 second
intervals).
Note:
•Pressing and holding
for 2 or more seconds
will cause the currently selected Pin to be
displayed.
•To set or change the Pin, see Setting the Serial
Number page in the Setup section.
•When the D-8000 cannot communicate with the
paired WB-8000RW, the display will indicate
“ErrC”, and the D-8000 power will turn off.
4) Step onto the WB-8000RW while the Green Indicator Light is
blinking on every second.
After the measurement is complete, the platform will beep
twice, the Green Indicator light on longer blinks (remains
solid), and weight will automatically be displayed on
D-8000.
d
d
d
d
Before proceeding, make sure that the WB
8000RW and D
8000 are within 17 feet (5m) of each other.
<LED: Blinking Green (4 Second Intervals)>
<LED: Blinking Green (1 Second Intervals)>
Pi
PiPi


