background image

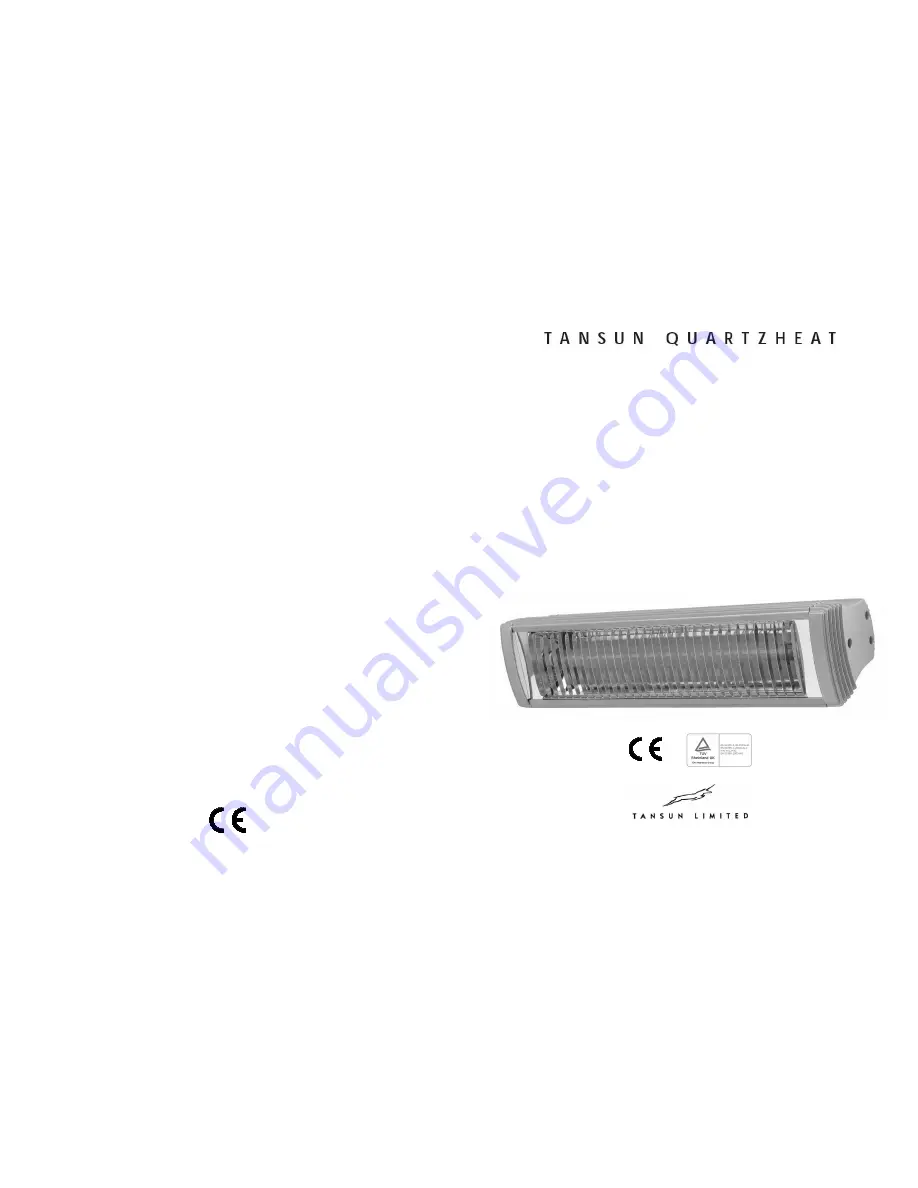
©Tansun Limited 2008                Part No. 042088                          Issue. 7 

Reference Manual 

Rio 2IP 

UK, EUROPEAN & AUSTRALIA/NEW ZEALAND MODELS: 

RIO 210IP UK, RIO 210IP EU & RIO 210IP ANZ, 
RIO 215IP UK, RIO 215IP EU & RIO 215IP ANZ, 

RIO 220IP UK, RIO 220IP EU & RIO 220IP ANZ 

UNIVERSALLY MOUNTED MODELS &  


RIO 213IP UK, RIO 213IP EU & RIO 213IP ANZ 

HORIZONTALLY MOUNTED MODEL 

Spectrum House, Unit 1, Ridgacre Road, West Bromwich, 

West Midlands, B71 1BW, England. 

Tel: +44 (0)121 580 6200 - Fax: +44 (0)121 580 6222 

Email: quartzinfo@tansun.com - Website: www.tansun.com 

Summary of Contents for RIO 210IP EU

Page 1: ...Z RIO 215IP UK RIO 215IP EU RIO 215IP ANZ RIO 220IP UK RIO 220IP EU RIO 220IP ANZ UNIVERSALLY MOUNTED MODELS RIO 213IP UK RIO 213IP EU RIO 213IP ANZ HORIZONTALLY MOUNTED MODEL Spectrum House Unit 1 Ridgacre Road West Bromwich West Midlands B71 1BW England Tel 44 0 121 580 6200 Fax 44 0 121 580 6222 Email quartzinfo tansun com Website www tansun com ...

Page 2: ...use The heater is not intended for use by young children or infirm persons unless they have been adequately supervised by a responsible person to ensure that they can use the heater safely Do not insert any object through any slot or opening in the heater Do not use if guard is not present Do not install less than the minimum mounting distance from the floor Warning this appliance must be earthed ...

Page 3: ...nnection Otherwise the plug should be connected to a socket indoors If in any doubt please contact a suitably qualified electrician M o u n t i n g The Rio models RIO 210IP RIO 215IP and RIO 220IP can be mounted in a horizontal or vertical manner hence the term universal burning The RIO 213IP can only be mounted horizontally and should be positioned in such a way that the halogen emitter does not ...

Page 4: ...e the heater and lamp are cool and the power supply is disconnected by removing the plug from the socket outlet 2 Remove the heater from its mounting and work on a safe flat surface 3 Remove the screws from the terminal box and lift off the lid Fig 1 Fig 2 11 Take your new lamp and refit by ensuring the leads are facing upwards and away from the lamp holders The lamp can be clipped in by pulling t...

Reviews: