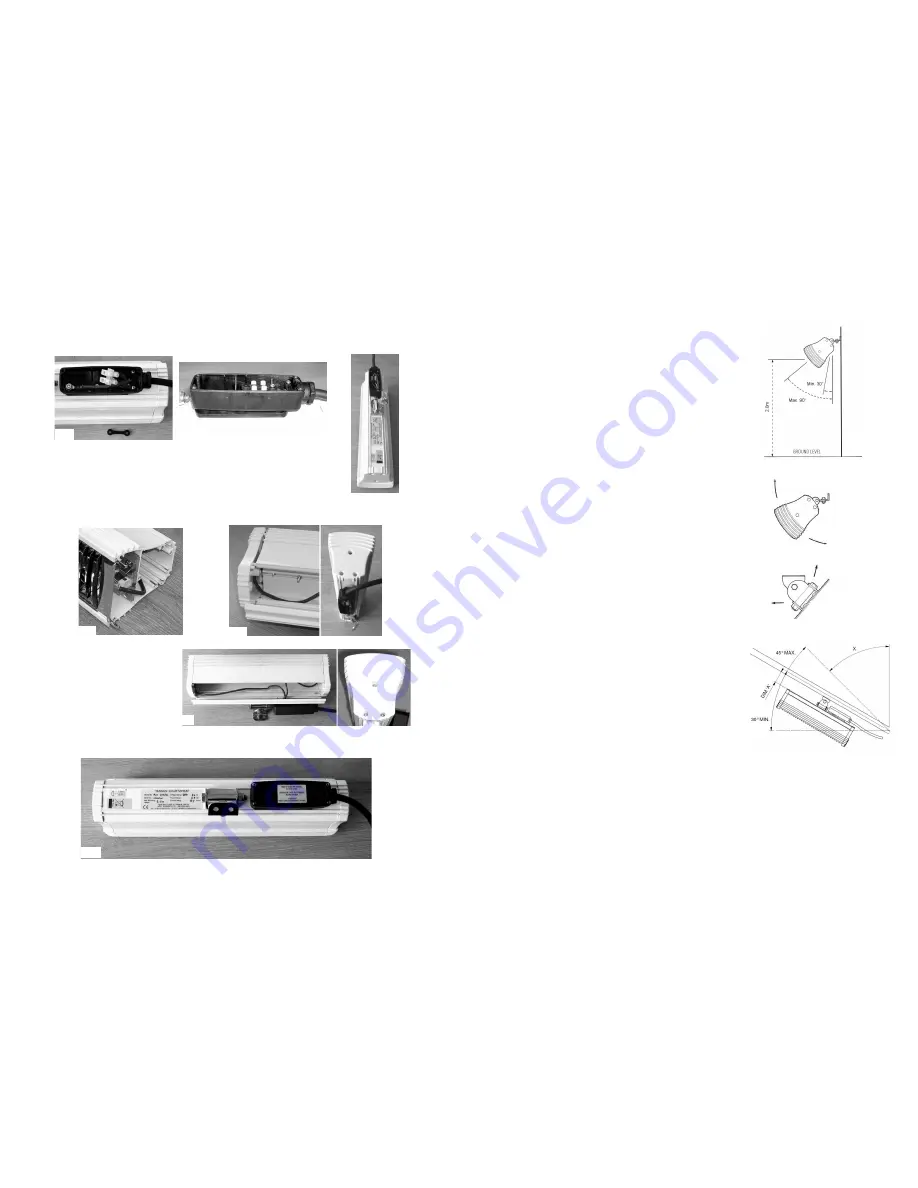
17. From inside of the heater body, push one of the leads through the black rubber gasket and into the terminal box. The gas-
ket has two small holes in it and one wire per hole should be inserted (the sleeving needs to be pulled back so only the white
wire comes through) and push it firmly into either one of the terminals. Hold in place and tighten the screw fully (see Fig. 17).
18. Push the other lamp lead through the second hole in the gasket and fit to the second terminal of the
connector block (Fig. 17). The connector block can now be returned to its locating lugs and the screws
checked for tightness. Replace the saddle and screw (Fig. 18).
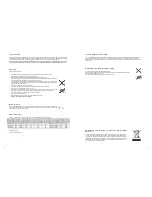
19. The back plate can now be placed on the back of the heater and the locating lugs pushed in as shown
in Fig. 19.
20. The other end casing can be aligned and ensuring the lead is not going to get trapped
(as step 15!)
and is positioned as
shown in Fig 20,
push the end casing into place. It is recommended that the heater is stood up on its fixed end and downward
force applied to ensure everything goes back together correctly (Fig. 21).
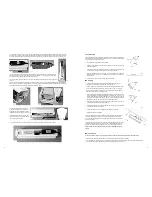
21. If the leads are free to move and the
guard and side reflectors are in order, the
back plate should be closed and all screws
refitted and checked for tightness as Fig. 22.
22. Make a final check in the terminal box
that all of the wires are secure and replace
the cover and refit the screws.
23. The heater can now be returned to its original mounting position and the mains power reconnected.
Fig. 23
6
Fig. 22
Fig. 17
Fig. 18
Fig. 19
Fig. 20
Fig. 21
I n s t a l l a t i o n
The Rio heater is fitted with 5 meters of supply cable and a moulded plug, therefore it
is unnecessary to open the terminal box in order to carry out normal installation of this
product and should not be interfered with.
We recommend using a RCD where applicable.
Please observe the minimum safe distance between the heater body and any
inflammable surfaces.
If the supply cord becomes damaged, it must be replaced by the manufacturer, its
service agent or a similar qualified person in order to avoid a hazard.
When the electrical connection is outside, it is recommended that a waterproof
socket is used for the connection. Otherwise, the plug should be connected to a
socket indoors.
If in any doubt, please contact a suitably qualified electrician.
M o u n t i n g
The Rio models RIO 210IP, RIO 215IP and RIO 220IP can be mounted in a
horizontal or vertical manner hence the term universal burning.
The RIO 213IP can only be mounted horizontally and should be positioned in such
a way that the halogen emitter does not slant more than 4° from the horizontal.
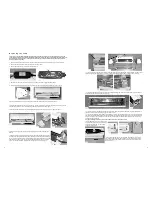
When mounting the Rio horizontally, do not position the heater at an angle more
than 90° and less than 30° as shown in Fig. A.
When vertically mounting the Rio (not applicable to RIO 213IP) models, ensure to
leave a gap between the heater and mounting surface (See Fig. D - dim A). The
heater should always be angled downwards when mounting this way with the
terminal box at the bottom of the heater - see Fig. D. Do not position the heater at
an angle more than 45° and less than 30° to the horizontal as shown.
Always allow the heater to cool before attempting to reposition/move. Never at-
tempt to move the heater while it is switched on!
Observe the minimum safe distance between the heater body and inflammable
surfaces and objects when mounting.
Please refer to Table 1 for the recommended positioning of the heater.
Keep out of the reach of children.
1. Securely fasten the Rio bracket to the mounting surface using the fixing holes in
the bracket. Please refer to Table 1 for recommended positioning of the heater.
2. Fix in the required angular position by tightening the fixing bolt on the bracket at
the rear of the heater.
3. The Rio bracket can be used to adjust the direction of the heater up and down (see
Fig. B) and side to side (see Fig. C). This is done by loosening the bolts fixing the
heater to the bracket, and then retightening once the correct position is achieved.
Always isolate the heater from the mains supply when adjusting the angular
position.
3
M a i n t e n a n c e
In the event of heater failure, or for spare parts or advice, please contact the manufacturer in the first instance.
Disconnect from the mains before commencing any maintenance procedure including cleaning.
To ensure optimum heat effectiveness, it is recommended that that the guard and lamp are removed and the reflector is wiped
with a lint-free cloth before reassembling should the reflector show signs of dust or dirt.
Fig. A
Fig. B
Fig. C
Fig. D


