7.
MAINTENANCE
Tapflo LPX series
37
7.7.3.
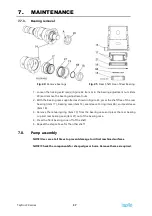
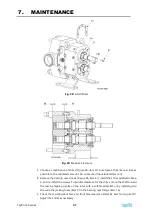
Bearing removal
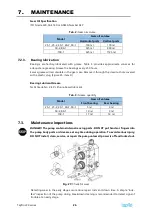
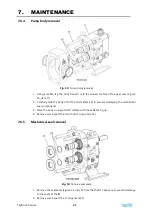
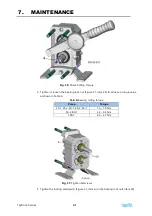
Fig. 40:
Remove bearings
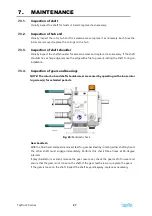
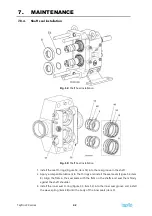
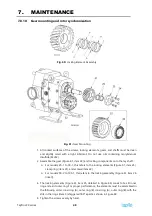
Fig. 41:
Press Shaft Free of Rear Bearing
1.
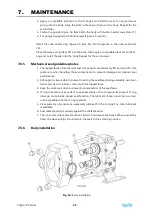
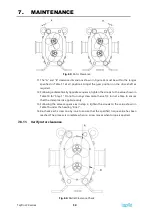
Loosen the locking setscrew(s) (Figure 42, item A) in the bearing adjustment nuts (item
20) and remove the bearing adjustment nuts.
2.
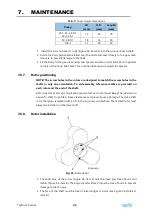
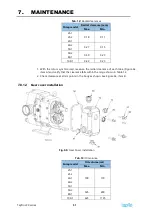
With the bearing case supported as shown in Figure 43, press the shaft free of the rear
bearing (item 17), bearing case (item 14), seal sleeve O-ring (item 68), and seal sleeve
(item 18).
3.
Remove the retaining ring (item 19) from the bearing case and press the rear bearing
cup and rear bearing seal (item 27) out of the bearing case.
4.
Press the front bearing cone off of the shaft.
5.
Repeat the steps above for the other shaft.
7.8.
Pump assembly
NOTE!
Use care at all times to prevent damage to critical machined surfaces.
NOTE!
Check the components for sharp edges or burrs. Remove them as required.
Summary of Contents for LPX Series
Page 59: ...9 PARTS LISTS Tapflo LPX series 59 9 3 Model 25 1 to 50 1 Pump Parts B exploded view ...
Page 61: ...9 PARTS LISTS Tapflo LPX series 61 9 5 Model 50 2 to 100 1 Pump Parts A exploded view ...
Page 63: ...9 PARTS LISTS Tapflo LPX series 63 9 7 Model 50 2 to 100 1 Pump Parts B exploded view ...
Page 69: ...Tapflo LPX series 69 ...

