7.
MAINTENANCE
Tapflo LPX series
53
3.
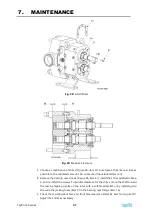
Remove the acorn nuts and spacers used to secure the pump body.
4.
Install the cover (item 2) over the studs and fasten it securely with acorn nuts (item 35).
The pump should rotate freely by hand with no binding or dragging.
5.
Check that all labels are in place and legible. See chapter 2.0:
“Replacement Labels”.
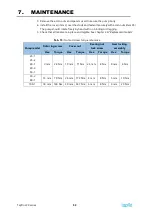
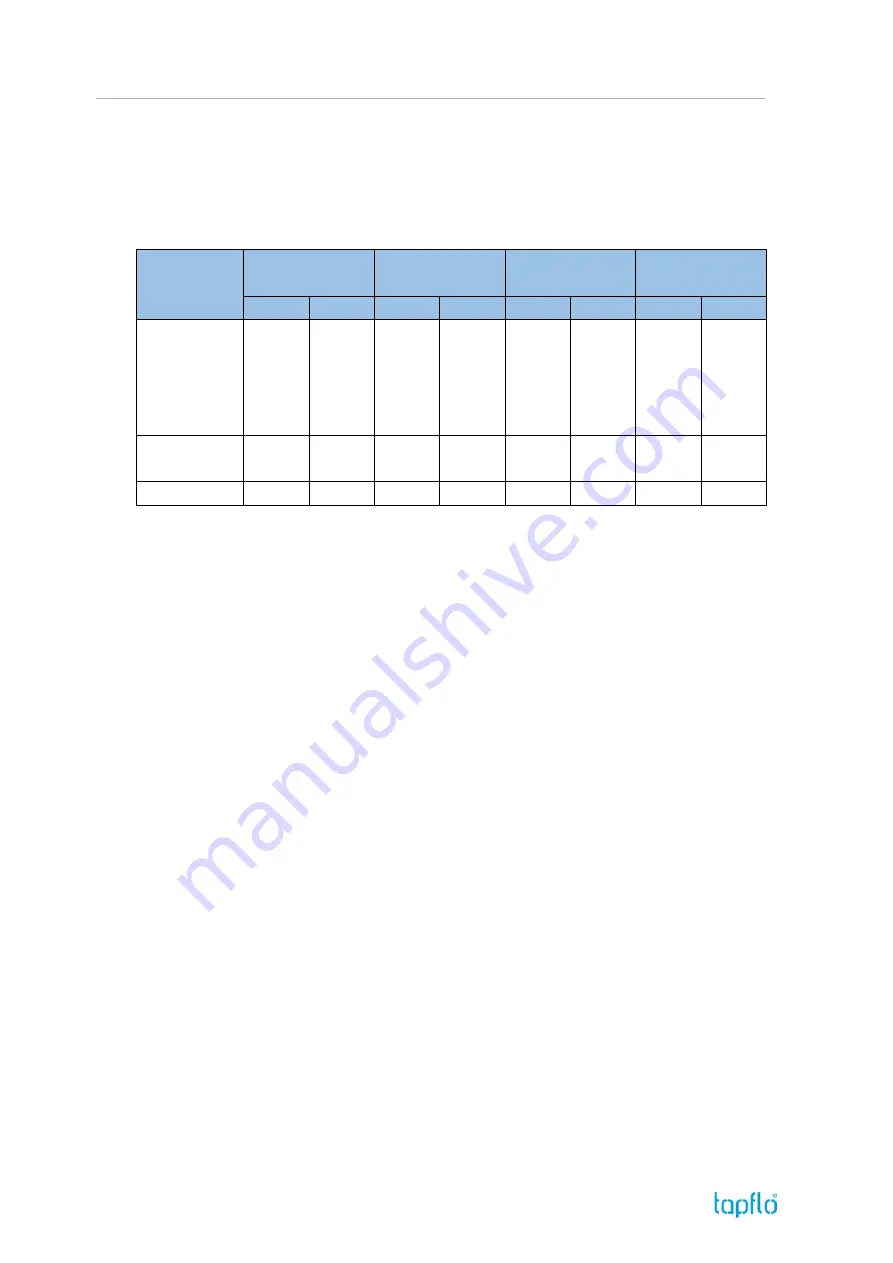
Tab. 15:
Nut and screw torque reference
Pump model
Rotor lug screw
Cover nut
Bearing nut
lock screw
Gear locking
assembly
Hex
Torque
Hex
Torque
Hex
Torque
Hex
Torque
25-1
25-2
40-1
40-2
50-1
9 mm
24 Nm
19 mm
71 Nm 2.5 mm
4 Nm
8 mm
6 Nm
50-2
80-1
13 mm
70 Nm
24 mm 172 Nm
3 mm
8 Nm
5 mm
10 Nm
100-1
18 mm 160 Nm 30 mm 347 Nm
3 mm
8 Nm
6 mm
25 Nm
Summary of Contents for LPX Series
Page 59: ...9 PARTS LISTS Tapflo LPX series 59 9 3 Model 25 1 to 50 1 Pump Parts B exploded view ...
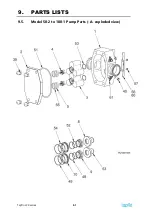
Page 61: ...9 PARTS LISTS Tapflo LPX series 61 9 5 Model 50 2 to 100 1 Pump Parts A exploded view ...
Page 63: ...9 PARTS LISTS Tapflo LPX series 63 9 7 Model 50 2 to 100 1 Pump Parts B exploded view ...
Page 69: ...Tapflo LPX series 69 ...


