12
13
Preparation for installation
If you wish to install a large quantity, we recommend
that you carry out the registration with the Owner Card
prior to installation.
Installation in core pulling protection fittings
Please note: If you wish to install the Tapkey
Smart Lock in core pulling protection fittings
or a safety fitting or rosette, prepare the
fittings in such a way that the coupling shaft
of the Tapkey Smart Lock fits through the
opening of the fittings. Due to the variety of
fittings available on the market, the individual
fittings are not illustrated here.
Tapkey Smart Lock
Please note: Always install and program the
Tapkey Smart Lock with the door open so that
you do not lock yourself out.
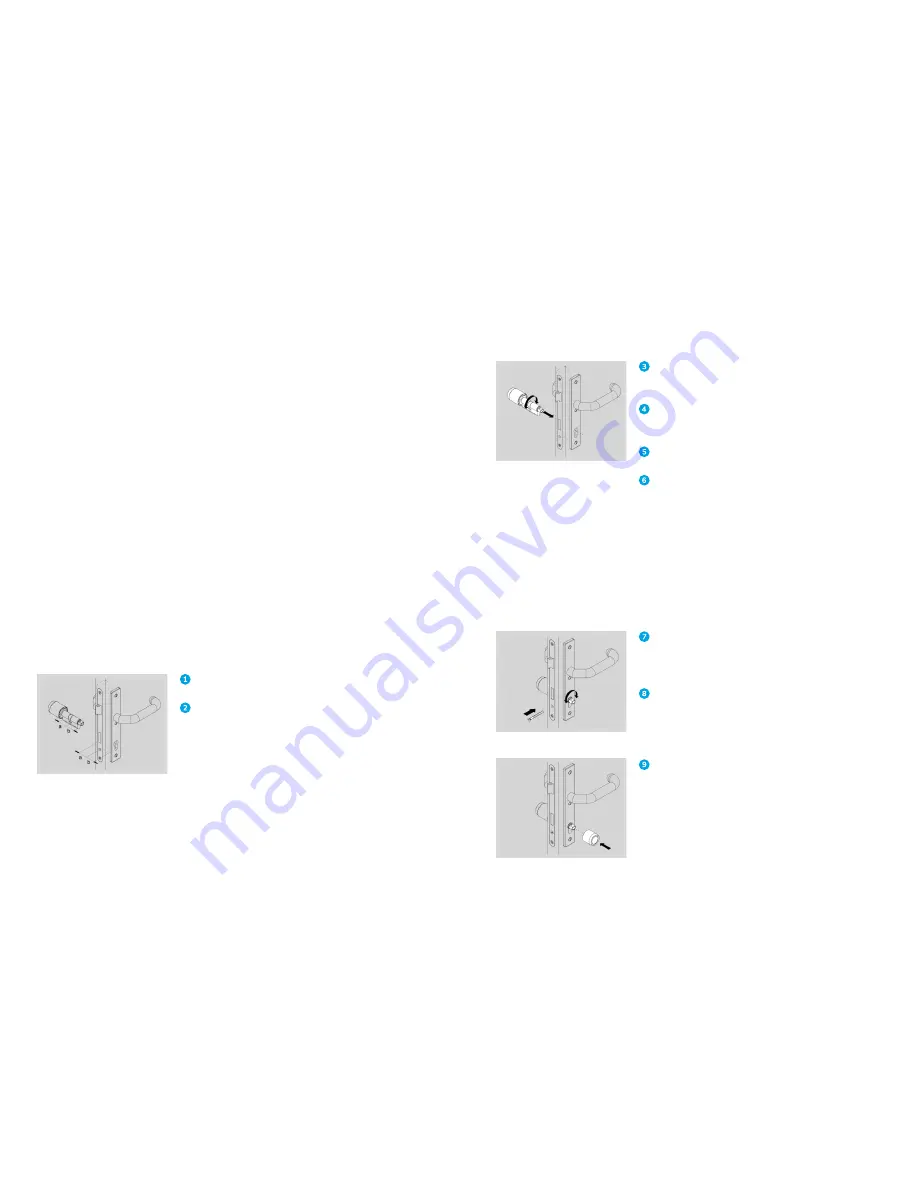
Measure the thickness of the door with fitting.
Ensure that the basic length of the Tapkey Smart
Lock is adapted to the measured thickness: Note
the division into outside (a) and inside (b).
Please note: Ideally, the door with fitting
should be a little thinner than the cylinder
body of the Tapkey Smart Lock, so that
the knobs do not scrape on the fitting and
move freely. The cylinder must not project
Fig. 1: Measure the thickness
from the fitting more than 3 mm on security-
relevant doors.
Remove the old locking cylinder if necessary
(not illustrated).
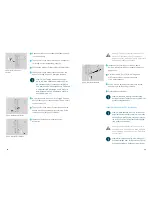
Carefully remove Tapkey Smart Lock with pre-
assembled outside knob from the packaging.
Align the cam flush with the cylinder body.
Carefully slide Tapkey Smart Lock through the fit-
ting from the outside with the inside forwards.
Please note: It is preferable to install the
Tapkey Smart Lock from the outside. If it is
necessary to install from the inside, disas-
semble the knob sleeve and electronics in the
reverse order described in cylinder installation,
with core pulling protection
(Fig. 6–Fig. 14).
Turn the inner side so that you can feel the correct
position of the cam and align the Tapkey Smart
Lock.
Fix the Tapkey Smart Lock with the screw as
soon as you feel the correct position. Do not com-
pletely tighten the screw yet.
Insert the inside knob accurately until it reaches the
end position.
Fig. 2: Insert the Tapkey Smart Lock
Fig. 3: Align cam
Fig. 4: Insert inside knob


