Page 1: ...Before Setting Oven Controls 9 Setting Oven Controls 1O 12 Oven Cleaning 13 14 General Cleaning 15 17 Chansin 8 Oven Light 18 Adjusting Oven Temperature 18 Avoid Service Checklist 19 20 Notes 21 23 W...
Page 2: ...ugh the information contained in your literature pack to learn more about your new appliance Record Your Model and Serial Numbers Recordin the spaceprovided below the model and serial numbersfound on...
Page 3: ...child on an open door may cause the range to tip resulting in serious burns or other injury r i VAVI I qL BBL L_II DO not use the oven or warmer drawer for storage may cause bodily injury or property...
Page 4: ...se Care When Opening Oven Door or Warmer Drawer Stand to the side of the range when opening the door of a hot oven Let hot air or steam escape before you remove or replace food in the oven Keep Oven V...
Page 5: ...or locks when the self clean cycle is in use It glows constantly after the door locks TIMER PAD Used to set or cancel the minute timer The minute timer does not start or stop cooking baking time _ STO...
Page 6: ...push the first the t mer w II advance to 11 hours and 59 minutes 3 The display shows the timer count down in minutes until one minute remains Then the display will count down in seconds 4 When the set...
Page 7: ...a uniform and consistent heat during the off cycle The ceramic fixture thermally insulates the heating unit concentrating heat in the heating zone For efficient cooking turn off the unit several minu...
Page 8: ...HI Start most foods bring water to a boil pan broiling MEDIUM HIGH 7 8 Continue a rapid boil fry deep fat fry MEDIUM 4 6 Maintain a slow boil thicken sauces and gravies steam vegetables MEDIUM LOW 2...
Page 9: ...ion in the oven and good baking results OVENVENT I REMOVING REPLACING OVEN RACKS To remove pull the rack forward until it stops Lift up front of rack and slide out To replace fit the rack onto the gui...
Page 10: ...Controls for Normal Baking 1 Push _ appears in the display 2 Within 5 seconds push the The display will show 350 F or 177 C By holding the _ or the temperature can then be adjusted in 5 F 1 C incremen...
Page 11: ...ements 5 Push _ 0 00 wil f ash in the display 6 Push the or unt the des red amount of baking time appears in the display To Program Oven for a Delayed Start Time and to Shut Off Automatically 1 Be sur...
Page 12: ...e display Pushthe for H bro or the Yfor LO broil Most foods can be broiled at the HI broil setting Select the LO broil setting to avoid excessbrowning or drying of foods that should be cooked to the w...
Page 13: ...igh cleaning temperatures 3 Oven racks may be left in the oven or may be removed If they go through the clean cycle their color will turn slightly blue and the finish will be dull After the cycle is c...
Page 14: ...cycle 4 As soon as the or is released CLn appears in the display 5 As soon as the controls are set the motor driven lock will begin to close automatically and the LOCK indicator light will flash DO NO...
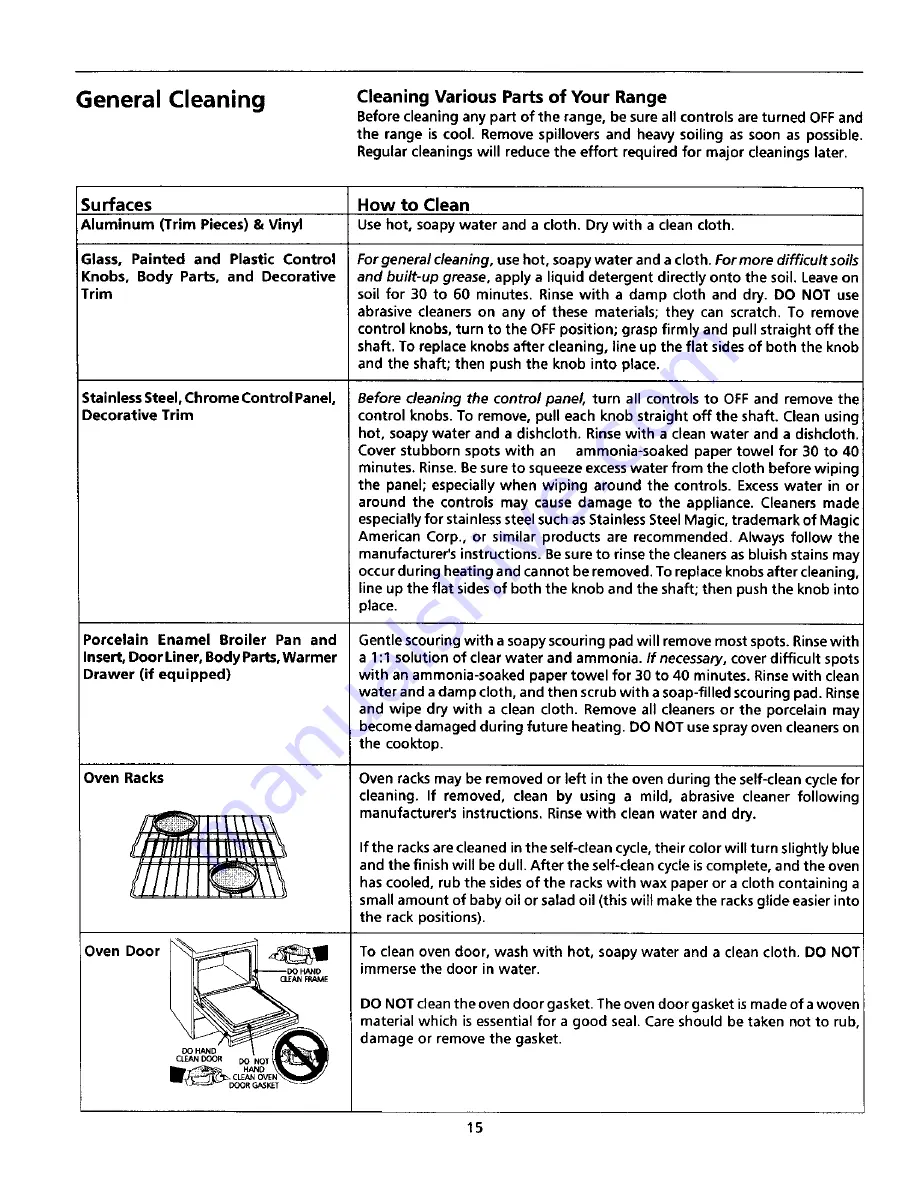
Page 15: ...r in or around the controls may cause damage to the appliance Cleaners made especially for stainless steel such as Stainless Steel Magic trademark of Magic American Corp or similar products are recomm...
Page 16: ...urface to cool 2 Carefully scrape soil with a metal razor blade scraper Hold razor blade scraper at a 30 angle to the cooktop 3 Remove loosened soil with a clean paper towel 4 Apply cooktop cleaning c...
Page 17: ...structions provided in the cleaning chart under General Cleaning Uft door straight off 2 door hinges To Replace Oven Door 1 Besure the hinge arms are in the quarter open position Becareful if pulling...
Page 18: ...hange the se f c eaning temperature The temperature in the oven has been set at the factory When first using the oven be sure to follow recipe times and temperatures If you think the oven is too hot o...
Page 19: ...must be accessible for service appliance accessible Carpet interferes with range Provide sufficient space so range can be lifted over carpet Oven control beeps and displays F1 or F3 Electronic contro...
Page 20: ...get hot enough to burn on residue Clean these areas before the self cleaning cycle is started Burned on residue can be cleaned with a stiff nylon brush and water or a nylon scrubber Be ca reful not t...
Page 21: ...21...
Page 22: ...22...
Page 23: ...23...
Page 24: ...iring 4 Expensesfor making the appliance accessiblefor servicing suchas removal of trim cupboards shelves etc which are not a part of the appliance when it was shipped from the factory 5 Damages to fi...