background image


 15


BFM

-

505, 506, 507 Finish Mower


Before attaching the rotary tiller to the tractor, check the unit to ensure there is oil 

in the top and side gearbox. See Maintenance section for lubricant specifications.


Operating Instructions 

Operating Instructions 

Attaching to Tractor 

Attaching PTO Shaft 


Attaching the PTO shaft:


Before installing the PTO shaft make sure that the RPM rating and the direction of rotation match those of the 
tractor. Carefully read the PTO shaft and tractor instructions. Before operation, make sure that the guards are 
installed on the power take off of the tractor and PTO shaft. Make sure that they cover the PTO shaft 
throughout its length. Note: The PTO shaft may be too long and require shortening. See 

Shortening a PTO 

driveline

” 

below.


Press the locking pin on the PTO yoke and slide yoke on to the PTO of the tractor until the pin seats. Pull on 
PTO shaft to make certain it is locked in place. Repeat the procedure for the machine end. Attach the PTO 
cover

s safety chains to a stationary part of the tractor. Leave some slack in the chain to accommodate 

movement.


Shortening a PTO driveline:


1.


With the machine attached to the tractor

s 3

-

point hitch, and the PTO shaft not installed, 
separate the PTO shaft. Attach the machine 
end to the machine and the other end to the 
tractor PTO input shaft.


2.


Raise the machine by using the tractor

hydraulic 3

-

point hitch to its maximum lift 

height.


3.


Hold the half shafts next to each other and 
mark them so each end is approximately 

1/2” 

from hitting the end of the telescopic 

profiles.


4.


Shorten the inner and outer guard tubes 
equally.


5.


Shorten the inner and outer profiles by the same length as the guard tubes. Using a rattail file, round off all 
sharp edges and burrs. Grease the telescopic profile generously before reassembling.


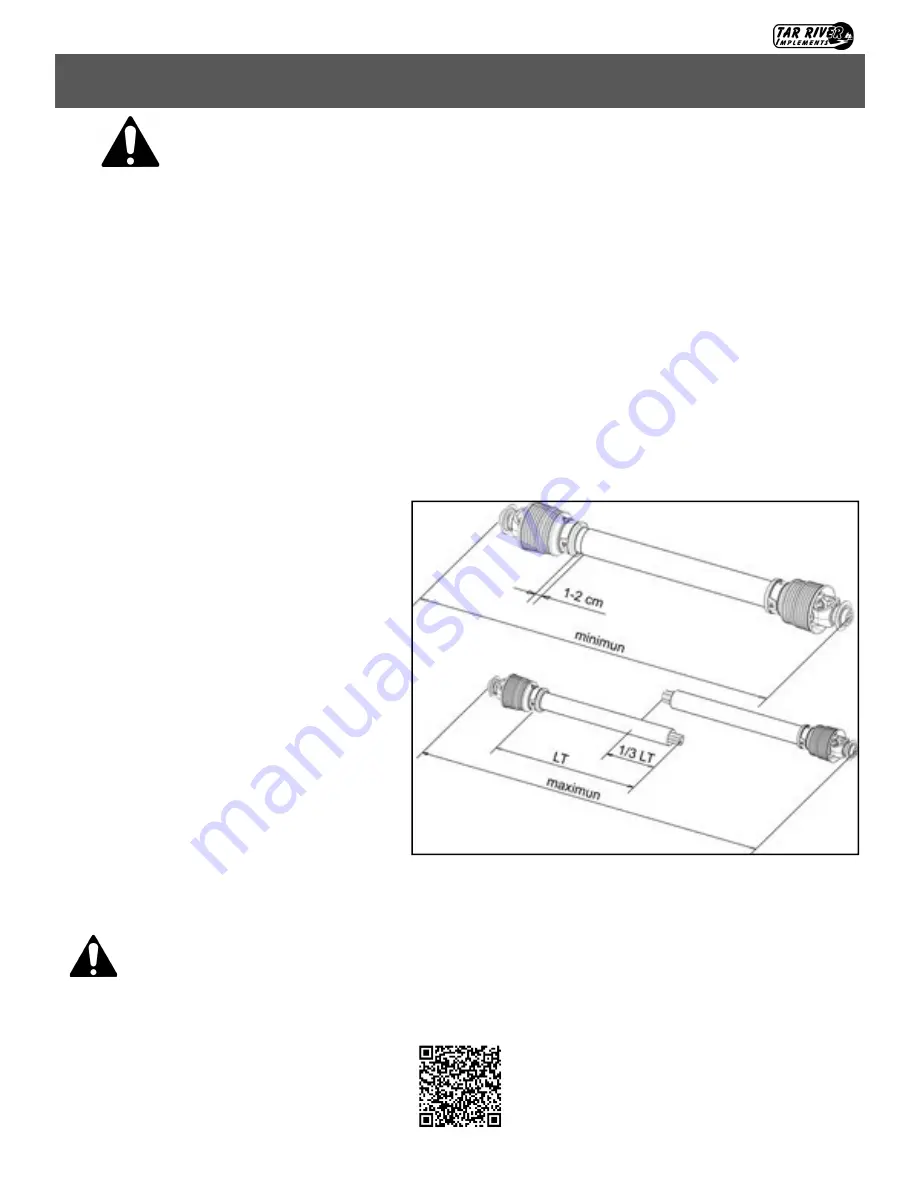
When fully extended, the tubes must overlap by at least 1/3 of the length of the pipes 
(LT). When retracted, the min. acceptable clearance is 1

-

2 cm 

(3/8”

-

3/4”)


Operating Instructions 

Scan the QR code below for more detailed information on PTO installation.


Summary of Contents for BFM-505

Page 1: ...Rev 11 22 Rear Discharge Finishing Mower BFM 505 BFM 506 BFM 507 Operator s Manual...

Page 2: ...2 BFM 505 506 507 Finish Mower Page left blank intentionally...

Page 3: ...g dealer The equipment you have purchased has been carefully engineered and manufactured to provide dependable and satisfactory use Like all mechanical products it will require cleaning and upkeep Lub...

Page 4: ...Signal Words 6 General Safety Guidelines 7 Safety Decal Care 7 Before Operation 8 During Operation 9 Highway And Transport Operations 10 11 Operating Instructions 12 16 Maintenance 17 18 Trouble Shoo...

Page 5: ...Specifications Solid rubber tires Rear discharge Floating hitch Easy cutting height adjustment Easy belt tension adjustment Powder coat paint Category 1 hitch Anti scalp roller is standard for the BF...

Page 6: ...instructions involving you personal safety and the safety of others Failure to follow these instructions can result in injury or death This symbol means Attention Become alert Your safety is involved...

Page 7: ...ually This equipment is dangerous to children and persons unfamiliar with its operation The operator should be a responsible adult familiar with farm machinery and trained in this equipment s operatio...

Page 8: ...uctions included with this manual Be sure that there are no tools lying on or in the equipment Do not use the unit until you are sure that the area is clear especially of children and animals Don t hu...

Page 9: ...look around to make sure that it is safe to start the engine of the towing vehicle or move the unit This is particularly important with higher noise levels and quiet cabs as you may not hear people sh...

Page 10: ...m your dealer The use of flashing amber lights is acceptable in most localities However some localities prohibit their use Local laws should be checked for all highway and marking requirements When dr...

Page 11: ...nit length when making turns Operate the towing vehicle from the operator s seat only Never stand alongside of unit with engine running or attempt to start engine and or operate machine while standing...

Page 12: ...ht by means of the spacers 3 Skip the following step if Gearbox and Belts are already assembled on mower Place the belts 7 onto the pulleys Place the gearbox support 8 on the machine insert both belts...

Page 13: ...he machine and insert the bolts 23 with relative nuts 24 Place the top link 25 on both tie rods and uprights by inserting the spacer 26 between the top link and the tie rods finally tighten the screw...

Page 14: ...the top link and securing it by means of the pin Adjust the top link so that the upper part of the frame is parallel to the ground Block all the linking parts by means of the sway chains or arms Make...

Page 15: ...t the procedure for the machine end Attach the PTO cover s safety chains to a stationary part of the tractor Leave some slack in the chain to accommodate movement Shortening a PTO driveline 1 With the...

Page 16: ...ension as they stretch the correct belts tensioning ensures that the machine works correctly To adjust the belts tension Remove the two Belt Shields A Loosen the Nuts B holding the gearbox in place ju...

Page 17: ...s environmental dust seasonal factors etc First check After 50 working hours check the oil in the gearbox A and make sure that all the screws and bolts are tightened Maintenance Caution Before injecti...

Page 18: ...res to prevent accidental machine start up Place the equipment on sturdy supports Maintenance Danger Before replacing the blades turn the tractor engine off pull the parking brake disengage the power...

Page 19: ...rees to the first pass Cut a partial swath only Grass wet Allow grass to dry before mowing Slow trac tor s ground speed but maintain 540 RPM PTO speed Excessive vibration Driveline broken or bent Repl...

Page 20: ...or repair shaft Oil seal installed wrong Replace with OEM seal Oil seal not sealing in the housing Replace with OEM seal or use a sealant on out side diameter or seal Oil level to high Drain oil to p...

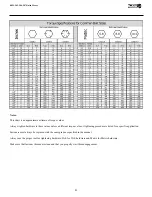
Page 21: ...nt torque value or tightening procedure is listed for a specific application Fasteners must always be replaced with the same grade as specified in the manual Always use the proper tool for tightening...

Page 22: ...22 BFM 505 506 507 Finish Mower Page left blank intentionally...

Page 23: ...Rev 11 22 Rear Discharge Finishing Mower BFM 505 BFM 506 BFM 507 Parts Manual...

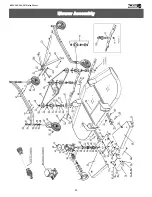
Page 24: ...24 BFM 505 506 507 Finish Mower Hopper Assembly Operating Instructions Operating Instructions Attaching to Tractor Attaching PTO Shaft Mower Assembly...

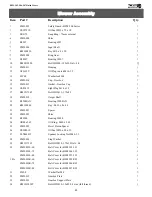
Page 25: ...00840 Key M10 x 8 x 40 21 FM50021 Spacer 22 FM50022 Shim 23 B30208 Bearing 30208 24 OR40x2 65 Oil Ring M40 x 2 65 25 FM50025 Bevel Pinion Spacer 26 OS508010 Oil Seal M50 x 80 x 10 27 SLNM4015 Spanner...

Page 26: ...26 BFM 505 506 507 Finish Mower Hopper Assembly Hopper Assembly Operating Instructions Operating Instructions Attaching to Tractor Attaching PTO Shaft Mower Assembly...

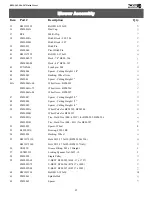
Page 27: ...Height 1 2 49 FM50049 Spacer Cutting Height 1 4 50 FM50050A Wheel Yoke for BFM 505 BFM 506 FM50050B Wheel Yoke for BFM 507 51 FM50051A Tire Hard Tire 000 6923Y for BFM 505 BFM 506 FM50051B Tire Hard T...

Page 28: ...28 BFM 505 506 507 Finish Mower Hopper Assembly Operating Instructions Operating Instructions Attaching to Tractor Attaching PTO Shaft Mower Assembly...

Page 29: ...76 FM50076 Top Hitch Pin 76A FM50077 Spacer Top Link 77 BM1217575 Bolt M12 1 75x75 FW12 Flat Washer M12 Used with BM1217575 LW12 Lock Washer M12 Used with BM1217575 78 FM50078 Bracket for Roller BFM...

Page 30: ...ear pins tires tubes knives blades or other wear items Oil or grease is not covered by this warranty All obligations of Belco Resources Equipment under this limited warranty shall be terminated if Pro...

Page 31: ...31 BFM 505 506 507 Finish Mower Page left blank intentionally...

Page 32: ...401 Jeffreys Road Rocky Mount NC 27804 www tarrivermfg com Tel 252 822 7140 Fax 252 787 5855 Sales tarrivermfg com...

Reviews: