2-35
Getting Started
Removing the Disk
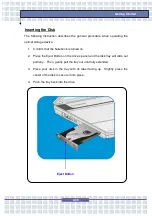
1. Press the Eject Button on the drive’s panel and the disk tray will slide out
partially. Then, gently pull the tray out until fully extended.
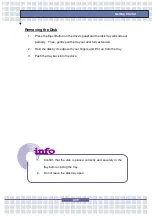
2. Hold the disk by its edge with your fingers and lift it up from the tray.
3. Push the tray back into the drive.
1. Confirm that the disk is placed correctly and securely in the
tray before closing the tray.
2. Do not leave the disk tray open.
Summary of Contents for 1561 ML
Page 58: ...2 36 Getting Started...
Page 68: ...3 10 Customizing this Notebook Notebook...
Page 103: ...Notebook 2 In the next step you can choose between the four options mentioned above 8 3...
Page 108: ...Notebook 8 8...
Page 180: ...3 10 Personnalisation de votre notebook...
Page 214: ...7 8 Notebook...
Page 221: ...8 7 Notebook 10 Une fois la restauration termin e cliquez sur Red marrer l ordinateur...
Page 222: ...8 8 Notebook...
Page 242: ...XX Voorwoord Notebook...
Page 251: ...2 5 De eerste stappen DOS BIOS Fast boot ondersteuning Ja Andere Kensington slot Ja Norm WHQL...
Page 294: ...3 10 Dit notebook personaliseren Notebook...
Page 320: ...5 14 Notebook...
Page 330: ...7 8 Notebook...
Page 333: ...8 3 Notebook 2 In de volgende stap kunt u tussen de vier hiervoor vermelde opties kiezen...
Page 338: ...8 8 Notebook...
Page 356: ...XVIII Forord...
Page 437: ...8 3 Notebook 2 I det neste trinnet kan du velge mellom de fire alternativene ovenfor...
Page 439: ...8 5 Notebook Klikk p OK for bekrefte at du har lest advarselen i neste vindu...
Page 442: ...8 8 Notebook...

