background image

Targa Visionary LT 2210 

Receiving TV Programmes 


English - 17


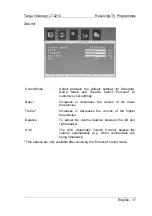
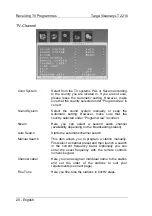
Sound 


Sound Mode


Select between the default settings for Standard, 
News, Music and Theatre. Select “Personal” to 
customize your settings.


Bass *


Increases or decreases the volume of the lower 
frequencies.


Treble *


Increases or decreases the volume of the higher 
frequencies.


Balance


To adjust the volume balance between the left and 
right speaker.


AVC


The AVC (Automatic Volume Control) adjusts the 
volume automatically (e.g. when commercials are 
being broadcast).


* This options are only available after choosing the “Personal” sound mode.


Summary of Contents for LT 2210

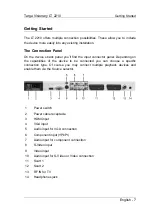
Page 1: ...er volume 20 Raise volume 21 Select source Front panel 22 Power indicator Connection panel 1 Power switch 2 Power cable receptacle 3 HDMI input 4 VGA input 5 Audio input for VGA connection 6 Component...

Page 2: ...er volume 20 Raise volume 21 Select source Front panel 22 Power indicator Connection panel 1 Power switch 2 Power cable receptacle 3 HDMI input 4 VGA input 5 Audio input for VGA connection 6 Component...

Page 3: ...rom www targa online com This guarantee is valid in the UK All Targa LCD and TFT displays conform to the ISO standard 13406 2 Class II Your statutory guarantees from the seller are in addition to this...

Page 4: ...ed 7 The Connection Panel 7 Connecting the Devices 8 HDMI 8 VGA 8 S Video 9 Component connector 9 Scart Euro AV 10 RF Antenna connector 10 Inserting the Batteries 11 Switching the Device On and Off 11...

Page 5: ...8 System 19 TV Channel 20 Channel List 21 Deleting a Channel 21 Renaming a Channel 22 Resorting Channels 22 Advanced Functions 23 Teletext 23 Remote Control Function Buttons 23 Picture and Audio Setti...

Page 6: ...ver it Take special care that the cable does not become pinched particularly at the plug and ports The power switch of this device does not fully disconnect the device from the mains Furthermore the d...

Page 7: ...y injury or property damage Install all batteries correctly with and signs matching the marks indicated Do not mix batteries old and new or carbon and alkaline etc Remove batteries when the device is...

Page 8: ...eating units Always make sure there is sufficient ventilation The ventilation slots on the lid of the device should never be covered e g by laying a cloth on the device Never place the device in the i...

Page 9: ...t be disposed of separately from household waste at established bodies With the proper disposal of old devices you avoid damage to the environment and your personal health This device has been tested...

Page 10: ...epending on the capabilities of the device to be connected you can choose a specific connection type Of course you may connect multiple playback devices and enable them via the Source selector 1 Power...

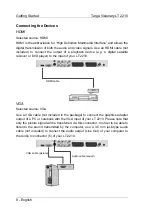
Page 11: ...DVD player to the input of your LT 2210 HDMI cable VGA Selected source VGA Use a VGA cable not included in the package to connect the graphics adapter output of a PC or notebook with the VGA input of...

Page 12: ...tor 10 Audio cable S Video cable Component connector Selected source YPBPR Use a triple Cinch cable not included to connect this input to a high end video source Connect the green blue and red cables...

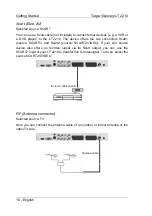
Page 13: ...nnectors Scart1 source SCART1 and Scart2 source SCART2 VIDEO If your A V source device also offers an S Video signal via its Scart output you can use the SCART2 input of your LT 2210 to transfer this...

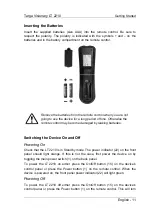
Page 14: ...king batteries Switching the Device On and Off Powering On Check that the LT 2210 is in Standby mode The power indicator 22 on the front panel should light orange If this is not the case first power t...

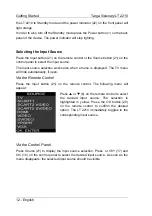
Page 15: ...also when a menu is displayed The TV menu will hide automatically if open Via the Remote Control Press the Input button 21 on the remote control The following menu will appear Press S or T 6 on the r...

Page 16: ...control While the mute function is enabled the message MUTE will be displayed Press the button again or press or the button V 5 to resume the sound output Switching Preset Programmes You can switch t...

Page 17: ...ress the LCD MENU button 7 on the remote control The TV menu will appear Press the X button 6 on the remote control 4 times to display the TV Channel menu Press the T button 6 on the remote control 4...

Page 18: ...control Press W or X 6 on the remote control to select a function then press T or S 6 on the remote control to select an option Press X 6 on the remote control to confirm the selected option and then...

Page 19: ...uration Sharpness To adjust the picture sharpness NR Noise Reduction Select a noise reduction level between Weak Middle or Strong or select Off to disable the Noise Reduction feature Color Temperature...

Page 20: ...gs Bass Increases or decreases the volume of the lower frequencies Treble Increases or decreases the volume of the higher frequencies Balance To adjust the volume balance between the left and right sp...

Page 21: ...ption to the SCART2 input 12 SCART2 SVIDEO Second Scart Euro AV connector by using the S Video transmission line within the Scart cable Switches the signal reception to the SCART2 input 12 HDMI HDMI i...

Page 22: ...enu between 0 and 100 Sleep Allows programming the auto power off after 15 30 45 or 60 minutes Select Off to disable the auto off function Information Shows information about the current software of t...

Page 23: ...d under Program Area is correct Nicam Here you can select a second audio channel availability depending on the broadcasting station Auto Search Starts the automatic channel search Manual Search This i...

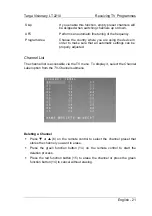
Page 24: ...l automatic settings can be properly adjusted Channel List The channel list is accessible via the TV menu To display it select the Channel Label option from the TV Channel submenu Deleting a Channel P...

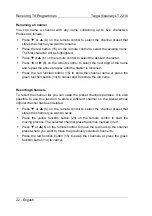
Page 25: ...ion button 15 to store the channel name or press the green function button 14 to cancel and to restore the old name Resorting Channels To resort the channel list you can swap the preset channels pairw...

Page 26: ...page of the top text The buttons 10 to 13 and 24 to 27 correspond to the usual control buttons for Teletext Remote Control Function Buttons Picture and Audio Settings The PMODE button 8 gives you dire...

Page 27: ...nutes The value 0 minutes will disable the sleep timer witch to Last Active Channel You can press the Recall last tuned programme button 17 to quickly toggle between two channels even if the two chann...

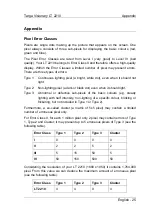
Page 28: ...ot even when it should light Type 3 Abnormal or defective sub pixels of the basic colours e g steady lighting with half intensity non lighting of a specific colour blinking or flickering but not inclu...

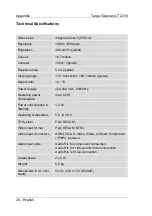
Page 29: ...tio 16 10 Power Supply 220 240 VAC 50 60 Hz Operating power consumption max 60 W Power consumption in Standby 2 W Operating temperature 5 C to 35 C TV System PAL SECAM Video input format PAL SECAM NTS...

Page 30: ...rom www targa online com This guarantee is valid in the UK All Targa LCD and TFT displays conform to the ISO standard 13406 2 Class II Your statutory guarantees from the seller are in addition to this...

Reviews: