TARGA TM-2100
English
15
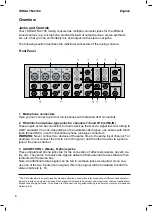
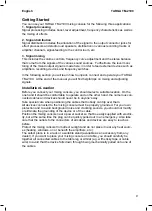
26 Level indicators
By means of these indicators you can control the signal level fed to the Stereo bus. The
"0" value corresponds to a normal output level. The indicator lights red when the signal
level has reached or exceeded the maximum clipping level. From this level the sound
signal can be distorted.
27 MAIN L/R Master Fader (Stereo overall signal control)
Here you can adjust the level of the supplied stereo signals to the MAIN OUTPUT (8)
jacks. This is the already-mixed signals from all channels.
28 CTRL-R/PHONES control
Here you can control the level of the supplied signals to the HEADPHONE (7) and
CONTROL ROOM L and R (6) jacks. It serves to adjust the listening volume for the
headphones or studio loudspeaker.
29 AUX RETURN controls
Here you can set the levels of the mixed L/R signal that is directed from the (3) AUX
RETURN (L (MONO) and R) jacks to the Stereo bus.
Note: If you feed in a pure Mono signal via the RETURN L (MONO) jack, the signal will
be equally output on both channels of the Stereo bus (L and R).
30 TAPE control
Here you can adjust the levels of the signal that is directed from the TAPE IN (4) jacks
on the Stereo bus.
Mixing the Sound Signals
Before you can mix the signals of the different sound sources, you must correctly set the
levels of the individual input signals (channels). By doing this you will avoid overboost-
ing and sound distortion.
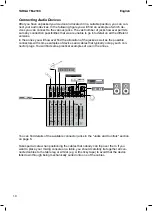
1. Turn the LEVEL (22) control of the relevant channel to the middle position.
2. Turn the TRIM (16) and AUX (19) controls anti-clockwise as far as you can and turn
the HF, MF and LF of the Equalizer to the middle position.
3. Connect the desired sound source to a suitable input jack of the channel.
4. Start playback on the sound source. If this is an instrument, play a song. Or say
something if you have connected a microphone. It is important here that the play
-
back takes place with the same volume as you want to later use to mix.
5. Turn the TRIM control (16) clockwise till the PEAK indicator (15) lights. Then turn
the control gently anti-clockwise till the PEAK indicator (15) no longer lights continu
-
ously.
6. Adjust the HF, MF and LF controls of the Equalizer (18) to set the desired sound
characteristics for the bass, mid and high tones.
7. After setting the sound characteristics it may be necessary to correct the levels us
-
ing the TRIM control (16).

