background image

TARGA TM-2100

English

Cables

Always hold cables by the plug and never pull on the cable itself.
Never hold the power cord with wet hands as this may cause a short circuit or electric 
shock. 
Never place the device, heavy objects or furniture on the cable and take care that the 
cord does not become trapped, especially at the plug and sockets. Never make knots in 
the cable and do not tie it together with other cords. All cables should be positioned so 
that nobody can trip over them or be obstructed by them. 

A damaged power cord can cause a fire or an electric shock. Inspect the power cord 

from time to time. Never use adapter plugs or extension cables that don't comply with 
the current safety regulations in your country, and don't modify any of the power cords 
or electrical installations yourself!

Maintenance and Care

Servicing is required when this device has been damaged in any way, for example, 
when the power plug, power cord or housing is damaged, when liquid or objects have 
entered the device, when the product has been exposed to rain or moisture, when the 

product does not work normally or if the product has been dropped. If you notice any 

smoke, unusual noise or strange smells, switch off the device immediately and pull the 

plug from the wall outlet. In this case the device should not be used further and should 

be inspected by authorized service personnel. Please contact qualified personnel when 

servicing is needed. Never open the housing of the device, the power adapter or the ac-
cessories. By opening the housing you endanger your life through risk of electric shock. 
Only use a clean, dry cloth for cleaning and never use any abrasive liquids.

Never open the mixing console! Modifications and repairs must be performed by autho

-

rized technicians or service personnel.
Do not attempt to open the housing of the device otherwise you will void your warranty.

Disposal of Old Devices

1.  If the product is labelled with a crossed-out waste bin, it is subject to the European 

Guideline 2002/96/EC.

2.  All electric and electronic devices must be disposed of separately from household 

waste at established bodies.

3.  With the proper disposal of old devices you avoid damage to the environment and 

your personal health.

4.  For further information about proper disposal, contact your local government, dis-

posal bodies or the shop where you bought the device.

Children

Electrical appliances do not belong in the hands of children! Do not allow children to use 

electrical devices when not under supervision. Children may not comprehend the pres

-

ence of potential risks. Small parts can represent choking hazards. 
Keep the packaging away from children too  to avoid the danger of suffocation

Summary of Contents for TM-2100

Page 1: ...mation Update 08 2008 Ident No 082008 GB IE CY MT TARGA GmbH Lange Wende 41 D 59494 Soest Art Nr 16374 Sound Mixer Sound Mixer Operation and Safety Notes 4722_Musik Mischpult_GB indd 1 2 07 08 2008 16...

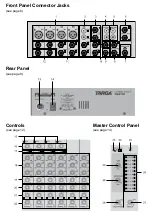
Page 2: ...Front Panel Connector Jacks see page 6 Rear Panel see page 8 Controls see page 12 Master Control Panel see page 14...

Page 3: ...y never be immersed do not place any objects filled with liquids such as vases or drinks near the device no fire sources e g burning candles are placed on or near the device no foreign bodies are intr...

Page 4: ...from the wall outlet In this case the device should not be used further and should be inspected by authorized service personnel Please contact qualified personnel when servicing is needed Never open t...

Page 5: ...um permitted noise level is 100 dB Using the loudspeakers headphones at a higher sound volume can damage your hearing and cause nuisance to your surroundings The output voltage on the HEAD PHONE jack...

Page 6: ...ts 4 Features and Characteristics 5 Overview 6 Jacks and Controls 6 Getting Started 9 Installation Location 9 Connecting Audio Devices 10 Connecting the Power Adapter 11 Powering On the Mixing Console...

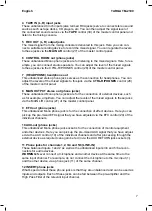
Page 7: ...channel out put From there the stereo signal can be forwarded to an external sound effect device e g reverb effect and then fed into the Return AUX input of the TM 2100 Please check that delivery con...

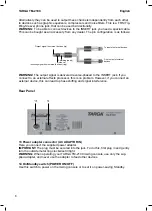
Page 8: ...red via the Phantom power supply when optionally powered on via the microphone input The mixing console has INSERT jacks for the input channels 1 and 2 Via these jacks the signals of various effect pr...

Page 9: ...NING Never connect two devices at the same time to the same input channel For example do not connect the first to a Cinch input 2 and the other device via a phone jack of the same channel 3 AUX RETURN...

Page 10: ...he connection of external devices such as for example amplifiers You can adjust the levels of the mixed signals to these jacks via the MAIN L R control 27 of the master control panel 9 EFX out phone j...

Page 11: ...To do this first plug in and gently turn the outside metal ring clockwise till tight WARNING When operating your TARGA TM 2100 mixing console use only the sup plied adapter and never use the adapter...

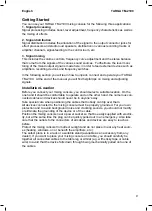
Page 12: ...g console you should select a suitable location On the one hand it should be comfortable to operate and on the other hand the numerous con nected cables and devices should never be in anyone s way Tak...

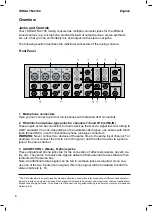
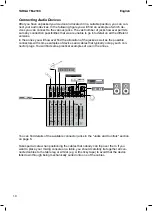
Page 13: ...find the allocation of the jacks as well as the possible connectors with some examples of devices and cables that typically occupy such con nector plugs You will find some practical examples of use in...

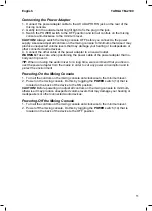
Page 14: ...ble of the power adapter that no body can trip over it TIP When not using the audio mixer for a long time we recommend that you discon nect the power adapter from the mains in order to cut any power c...

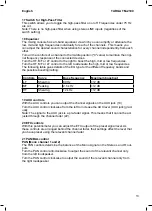
Page 15: ...Q signal and lights red when the level reaches 5dB below the clipping level For stereo channels with XLR jacks 3 4 and 5 6 it measures the post EQ level and the pre amplified mic levels The display li...

Page 16: ...the different frequency bands and the possible boosting cutting Controls Curve Base frequency Maximum boost cut LF Shelving 80 Hz 12 dB MF Peaking 2 5 kHz 12 dB HF Shelving 12 kHz 12 dB 19 AUX control...

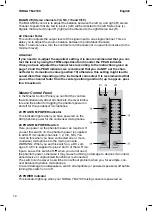
Page 17: ...der from the center position position 5 up to approx posi tion 8 maximum Master Control Panel In the Master Control Panel you can find the controls that simultaneously affect all channels the level in...

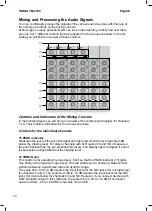
Page 18: ...can adjust the levels of the signal that is directed from the TAPE IN 4 jacks on the Stereo bus Mixing the Sound Signals Before you can mix the signals of the different sound sources you must correct...

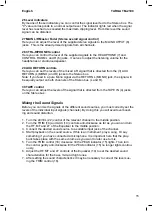
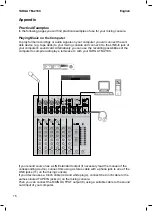
Page 19: ...tively you can use the recording possibilities of the computer to compile radio plays remixes etc with your TARGA TM 2100 If your sound source has a LINE standard output if necessary read the manual o...

Page 20: ...he mic inputs and the instruments to the Mono e g E guitar or Stereo phone jacks e g synthesizer Connect the recording device e g DAT to the REC OUT stereo output 5 To listen to the results connect th...

Page 21: ...s one For output however you connect the mixing console to an amplifier and not to a recording device As a DJ you simply replace the stereo instrument for a tape deck CD player or similar device If ne...

Page 22: ...onnector For unbalanced operation pins 1 and 3 must be short circuited 6 3mm phone jack connector Mono to be used for unbalanced Mono phone jacks Tip Signal Sleeve Shielding earth Tip Signal Sleeve Sh...

Page 23: ...TARGA TM 2100 English 20 Cinch connector red white for TAPE IN input Stereo inputs of the channels 7 8 and REC OUT Stereo output jacks for recording devices...

Page 24: ...ith the corresponding TRIM and LEVEL controls of the channels to which the corresponding devices have been connected Also adjust the output level of the mixing signal using the MAIN L R control 5 on t...

Page 25: ...rol indicator Peak LED for channels 1 2 3 4 5 6 5dB before clipping level Control indicator 2 x 10 LEDs for Stereo output signal Phantom power 48V for channels 1 2 3 4 5 6 to connect con denser microp...

Page 26: ...TARGA TM 2100 English 23 Block Diagram...

Page 27: ...TARGA TM 2100 English 24 Manufacturer TARGA GmbH Lange Wende 41 59494 Soest Germany...

Page 28: ...of purchase Manufacturer TARGA GmbH Postfach 2244 D 59482 Soest www targa online com UK 1191514 Important warranty information Dear Customer Thank you for purchasing a TARGA product Please carefully...

Reviews: