background image

Memory User's 

Guide 

Page 3-2 

3.1   Removing Memory Module  

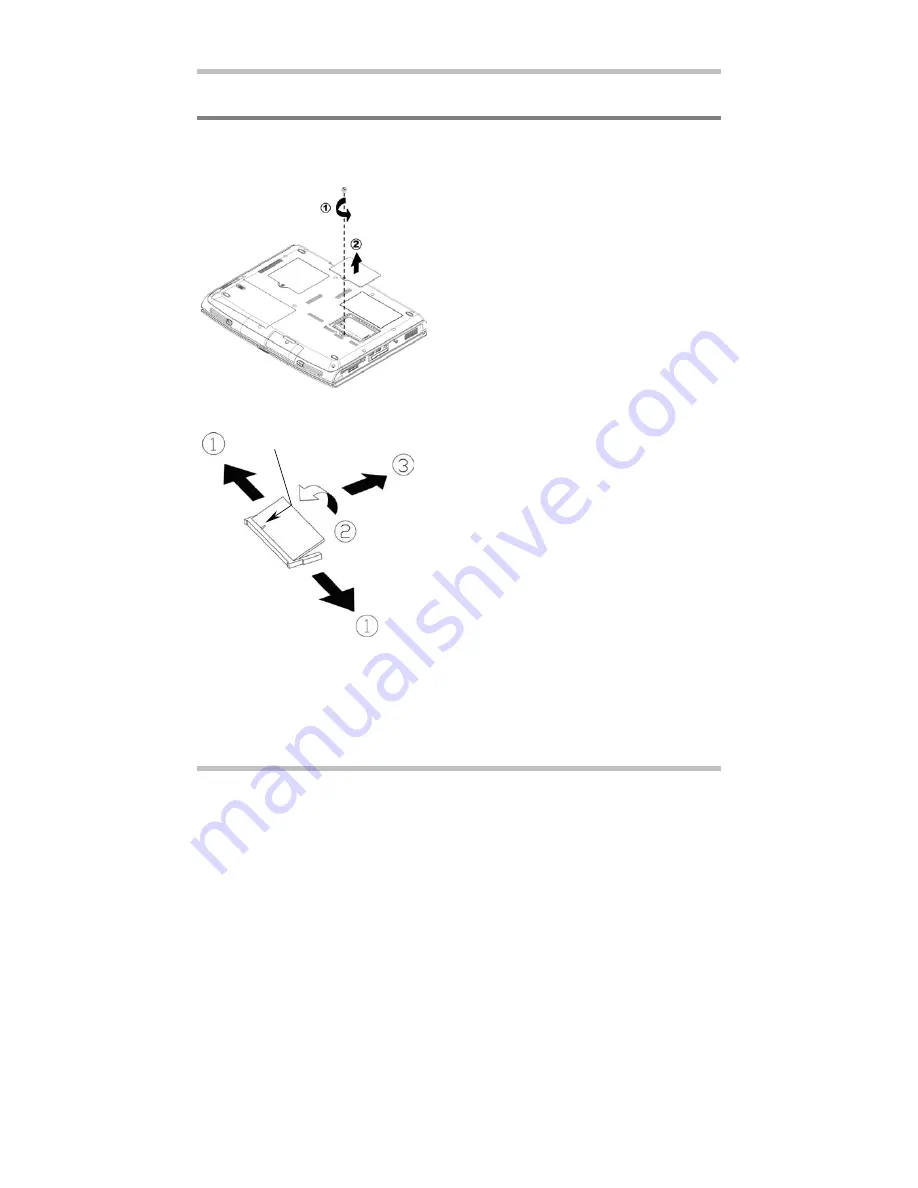
Below is the procedure on how to remove the memory module. 


To insert the memory module, reverse the steps above. 


• 

Make sure the system is properly 
shutdown. 

• 

Flip the system upside down. 

• 

Remove the screw as shown by 

#1

• 

Remove the compartment door as 
shown by 

#2


The Groove 


• 

Press the spring-locks sideways as 
shown by 

#1

• 

The memory module would pop up 
as shown by 

#2

• 

Remove the memory module as 
shown by 

#3

Summary of Contents for W730-K7

Page 1: ...Notebook PC User s Guide Model W730 P4 W730 K8 W730 K7 First Edition January 2004 ...

Page 2: ...ll be incorporated in future editions The manufacturer assumes no responsibility for errors or omissions in this document Windows XP is the trademark of Microsoft Corporation Intel is the trademark of Intel Corporation AMD is the trademark of AMD Corporation Other trademarks are properties of their respective owners NOTICE TRADEMARKS ...

Page 3: ... important information in this document The messages that appear on the Notebook screen will be boxed when they are referenced Whenever extra caution is called for the information will be boxed in a dark frame preceded by Note or Warning Usually after performing a step by step instruction you will be asked to Press the Esc key Which means you should press the key located at the upper left hand cor...

Page 4: ......

Page 5: ...APTER 2 BATTERY 2 1 2 1 BATTERY PACK 2 1 2 2 RECHARGING THE BATTERY PACK 2 1 2 3 QUESTIONS AND ANSWERS 2 2 2 4 BATTERY MAINTENANCE 2 3 2 5 POWER CONSUMPTION 2 3 2 6 REDUCING POWER CONSUMPTION 2 4 2 7 REMOVING THE BATTERY PACK 2 5 CHAPTER 3 MEMORY 3 1 3 1 REMOVING MEMORY MODULE 3 2 CHAPTER 4 MINI PCI MODULE 4 1 4 1 REMOVING MINI PCI MODULE 4 1 CHAPTER 5 THE HDD DRIVE 5 1 5 1 REMOVING THE HARD DISK ...

Page 6: ......

Page 7: ...ur computer 1 1 Checking What You Received Your notebook package should contain the following items Note You should keep the original factory carton and packing materials in case you need to ship the unit back for servicing The Notebook AC Adapter AC Power Cord CD Disc Including Drivers and User s Guide Battery Pack ...

Page 8: ...fore you start using your computer you need to get acquainted with your notebook s main features and interfaces Panoramic View Optical Drive Ventilation Grills Keyboard Touch Pad LCD Screen Speaker Speaker Cover Latch Five Status LEDs Seven System Buttons Two Power LEDs ...

Page 9: ...age 1 3 Front View Rear View Cover Latch Speaker DC In Microphone Headphone USB Ports RJ11 Fax Modem Connector RJ45 LAN Connector VGA Port S Video Connector Optional Kensington Lock Ventilation Grills Speaker HDD Drive Woofer Woofer ...

Page 10: ... View Right View Ventilation Grills IEEE1394 Connector Optional USB Ports PCMCIA Eject Handle PCMCIA Socket Door CF Card Socket Door CF Card Eject Handle 4 in 1 Socket Door for MMC MS SD CF Cards Optical Drive Eject Button Emergency Hole ODD LED ...

Page 11: ...udio Jet Mono Connector Your microphone jet should have this type of connector as shown here Stereo Connector Your headphone jet should have this type of connector as shown here Two Battery Latches Battery Pack Mini PCI Door DDR Memory Door HDD Door Ventilation Grills ...

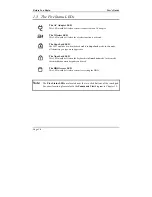
Page 12: ... lit when the keyboard is in Caps Lock mode In this mode all characters you type are in uppercase The Num Lock LED This LED would be lit when the keyboard is in Num Lock mode In this mode the embedded numeric keypads can be used The HDD Access LED This LED would be lit when system is accessing the HDD Note The Five Status LEDs are located near the two click buttons of the touch pad For exact locat...

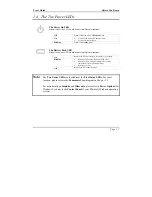
Page 13: ...ations On Battery pack is being recharged fast charge or pre charge Blinking Battery pack is consuming down to 10 level Battery pack is waiting for recharge when battery temperature is too high after discharge Battery pack error Off Battery pack is not under recharge Note The Two Power LEDs are located near the Five Status LEDs For exact location please refer to the Panoramic View diagram in Chapt...

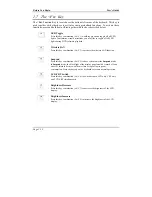
Page 14: ...on to activate the internet function Email Button Press this button to activate the email function Volume Up Button Press this button to increase volume CD Play Button Press this button to playback audio CD Volume Down Button Press this button to decease volume Note When the two system buttons Volume Up Button and Volume Down Button are pressed together the sound volume would be muted Note The Sev...

Page 15: ...o eject CF card A protruded handle is prone to external interference such as ramming by an inkjet printer or external keyboard When CF card is not inserted into the CF card socket make sure this socket is covered by the CF card socket door as supplied together with this notebook The purpose of this CF card socket door is to prevent foreign matters from entering into the system unit through this so...

Page 16: ...yback Wireless LAN Press this key combination Fn F2 to activate the wireless LAN function Suspend Press this key combination Fn F3 to have system enter the Suspend mode In Suspend mode the black light of the display panel would be turned off and a host of internal devices would enter into a stage of lower power consumption Press any keycap on the keyboard to resume normal operation LCD CRT Switch ...

Page 17: ... play back Stop This hot key is for audio CD disc playback Press this key combination Fn F10 to stop audio playback Previous Track This hot key is for audio CD disc playback Press this key combination Fn F11 to skip to the previous track Next Track This hot key is for audio CD disc playback Press this key combination Fn F12 to skip to the next track ...

Page 18: ......

Page 19: ...especially I O activities can affect the operation time greatly 2 2 Recharging the Battery Pack Your notebook supports both on line and off line recharge Follow the procedure below to recharge battery Make sure the battery pack is installed in the notebook Connect the AC adapter to the notebook and to an electrical outlet When a battery pack is being recharged its battery LED located near the Five...

Page 20: ...e AC Adapter Wait until it is cooled down Then plug in the AC Adapter to start recharging again Q I did not use my spare battery for a few days Even though it was fully recharged there wasn t as much power left as a newly charged one Why A The batteries will self discharge 1 per day for Li Ion when they are not being recharged To make sure a battery pack is fully charged recharge before use Always...

Page 21: ... 59 77 F Then insert the AC adapter to recharge the battery 2 5 Power Consumption The Windows XP the latest Windows operating systems has incorporated the latest state of the art ACPI Advanced Configuration Power Interface power management methodology In order to fully utilize the power of your battery pack it would be a good idea for you to spend sometime to acquire a basic understanding of the p...

Page 22: ...measures you can take to reduce the power consumption Use the AC power whenever possible Lower the intensity of the LCD backlight A very bright screen translates to higher power usage Try to use the HDD or the PCMCIA drive to read and write files instead of using the external USB FDD Note The battery pack should be locked in the battery compartment all the time ...

Page 23: ...ack while power is on make sure this battery pack is not the only electrical source to the system unit Follow the steps below to remove the battery pack To insert the battery pack reverse the steps above Make sure the system is properly shutdown Flip the system upside down Push the two battery latches to the unlock position as shown by 1 and 2 Enlarged Diagram Maintain the latch in the unlock posi...

Page 24: ......

Page 25: ...d Two types of DDR S O DIMM are available in the market PC2100 DDR266 and PC2700 DDR333 If it occurs that system is installed with both the PC2100 and PC2700 S O DIMM s the overall speed would be downgraded to DDR266 Total Memory In System Memory SODIMM Memory 256MB 256MB 0MB 384MB 256MB 128MB 512MB 256MB 256MB 768MB 256MB 512MB 512MB 512MB 0MB 640MB 512MB 128MB 768MB 512MB 256MB 1024MB 512MB 512M...

Page 26: ...the memory module reverse the steps above Make sure the system is properly shutdown Flip the system upside down Remove the screw as shown by 1 Remove the compartment door as shown by 2 The Groove Press the spring locks sideways as shown by 1 The memory module would pop up as shown by 2 Remove the memory module as shown by 3 ...

Page 27: ...ini PCI module reverse the steps above Make sure the system is properly shutdown Flip the system upside down Remove the screw as shown by 1 Remove the compartment door as shown by 2 The Groove Press the spring locks sideways as shown by 1 The Mini PCI module would pop up as shown by 2 Disconnect the two cables as shown by 3 Note there are two types of mini PCI module Externally they look slightly ...

Page 28: ......

Page 29: ...rd 2 5 9 5mm hard disk drive 5 1 Removing The Hard Disk Drive Below is the procedure on how to remove the hard disk drive To insert the hard disk drive reverse the steps above Make sure the system is properly shutdown Flip the system upside down Remove the screw as shown by 1 Remove the HDD drive as shown by 2 ...

Page 30: ......

Page 31: ...OT use liquid or sprayed detergent for cleaning Use a clean moistened cloth CAUTION The wall socket used should be positioned near the equipment and should be easily accessible CAUTION Please keep this equipment free from humidity CAUTION Place the equipment on a reliable surface at all times A drop or fall can cause severe damage WARNING The openings of the enclosure are for air ventilation and a...

Page 32: ... into any openings a fire or electrical shock is possible WARNING For safety reasons other than pre designated ports doors and the equipment should be opened only through qualified service personnel CAUTION If one of the following situations should arise the equipment should be checked by an authorized technician a The power cord or plug is damaged b Liquid has penetrated into the equipment c The ...

Page 33: ...nless the modem telephone line has been disconnected at the network interface CAUTION Use caution when installing or modifying modem telephone lines WARNING Avoid using a modem telephone other than a cordless type during an electrical storm There may be a remote risk of electric shock from lightning WARNING This computer contains an internal lithium battery powered real time circuit There is a ris...

Page 34: ... the outside of the CD ROM DVD ROM drive with the following wordings CLASS 1 LASER PRODUCT KLASSE 1 LASER PRODUKT WARNING Danger of explosion if battery is incorrectly replaced Replace only with the same or equivalent type recommended by the manufacturer Dispose of used batteries according to the manufacturer s instructions Explosionsgefahr bei unsachgemäßen Austausch der Batterie Ersatz nur durch...

Page 35: ...e ranging from 100V to 240V and is compatible with most international power sources If you are unsure whether your power source is compatible please contact the local dealer for assistance CAUTION To reduce the risk of fire use only No 26 AWG or larger telecommunication line cord CAUTION For Continued Protection Against Risk of Fire Replace Only with same Type and Rating of Fuse CAUTION If the com...

Page 36: ...easures Reorient or relocate the receiving antenna Increase the separation between the equipment and receiver Connect the equipment into an outlet on a circuit different from that to which the receiver is connected Consult the dealer or an experienced radio or television technician for help Modifications The FCC requires the user to be notified that any changes or modifications made to this device...

Page 37: ...es in hazardous locations is limited by the constraints posed by the safety directors of such environments The use of wireless devices on airplanes is governed by the Federal Aviation Administration FAA The use of wireless devices in hospitals is restricted to the limits set forth by each hospital Antenna use In order to comply with FCC RF exposure limits low gain integrated antennas should be loc...

Page 38: ...l objet d une licence il doit être utilizé à l intérieur et devrait être placé loin des fenêtres afin de fournir un écran de blindage maximal Si le matériel ou son antenne d émission est installé à l extérieur il doit faire l objet d une licence European Union Notice Product with the CE Marking comply with the EMC Directive 89 336 EEC and the Low Voltage Directive 73 23 EEC issued by the Commissio...

Page 39: ...ted in countries or regions other than those of designated use As a user of these products you are responsible for ensuring that the products are used only in the countries or regions for which they were intended and for verifying that they are configured with the correct selection of frequency and channel for the country or region of use And deviation from permissible settings and restrictions in...

Page 40: ...er operation of your equipment If they do you will be notified in advance to give you an opportunity to maintain uninterrupted telephone service The FCC prohibits this equipment to be connected to party lines or coin telephone service In the event that this equipment should fail to operate properly disconnect the equipment from the phone line to determine if it is causing the problem If the proble...

Page 41: ...quire that intended users of their network request permission to connect and for the installation of an appropriate socket The Ringer Equivalence Number REN of this modem is 1 REN is guide to the maximum number of apparatus that can simultaneously be connected to one telephone line The REN value of each apparatus is added together and should not exceed 4 Unless otherwise marked a telephone is assu...

Page 42: ......

Page 43: ...ture 20ºC to 60ºC Humidity 20 to 80 non condensing Shock 5G operating 60G non operating Vibration 3 200Hz 1 0G operating 3 200Hz 1 5G non operating Warning Don t expose your notebook to excessive heat or coldness frost Don t drop spill fluids or open the exterior of the case This can damage the notebook and void the warranty ...

Reviews: