background image

5

Notebook Security DEFCON

®

 CL UltraMax Combo Cable Lock

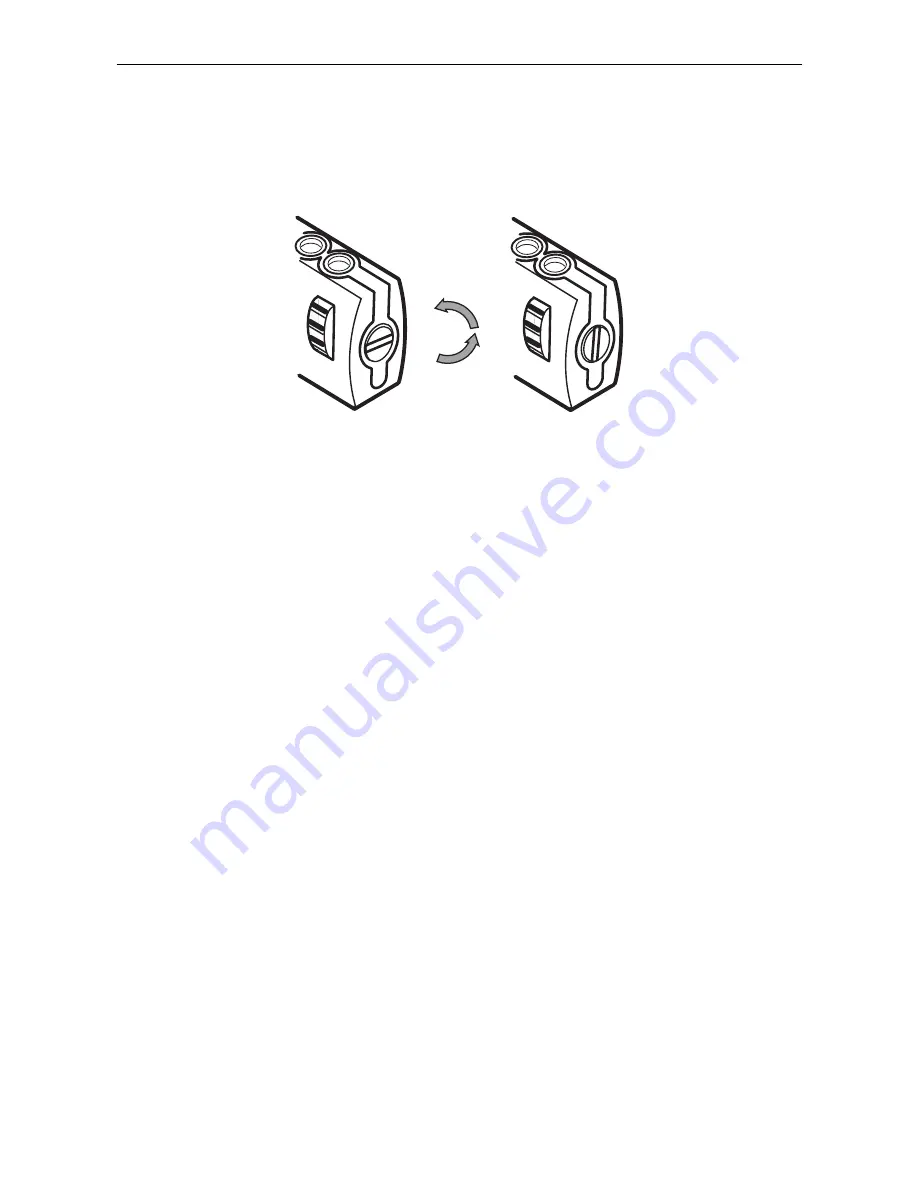
5 Rotate the reset screw 90 degrees counterclockwise,

back to its original vertical position to save the new
combination.

Locking the combination lock

6 Record the combination in either the space provided

at the end of this guide or another secure, easy-to-find
place.

Testing the Combination

Before attaching the lock to your notebook computer:

1  Turn the dials to disguise the combination.

2 Return to the combination you set.

3 Check that the locking button depresses completely.

Securing the UltraMax Cable

Lock

Select an object in the room to which you will secure your
notebook computer with the UltraMax Cable Lock.
Choose a lartge, heavy piece of furniture such as table or

Summary of Contents for DEFCON CL ULTRA MAX

Page 1: ... at www targus com Features and specifications subject to change without notice 2006 Targus Group International Inc and Targus Inc ASP02US 410 0009 001B USER GUIDE notebook security DEFCON CL ultra max combo cable lock ...

Page 2: ...Combination 5 Securing the UltraMax Cable Lock 5 Locking the UltraMax Cable Lock to your Notebook Computer 6 Using the SecureSpacers 8 Unlocking the UltraMax Cable Lock 9 Specifications 9 Technical Support 10 Product Registration 10 Warranty 10 Recording Your Combination 11 ...

Page 3: ...n periodically for increased security Protection is enhanced by the incorporation of a Technora coating for added toughness In addition to this user guide this package contains Notebook Security DEFCON CL UltraMax Combo Cable Lock SecureSpacers WARNING TO USE THE ULTRAMAX CABLE LOCK OR RESET THE COMBINATION YOU MUST SET THE LOCK TO THE CURRENT COMBINATION Setting the Combination 1 Locate the combi...

Page 4: ...time enter the preset combination 0000 The combination appears in the windows 3 Using a small flat head screwdriver or similar object push in and rotate the reset screw 90 degrees clockwise so that the crew s groove appears horizontal Unlocking the combination lock 4 Using the dials enter the new combination Locking button Combination dials Reset screw Combination windows ...

Page 5: ...he end of this guide or another secure easy to find place Testing the Combination Before attaching the lock to your notebook computer 1 Turn the dials to disguise the combination 2 Return to the combination you set 3 Check that the locking button depresses completely Securing the UltraMax Cable Lock Select an object in the room to which you will secure your notebook computer with the UltraMax Cabl...

Page 6: ...PART OF THE OBJECT THAT WILL DETER AN INTRUDER FROM SLIPPING THE CABLE OFF FOR EXAMPLE A TABLE OR DESK LEG WITH A CROSS BAR OR A DRAWER HANDLE 2 Feed the lock through the looped end of the cable as shown Securing the UltraMax Cable Lock to an object Locking the UltraMax Cable Lock to your Notebook Computer NOTE HOLD THE ULTRAMAX CABLE LOCK WITH BOTH HANDS FOR ADDITIONAL STABILITY WHILE INSERTING O...

Page 7: ...into your notebook computer s lock slot and release the locking button NOTE DUE TO THE VARIATION IN THE SIZE OF THE SECURITY SLOTS ON VARIOUS NOTEBOOK MODELS YOU MAY FIND THAT THERE IS SOME SLACK BETWEEN THE LOCK AND THE COMPUTER THE SLIPPED SECURESPACERS ARE THE BEST SOLUTION FOR OPTIMAL FIT AND SECURITY 4 Turn the dials to conceal your combination Due to differences in the size of the security s...

Page 8: ...the UltraMax Cable Lock away from the computer and check whether the gap is excessive 3 If so try each of the SecureSpacers to determine which one fits the gap The SecureSpacers come in three sizes 1 6mm 0 8mm and 0 4mm NOTE DO NOT REMOVE THE ADHESIVE STRIP FROM ANY OF THE SECURESPACERS UNTIL YOU DECIDE WHICH ONE TO USE 4 Once you know which SecureSpacer you are going to use remove the locking dev...

Page 9: ...ING THE COMBINATION TO DO SO WILL PHYSICALLY DAMAGE YOUR NOTEBOOK COMPUTER 1 Using the dials enter the correct combination 2 The combination appears in the windows 3 Press and hold the locking button to realign the locking teeth 4 Remove the UltraMax Cable Lock from your notebook computer s lock slot Specifications General Weight 9 ounces 255g Locking device Dimensions 1 2 x 1 17 x 0 81inches 31 x...

Page 10: ...n materials and workmanship for one year If your Targus accessory is found to be defective within that time we will promptly repair or replace it This warranty does not cover accidental damage wear and tear or consequential or incidental loss Under no conditions is Targus liable for loss of a damage to a computer nor loss of or damage to programs records or data nor any consequential or incidental...

Page 11: ...cord your combination in the space provided When recording the combination read from top to bottom using the number closest to the locking button as the starting point Targus assumes no responsibility for lost misplaced or forgotten combinations Locking Top combination button window window Bottom combination ...

Reviews: