background image


TASCAM CD-500/500B


19

Use the unit’s menu system to make various settings. 

Among the menu setting items are some that can also be 

set using dedicated buttons on the remote control.

Menu structure

The menu structure of the unit includes the following 

items.

Menu 

number

Item

Function set 

Reference

01

Origin

Original key 

Page 27

02

EJECT

Eject block 

Page 21

03

A-CUE

Auto-cue level 

Page 24

04

Prog

Program 

Page 27

05

FADE

Fade in/out playback 

Page 29

06

RELAY

Relay playback 

Page 30

07

P onPL

Power on play 

Page 26

08

Mono

Mono output

Page 32

09

RESUM

Resume 

Page 24

10

EOM

EOM (TRACK EOM) time 
display

Page 31

11

Inc-P

Incremental play 

Page 25

12

P-STEP

Pitch control steps

Page 27

13

232C

Baud rate 

Page 33

14

S-BAC

Skip back

Page 29

15

IR

Remote control reception

Page 17

16

INTVAL

Silent interval between 
tracks

Page 31

17

FRAM

Frame time display

Page 31

18

REMOT

Foot switch mode 

Page 32

19

FLASH

Flash start

Page 29

20

RESET

Restore unit to factory 
defaults 

Page 33

21

INFO

View the firmware version 

Page 33

22

U-DATA

User data settings (AES/
EBU, CD-500B only)

Page 34

23

PARALL

Set the parallel function 
(CD-500B only)

Page 34

Menu operation basics

The basic procedures for making settings using the menu 

system are as follows.

1  When the display shows the usual playback 

information, activate the menu mode in which you 

can select menu items by using the unit’s front 

panel buttons or the included TASCAM RC-500 

remote control. 

When using the front panel buttons:

• 

 In shift mode 

(when the 

SHIFT

 indicator is lit), press the 

PITCH 

[MENU]

 knob. 

When using the remote control:

• 

 Press the 

MENU


button. 

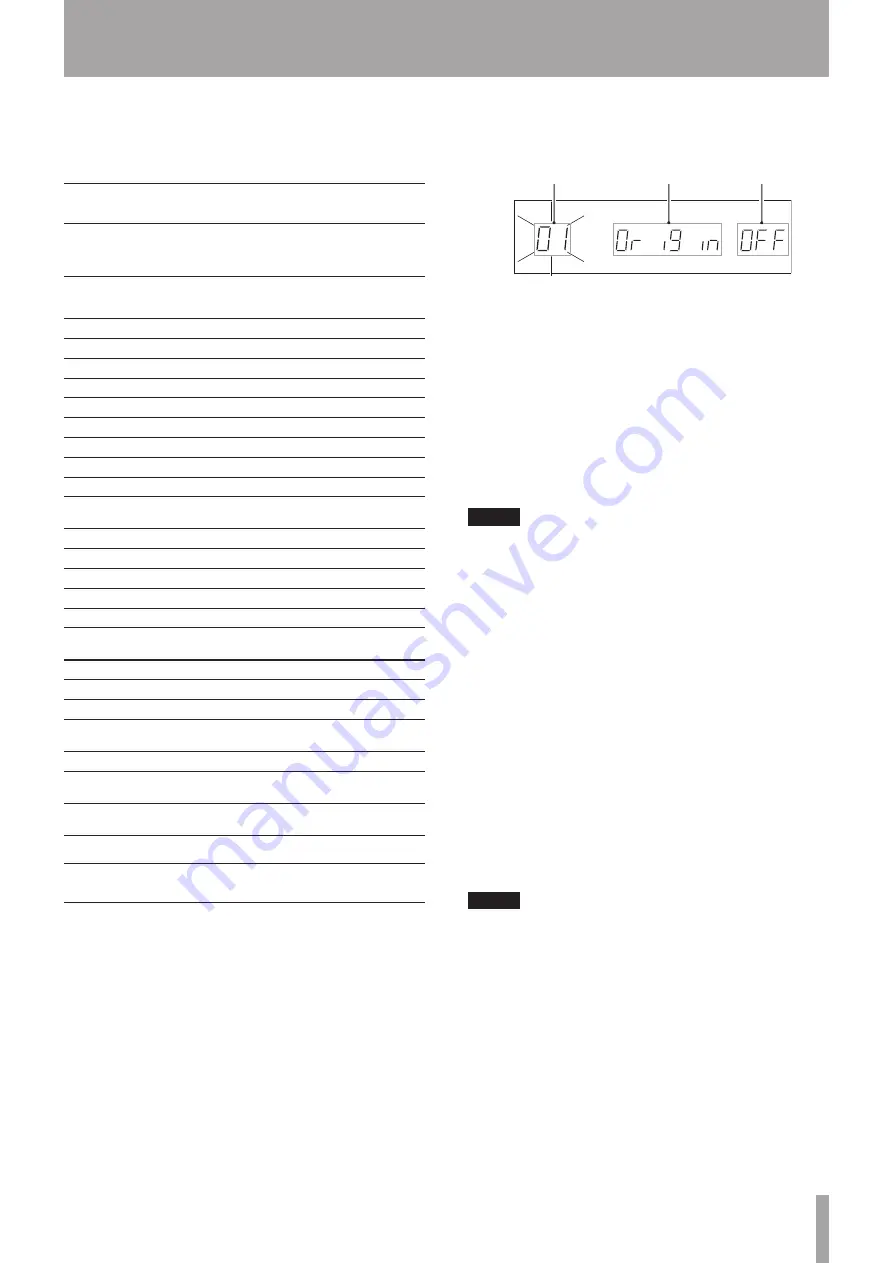
The center area of the display shows the menu item 

selected. The menu item that was selected the last 

time that the unit was in menu mode appears. 

Menu item number Menu item name

Setting

2  Use the unit’s front panel buttons or the remote 

control to conduct the following operation to select 

the desired menu item. 

When using the front panel buttons:

• 

 Turn the 

PITCH [MENU]

 knob or use the number buttons to 

select the menu item, and press the 

PITCH [MENU]


knob to confirm. 

When using the remote control:

• 

 Use the 

PREV


and 

NEXT

 buttons, as well as the number buttons to 

select the menu item, and press the 

ENTER

 button 

to confirm. 

NOTE

The menu item number blinks before it has been 

• 

confirmed. 
When using the number buttons input two digits 

• 

to select menu items. For example, to select menu 

number 

06

, press the 

0

 button followed by the 

6


button.


The following step (3) applies to all items except 

04 

PROG

19 FLASH

20 RESET

 and 

21 INFO

. See 

their explanations for instructions about how to use 

these items. 

3  Select the desired value. 

When using the front panel buttons:

• 

 Turn the 

PITCH [MENU]

 knob to select the value and press 

the 

PITCH [MENU]

 knob to confirm the setting. 

When using the remote control:

• 

 Use the 

PREV


and 

NEXT

 buttons to select the value and press the 

ENTER

 button to confirm the setting. 

NOTE

When a value different from the active setting is 

• 

selected, the value blinks. After the new setting is 

confirmed, menu mode ends and the display shows 

the usual playback information again.
To quit menu mode without changing a setting, press 

• 

the 

SHIFT

 button or 

DISPLAY [LOCK]

 button on the 

front panel of the unit, or press the 

MENU

 button on 

the remote control.

4 –  Menu

Summary of Contents for CD-500

Page 1: ...D01136920A CD 500 500B CD Player OWNER S MANUAL...

Page 2: ...cart stand tripod bracket or table specified by the manufacturer or sold with the apparatus When a cart is used use caution when moving the cart apparatus combination to avoid injury from tip over 13...

Page 3: ...an health because of the presence of hazardous substances in the equipment d The Waste Electrical and Electronic Equipment WEEE symbol which shows a wheeled bin that has been crossed out indicates tha...

Page 4: ...mmediately If the fluid gets on a person s body or clothing it could cause skin injuries or burns If this should happen wash it off with clean water and then consult a doctor immediately The unit powe...

Page 5: ...22 Using the jog function to search 22 Playback modes 23 Selecting the playback mode 23 6 Various Playback Functions 24 Auto cue function 24 Setting the auto cue level 24 Auto ready function 24 Resum...

Page 6: ...9 Error Messages 36 10 Specifications 37 Media and formats 37 Analog audio output 37 Digital audio output 37 Control input and output 37 Audio performance 37 Backup memory 37 General 38 Dimensional d...

Page 7: ...ayback of a track from the moment sound starts Transport and pitch can be controlled using a TASCAM RC 3F footswitch sold separately Flash start function enables playback without delay tracks 1 20 or...

Page 8: ...of data Trademarks TASCAM is a trademark of TEAC Corporation registered in the U S and other countries MPEG Layer 3 audio coding technology licensed from Fraunhofer IIS and Thomson Other company names...

Page 9: ...tatic solutions benzene paint thinner or other chemical agents to clean CDs as they could damage the delicate playing surface It may cause CDs to become unplayable Do not apply labels or other materia...

Page 10: ...ded however use these to make directory selections instead Set the auto cue function to determine what happens after selection See Skipping to the next or previous track on page 21 In program setting...

Page 11: ...to activate the intro check mode When this mode is activated press the play REPEAT button to play the first 10 seconds of each track in succession See Intro check mode on page 26 NOTE Even when shift...

Page 12: ...kHz When using the pitch control function while playing an audio CD or another disc with MP3 or WAV files the digital output is at a fixed sampling frequency of 44 1 kHz d ANALOG OUT UNBALANCED jacks...

Page 13: ...ayback mode PGMappears Random playback mode RANDOMappears 8 Repeat mode indicators The repeat mode is shown See Repeat playback on page 25 and A B repeat playback on page 25 Repeat mode REPEATappears...

Page 14: ...elect songs Input two digits for audio CDs and three digits for data CDs See Designating track numbers on page 22 9 SKIP buttons Use these buttons for track selection skipping Set the auto cue functio...

Page 15: ...or when paused press the button to search backward and press the button to search forward See Using the SEARCH buttons on page 22 When in program setting mode use these to select the program number S...

Page 16: ...nes Foot switch TASCAM RC 3F sold separately External controller CD 500B only Connecting a foot switch Connect a TASCAM RC 3F foot switch sold separately to the REMOTE connector to enable it to contro...

Page 17: ...me unresponsive Precautions about using batteries Misuse of batteries could cause them to leak rupture or otherwise be damaged Please read and abide by the precautions on the battery labels when using...

Page 18: ...buttons and the remote control are disabled LOCKEDwill appear on the display if you push any of the buttons NOTE Even when the panel lock function is enabled the unit can be controlled by a TASCAM RC...

Page 19: ...the PITCH MENU knob When using the remote control Press the MENU button The center area of the display shows the menu item selected The menu item that was selected the last time that the unit was in...

Page 20: ...le extension to recognize WAV files Always add the wav extension to WAV file names The player cannot play back WAV files that do not have the wav extension In addition to having the wav extension the...

Page 21: ...t playback from being interrupted accidentally by the pressing one of these buttons To turn the eject block function on set the 02 EJECT menu item to BL NOTE The eject block function on off setting is...

Page 22: ...n tracks Data CD directories are folders that contain MP3 and WAV files tracks In other words they are units that are larger than tracks Use the following procedures to select indexes and directories...

Page 23: ...ode indication area at the top of the display Tracks are played back in the order programed in advance See Program playback on page 27 Random playback mode RANDOMappears in the playback mode indicatio...

Page 24: ...auto cue function on off setting is retained even when the power is turned off Setting the auto cue level To set the auto cue function trigger level auto cue level use the 03 A CUEmenu item Options 2...

Page 25: ...the display NOTE The incremental play function on off setting is retained even when the power is turned off Repeat playback You can repeatedly play back all tracks or repeatedly play back a specified...

Page 26: ...on to enable intro check mode INT appears on the right side of the display M S F Appears NOTE If you press the INTRO CHECK button on the remote control during playback INTappears on the right side of...

Page 27: ...back mode on page 23 Program setting mode Use the following procedures to enter program setting mode and add tracks to the empty program NOTE You can add tracks to the program regardless of the curren...

Page 28: ...to change 2 Use the number buttons or SKIP buttons to select the desired track 3 Press the SEARCH button to confirm the change Inserting tracks into the program Using the front panel buttons 1 Turn t...

Page 29: ...e player or the MENU button on the remote to exit menu mode The fade in out function settings are retained even when the power is turned off Skip back playback During playback you can skip back by a p...

Page 30: ...responding number button Press the CLEAR 1 10 11 20 button again to return to FLASH 1 10 Exiting flash start mode Using the front panel buttons When in shift mode SHIFT indicator lit press the 1 FLASH...

Page 31: ...use the 17 FRAMmenu item default value ON NOTE The frame time display on off setting is retained even when the power is turned off End of track warning EOM During audio CD playback a warning indicatio...

Page 32: ...18 REMOTsetting Foot switch mode settings The functions of the controls in each mode are as follows MODE Footswitch controls L brief press C brief press R brief press L long press C long press R long...

Page 33: ...tings You can restore the unit to factory default settings that are stored in the backup memory The following default settings are stored in the backup memory Playback mode Playback time display mode...

Page 34: ...PLAY Tally OUT 10 PAUSE Tally FLASHLOADTally OUT 11 FADER START STOP Track Play 3 IN 12 STOP STOP FLASH LOAD IN 13 PLAY Track Play 4 IN 14 PAUSE Track Play 5 IN 15 5V IN active low external command re...

Page 35: ...Make sure that the panel lock function is not on Unit cannot be controlled with the remote control Confirm that batteries are in the remote control and that they have a charge No sound Confirm the uni...

Page 36: ...you are still unable to resolve the problem please contact TASCAM customer support Message Meaning Response Err01 TOC Read Error Clean or change the disc Err09 Flash ROM Error If one of these errors a...

Page 37: ...umers S PDIF Output impedance 75 Output level 0 5 Vp p Digital out connector AES EBU CD 500B only Connector XLR 3 32 1 GND 2 HOT 3 COLD Supported signal format IEC60958 4 AES EBU Output impedance 110...

Page 38: ...500 3 7 kg CD 500B Operating temperature range 5 40 C Installation tilt Within 30 Dimensional drawings 434 2 mm 482 6 mm 44 mm 1 mm 31 8 mm 280 mm 14 5 mm 6 mm 465 mm 432 6 mm 41 1 mm Illustrations i...

Page 39: ...TASCAM CD 500 500B 39 Notes...

Page 40: ...e Street Mississauga Ontario L4Z 1Z8 Canada TEAC MEXICO S A de C V http www teacmexico net Phone 52 55 5010 6000 R o Churubusco 364 Colonia Del Carmen Delegaci n Coyoac n CP 04100 M xico DF M xico TEA...

Reviews: