80
TASCAM DP-008EX
12 – Exchanging Data with a Computer
Exporting tracks
You can export the tracks that you want as 16-bit,
44.1kHz mono and stereo WAV files.
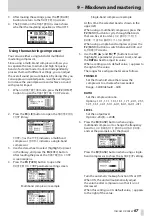
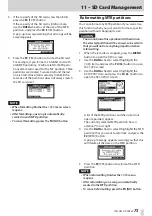
1. When the recorder is stopped, press the MENU
button to open the
MENU
screen.
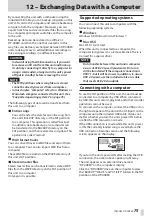
2. Use the DATA wheel to select (highlight) the
IMPORT/EXPORT
item, and press the F4 [
t
]
button to open the
IMPORT/EXPORT
screen.
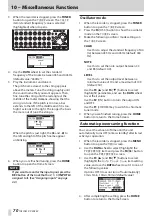
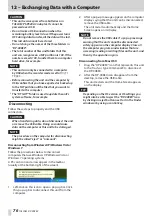
3. Use the DATA wheel to select (highlight) the
EXPORT TRACK
item, and press the F4 [
t
]
button to open the
EXPORT TRACK
screen.
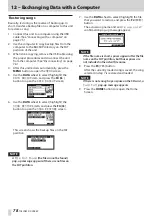
On this screen, song tracks that have audio files
are shown in a list.
You can tell the original track number by the file
name.
TIP
Press the
F3
[NAME] button to open the
NAME
EDIT
screen where you can edit the file name. (See
NOTE
Song tracks that do not have audio files are not
shown in the file list.
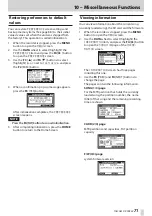
4. Use the DATA wheel to select (highlight) a track
to export, and press the F4 [
✔
] button to put a
✔
in its checkbox.
By putting
✔
marks in multiple checkboxes, you
can export multiple tracks at the same time.
NOTE
To remove a
✔
from a checkbox select (highlight)
that track and press the
F4
[
✔
] button.
5. When you finish selecting (putting a
✔
next to)
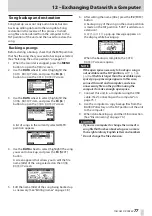
the tracks that you want to export, press the F2
[NEXT] button.
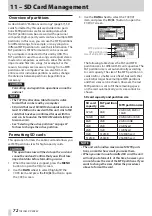
The amount of open space on the FAT partition
(which is the destination for the exported tracks)
and the total number of tracks to be exported is
shown.
TIP
In step 4 above, after selecting (highlighting) a
track (but before adding any
✔
marks), if you press
the
F2
[NEXT] button the selected track alone will
be exported.
6. Press the F4 [EXEC] button.
The selected tracks are exported to the FAT
partition with the edited file name with the “.WAV”
extension added as the track file name.
If you have previously exported a track file with
the same name (title), a
Duplicate name Are
you sure?
(A file with the same name already
exists. Are you sure that you want to overwrite
it?) confirmation pop-up message appears.
Press the F3 [YES] button to overwrite the old file.
Press the F4 [NO] button to cancel the export and
return to the file list screen.
7. Press the HOME button to reopen the Home
Screen.
8. Connect this unit to a computer. (See “Connecting
9. Use the computer to copy track files from the
WAVE folder on the FAT partition to the computer.


