background image

TASCAM LR-10  

59

CANCEL

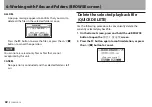
No operation is conducted on the selected file and the 
pop-up menu closes.

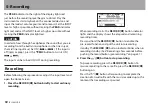
Folder operations

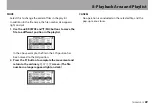
Select the desired folder on the 

BROWSE

 screen, and press the 

Á

 button to open the following pop-up menu.

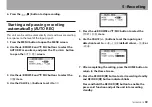
Use the 

§

/

BROWSE and 

/MIC buttons to select the desired 

item, and press the 

Á

 button to execute one of the following 

operations.

SELECT

Return to the Home Screen and select the first file in 
the folder. This folder becomes the new playback area 
regardless of the previous playback area setting.

When recording, files are created in the folder selected 
using this operation.

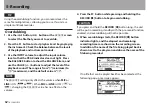
CREATE

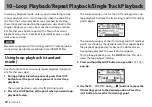
A pop-up appears to confirm that you want to create a 
new folder.

Press the 

Á

 button to create a new folder, or press the 


[

ª

] button to cancel the operation.

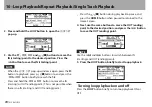
However, if you try to create a new folder inside a second 
level subfolder the 

Layer too Deep

 message appears 

and the folder is not made.

6–Working with Files and Folders (BROWSE screen)

Summary of Contents for LR-10

Page 1: ...LR 10 Instrumental Trainer Recorder D01128520B OWNER S MANUAL This device has a serial number located on the bottom panel Please record it and retain it for your records Serial number __________________ ...

Page 2: ...ction manual may cause harmful interference to radio communications However there is no guarantee that interference will not occur in a particular installation If this equipment does cause harmful interference to radio or television reception which can be determined by turning the equipment off and on the user is encouraged to try to correct the interference by one or more of the following measure...

Page 3: ...this apparatus during lightning storms or when unused for long periods of time 14 Refer all servicing to qualified service personnel Servicing is required when the apparatus has been damaged in any way such as power supply cord or plug is damaged liquid has been spilled or objects have fallen into the apparatus the apparatus has been exposed to rain or moisture does not operate normally or has bee...

Page 4: ... fluid gets in an eye it could cause loss of eyesight If fluid does enter an eye wash it out thoroughly with clean water without rubbing the eye and then consult a doctor immediately If the fluid gets on a person s body or clothing it could cause skin injuries or burns If this should happen wash it off with clean water and then consult a doctor immediately The unit power should be off when you ins...

Page 5: ...n have serious effects on the environment and human health as a result of the presence of hazardous substances in batteries and or accumulators d The crossed out wheeled dust bin symbol indicates that batteries and or accumulators must be collected and disposed of separately from household waste Pb Hg Cd If the battery or accumulator contains more than the specified values of lead Pb mercury Hg an...

Page 6: ... 19 Included items 20 About this manual 20 Intellectual property rights 21 About SD cards 22 Precautions for use 22 Precautions for placement and use 23 Beware of condensation 23 Cleaning the unit 23 2 Names and Functions of Parts 24 Top panel 24 Left side panel 30 Right side panel 30 Rear panel 31 Front panel 31 Bottom panel 32 Home Screen 33 Recording screen 35 Menu structure 36 Using the menu 3...

Page 7: ...ementation 54 Manual track incrementation during recording 54 Automatic track incrementation by file size 55 Dividing files DIVIDE 55 Recording duration 56 6 Working with Files and Folders BROWSE screen 57 BROWSE screen navigation 57 Icons on the BROWSE screen 57 File operations 58 Folder operations 59 Delete the selected playback file QUICK DELETE 60 7 Playback 61 Playback 61 Stopping playback 61...

Page 8: ...the effect 78 Reverb List 79 13 Using the tuner 80 Preparation 80 Chromatic tuner mode AUTO 81 Oscillator mode 81 14 Using the Metronome 82 Setting the metronome 82 Starting and stopping the metronome 82 15 System settings 83 System settings SETUP 83 Setting the forward backward search speed 83 Setting the automatic power off time 83 Adjusting the display contrast 83 Setting the battery type 83 Re...

Page 9: ... Input ratings 97 Analog audio input 97 Output ratings 97 Analog output ratings 97 Control input output ratings 97 Audio performance 98 Computer compatibility 98 Other specifications 98 Dimensional drawings 99 Table of Contents ...

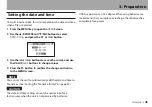
Page 10: ...it Formatting is necessary if you insert a new SD card Formatting will erase all the data on the card For details see Inserting and removing SD cards on page 39 Preparing the power ª ª Using AA batteries Insert AA batteries into the battery compartment which you opened when installing the SD card This unit can use either alkaline or nickel metal hydride Ni MH batteries It cannot recharge batteries...

Page 11: ...orage to the computer Select BUS POWER Using an AC adaptor sold separately Connect a TASCAM PS P520 AC adaptor sold separately which is designed for the specifications of this unit to the DC IN 5V jack DC plug AC outlet PS P520 TACAM sold separately Turn the power on ª ª Press and hold the ª button until the startup screen opens For details about power preparations see Powering the unit on page 42...

Page 12: ...computer software applications Be sure to use file formats that this unit can play back These formats include MP3 32 320 kbps 44 1 kHz and WAV 44 1 kHz 16 24 bit Connect the computer ª ª Use the included USB cable to connect the unit to the computer Transfer files from the computer ª ª Copy audio files to the MUSIC folder on the LR 10 drive that appears on the computer Disconnect from the computer...

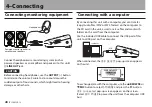
Page 13: ... If the line input is OFF press the MIC button to turn it ON Connect headphones or speakers ª ª Connect headphones or a monitoring system such as powered speakers or an amplifier and speakers to this unit s LINE OUT jack For details see Connecting monitoring equipment on page 46 CAUTION Before connecting headphones use the OUTPUT button to minimize the volume Failure to do so could cause the sudde...

Page 14: ...Press and hold the EFFECT button to open the EFFECTscreen where you can make detailed settings For details see Chapter 12 Using the built in effects on page 78 Step 7 Adjust the input and output levels Adjust the headphones volume ª ª Use the OUTPUT buttons to adjust the headphones volume When adjusting the volume the current level appears in a pop up at the bottom of the display For details see A...

Page 15: ...music This unit will output the sound input through the mic or the LINE IN jack even when recording is not enabled This allows you to select a song and play along after pressing the Á button This unit also has the following functions which you can use as you like to make practicing your instrument even easier Use repeat playback ª ª You can use two types of repeat playback You can either play a lo...

Page 16: ... the Á or button Use the VALUE buttons to select 1REPEATor ALLREPEAT After making the setting press the HOME button to return to the Home Screen For details about repeat playback see Repeat and single track playback on page 75 Change the key ª ª You can change the playback pitch key in semitones Press the KEY button to show the key setting at the bottom of the display Use the VALUE buttons to chan...

Page 17: ...t recording capturing sound up to 2 seconds before pressing the button Press the ª button to stop recording For details see Recording on page 50 Step 10 Record over a song overdub You can also record your performance together with the music that is playing back Use the  and buttons to select the song Press the Á button while pressing and holding the RECORD button to begin overdubbing Press the ª ...

Page 18: ...which you can use as you like One such function is the metronome which can be accessed easily by pressing the METRONOME button For details see chapter 14 Using the Metronome on page 82 Step 12 Turn off the power To turn the power off put the unit in standby press the ª button and hold it until the shutdown screen appears Quick Start Guide ...

Page 19: ... files possible Metronome functions Built in effects can be applied to the input signal and the playback signal Tuner functions Auto recording function can detect the sound input level to start recording automatically Recording continues automatically in a new file without pause when the maximum file size is reached during recording Track incrementation function allows the creation of a new file w...

Page 20: ...eparately Files saved on a computer can be transferred copied to the SD card in this unit via USB Included items The included items are listed below Take care when opening the package not to damage the items Keep the package materials for transportation in the future Please contact the store where you purchased this unit if any of these items are missing or have been damaged during transportation ...

Page 21: ...egistered trademarks or trademarks of Microsoft Corporation in the United States and or other countries Apple Macintosh iMac Mac OS and Mac OS X are trade marks of Apple Inc Other company names product names and logos in this document are the trademarks or registered trademarks of their respective owners Any data including but not limited to information described herein are intended only as illust...

Page 22: ...ation be responsible for the consequences of any illegal copying performed using the recorder About SD cards This unit uses SD cards for recording and playback You can use 64 MB 2 GB SD cards and 4 GB 32 GB SDHC cards with this unit A list of SD cards that have been tested with this unit can be found on the TASCAM web site www tascam com Use of cards that have not been verified for use with this u...

Page 23: ...oid installing this unit on top of any heat generating electrical device such as a power amplifier Beware of condensation If the unit is moved from a cold to a warm place or used after a sudden temperature change there is a danger of condensation vapor in the air could condense on the internal mechanism making correct operation impossible To prevent this or if this occurs let the unit sit for one ...

Page 24: ... this moves the cursor up on the screen When the Home Screen is open press and hold this button to open the QUICK DELETEpop up menu MIC button DOWN MIC INPUT When the Home Screen is open press this button to turn input from the built in microphone or LINE IN jack ON OFF When one of the setting screens is open this moves the cursor down on the screen  button PREVIOUS During playback or when stoppe...

Page 25: ...ginning of the current file is reached searching stops there 5 button F FWD Press this button to search forward Press briefly to search forward to the end of the current file Each time you press this button the search speed increases Press and hold to search forward continuously for as long as the button is pressed When the end of the current file is reached searching stops there 6 ª button POWER ...

Page 26: ... recording standby When in recording standby the indicator blinks Press and hold when stopped to enable prerecording 2 seconds maximum and start recording standby When in recording standby the indicator blinks Press during recording standby to start recording When recording the indicator lights Press the Á button while pressing and holding this button to start overdubbing See Recording the input s...

Page 27: ... each time e SPEED button Press to change the playback speed Use the VALUE buttons to increase decrease the playback speed For details see Changing the speed on page 70 r KEY button Press to change the pitch of the playback Press to cycle between the two modes Use the VALUE buttons to increase decrease the pitch Adjust the pitch in semitones using the KEYmode Adjust the pitch in cents using the FI...

Page 28: ...ome Screen is open press this button to open the MENUscreen The cursor starts on the last used item Press this button when one of the setting screens is open to return to the MENUscreen Press this button when the MENUscreen is open to return to the Home Screen For details see Using the menu on page 37 i BALANCE button Press to change the volume level of the playback sound and balance playback and ...

Page 29: ...yback Press briefly again to turn the loop playback function OFF When the playback area is set to playlist press this button briefly to show the currently selected loop number If the loop range has been set the and icons will appear under the playback position bar Use the VALUE buttons to change the selected loop number LOOP 1 LOOP 5 When the playback area is set to playlist press and hold this bu...

Page 30: ...TE jack Connect a TASCAM RC 3F foot switch sold separately which is designed for use with this unit to this 2 5 mm TRS jack Right side panel d LINE OUT jack Connect headphones here or connect a stereo mini jack cable from here to the line input jack of another audio device f INPUT volume Use to adjust the input level of the built in microphones or LINE IN jack signal g LINE IN jack Use this stereo...

Page 31: ...el j Built in stereo microphone L R This is an electret condenser stereo microphone To use this microphone as the input source set INPUTto MICon the INPUT SETTINGscreen k Built in mono speaker Use this built in speaker for monitoring This speaker is disabled when headphones are connected when recording and when in recording standby 2 Names and Functions of Parts ...

Page 32: ...ottom panel l Battery compartment cover Battery compartment Install batteries 2 AA in this compartment to power the unit See Using AA batteries on page 42 z SD card slot Use to insert and remove SD cards See Inserting and removing SD cards on page 39 ...

Page 33: ...epeat playback of all songs Loop playback 3 Key adjustment status This shows whether key adjustment is ON or OFF Key adjustment OFF Key adjustment ON 4 Effect ON OFF status This shows whether the effects are ON or OFF Built in effects OFF Built in effects ON 5 MIC LINE input ON OFF status These icons show whether the built in mic and LINE IN jack inputs are ON or OFF Built in microphones OFF Built...

Page 34: ...k position This bar shows the current playback position As playback proceeds the darkened bar extends from the left 9 Playback interval This shows the loop playback IN point starting point and OUT point ending point settings When a starting point is set the icon appears at the corresponding position beneath the playback position bar When an ending point is set the icon appears at the corresponding...

Page 35: ...el becomes too high an indicator appears briefly at the right end of the meter When MIC or LINE input is OFF or OFF appears here Recording screen When recording or when in recording standby the screen appears as follows 1 Playback speed status Depending on the playback speed setting the icon appears as follows The recording speed however cannot be changed Normal playback speed 110 150 speed 50 90 ...

Page 36: ...ilable hours minutes seconds on the current SD card 9 Level meter When MIC or LINE is ON or this shows the volume level of the input signals When MIC or LINE is OFF or OFFappears here Menu structure Press the MENU button to open the MENUscreen The menu contains the following items Menu item Function Pages INFORMATION View information about files the SD card and the system See on page 88 PLAYLIST E...

Page 37: ... or button to open that setting screen 3 Use the BROWSE and MIC buttons to select the desired setting item When selected the becomes and the setting value appears as light letters on a dark background 4 Use the VALUE buttons to change the setting 5 Repeat steps 3 and 4 as necessary for the other items 6 Press the MENU button to return to the MENUscreen Press the HOME button to return to the Home S...

Page 38: ...to move the cursor change the highlighted item right on a setting screen and to open a folder on the BROWSEscreen  button Use this button to move the cursor change the highlighted item left on a setting screen and to close the open folder on the BROWSEscreen VALUE buttons Use to change value of the selected item RECORD º button On the DIVIDEscreen use to execute the division of a file Á button Us...

Page 39: ...rd as is for recording and playback There is no need to reinsert it 1 Remove the battery compartment cover If there are batteries in the compartment confirm that the unit power is OFF and then remove them 2 Insert the SD card into the SD card slot in the back of the battery compartment in the direction shown in the illustration until it clicks into the place 3 Insert the card and close the cover I...

Page 40: ...se an SD card with this unit you must format it by using this unit first 1 Confirm that an SD card is inserted and press and hold the ª button on the top panel of the unit to turn the power ON 2 If a new card or a card that was formatted by a different device has been inserted in the unit the following pop up message appears 3 Press the Á button to start formatting Remove the SD card if you do not...

Page 41: ...evice however are compatible with this model If the system file or another important file has been accidentally erased from the SD card when accessing it from a computer the following pop up screen appears In this case press the Á button to format the card again Card write protection SD cards have write protection switches that prevent new data from being written to them Unprotected Protected If y...

Page 42: ...er to allow the unit to accurately show the amount of power remaining and determine whether enough power is available for proper operation See Setting the battery type on page 83 CAUTION Manganese batteries cannot be used with this unit This unit cannot recharge Ni MH batteries Use a commer cially available recharger The included alkaline batteries are provided for confirming the operation of the ...

Page 43: ... bus even if batteries are also in the unit Using an AC adaptor sold separately Connect a TASCAM PS P520 AC adaptor sold separately which is designed for the power requirements of this unit to the DC IN 5V jack as shown in the illustration DC plug AC outlet PS P520 TACAM sold separately CAUTION Never use any adaptor other than the TASCAM PS P520 AC adaptor sold separately because it is designed fo...

Page 44: ... it into standby Failure to follow these precautions could cause noise which might damage speakers or harm your hearing Turning the power on When the unit is in standby mode press and hold the ª button until the TASCAM LR 10startup screen opens The Home Screen opens after the unit completes startup Startup Screen Home Screen Setting the power to standby When the power is ON press and hold the ª bu...

Page 45: ...se the VALUE buttons to change values 4 Press the Á button to confirm the change and return to the MENU screen NOTE You can set the unit to automatically add the date and time to file names See Setting the file name format on page 85 CAUTION The date and time setting can only be maintained for a few minutes when the unit is not powered by batteries USB bus power or an AC adaptor When using batteri...

Page 46: ... other harm Connecting with a computer By connecting this unit with a computer you can transfer copy audio files WAV or MP3 format on the computer to the SD card in the unit as well as erase files and work with folders on the card from the computer Use the included USB cable to connect the USB port of this unit to a USB port on the computer USB computer When connected the USB SELECTpop up screen a...

Page 47: ...correct procedures for dismounting an external drive Connecting an instrument In addition to the built in microphone this unit has a line in jack stereo mini jack on its right side panel to which you can connect the outputs of keyboards and other instruments as well as audio devices Keyboard NOTE You can apply the built in effects to sound input by the connected instrument and play along to a song...

Page 48: ...the MENU button to open the MENUScreen 2 Use the BROWSE and MIC buttons to select INPUT SETTING and press the Á or button to open the INPUT SETTINGscreen This screen has the following setting items Use the BROWSE and MIC buttons to select the desired item When selected the becomes and the setting value appears as light letters on a dark background Use the VALUE buttons to change the setting value ...

Page 49: ...it to LMTto have the LR 10 automatically limit the input gain so that input level of loud sounds is reduced to prevent distortion The factory default setting is OFF 3 Press the HOME button to return to the Home Screen NOTE Try using one of the low cut filter settings when recording outdoors or another place where the unwanted sound of wind is being recorded When recording live performances and in ...

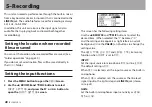
Page 50: ... during recording Recording Before following these procedures adjust the input level and open the Home Screen 1 Press the RECORD º button briefly to start ordinary recording When recording starts the RECORD º button indicator lights and the display shows the elapsed and remaining recording times Press and hold the RECORD º button to enable the pre record function and put the unit into recording st...

Page 51: ...e RECORD º button again Press the ª button after pausing to complete the creation of an audio file with the music recorded up to the moment that recording was paused TIP Use this function in combination with the auto recording function to record without missing the beginning of a performance NOTE If the unit was put into recording standby less than 2 seconds before this function is used recording ...

Page 52: ...rom 0 minimum to 20 maximum and the default value is 20 NOTE The BALANCEsetting only affects the volume when MIC or LINE is ON or When MIC or LINE is OFF or changing the BALANCEvalue has no effect on the volume 4 Press the Á button while pressing and holding the RECORD º button to begin overdubbing CAUTION If you press and hold the RECORD º button long the unit will be put in recording standby wit...

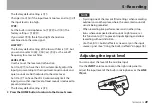
Page 53: ... AUTO RECscreen 3 Use the BROWSE and MIC buttons to select the MODEitem 4 Use the VALUE buttons to set it to ON 5 Press the BROWSE or MIC button to select the STARTLEVELitem 6 Use the VALUE buttons to set the input signal detection level to 6dB 12dB default value 24dBor 48dB 7 After completing the setting press the HOME button to return to the Home Screen 8 Press the RECORD º button to start recor...

Page 54: ...tically CAUTION When overdubbing the auto recording function cannot be used Track incrementation You can start recording to a new file without interruption manually If a file reaches the maximum size 2GB the unit will also automatically start recording to a new file In both cases the original file is saved and no gap occurs in the recording Manual track incrementation during recording At any time ...

Page 55: ...hours or more it will be displayed as 23 59 59 Dividing files DIVIDE You can split a recorded file into two files at any position you like 1 Use the  button button or BROWSEscreen to select the file that you want to divide 2 Press the MENU button to open the MENUscreen 3 Use the BROWSE and MIC buttons to select the DIVIDEmenu item and press the Á button or button to open the DIVIDEscreen 4 Use th...

Page 56: ... not possible if the file name would become more than 200 characters long Division is not possible if a file that already exists has the same name as the name that would be given to a new file created by division Recording duration The table below shows the approximate amount of recording time possible on SD SDHC cards of different capacities SD SDHC card capacity 1 GB 2 GB 4 GB 8 GB Approximate r...

Page 57: ...open the BROWSEscreen the contents of the folder that contains the file that was selected on the Home Screen are shown BROWSE screen navigation On the BROWSEscreen folders and music files appear in a hierarchical structure much like they would appear on a computer Folders can only be used to two levels Use the BROWSE and MIC buttons to select files and folders When a folder is selected press the b...

Page 58: ... select the desired item and press the Á button to execute one of the following operations PLAY Play the file and reopen the Home Screen If the playback area is set to FOLDER the playback area becomes the folder that contains that file INFO Show information date time and size about the selected file Press the Á button again or press the ª button to return to the BROWSEscreen ADD LIST Add the selec...

Page 59: ...e Home Screen and select the first file in the folder This folder becomes the new playback area regardless of the previous playback area setting When recording files are created in the folder selected using this operation CREATE A pop up appears to confirm that you want to create a new folder Press the Á button to create a new folder or press the ª button to cancel the operation However if you try...

Page 60: ...les that are not recognized by this unit CANCEL No operation is conducted and the selected folder is left as is Delete the selected playback file QUICK DELETE Use the following procedure to conveniently delete the currently selected playback file 1 On the Home Screen press and hold the BROWSE button to open the QUICK DELETEscreen 2 Press the Á button again to confirm deletion or press the ª button...

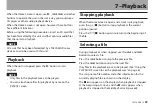
Page 61: ...u can also choose files for playback by name on the BROWSEscreen Stopping playback When the Home Screen is open and a track is playing back press the ª button to stop playback at the current position pause Press the ª button again to return to the beginning of the file Selecting a file During playback or when stopped use the  and buttons to select a file Press the  button to skip to the previous...

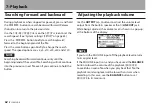
Page 62: ...e beginning end of the current file Searching will not continue into the previous or next file even if you continue to hold the button Adjusting the playback volume Use the OUTPUT buttons to adjust the volume level output from the built in speaker or the LINE OUT jack While being adjusted the volume level is shown in a pop up at the bottom of the display NOTE If you turn the MIC LINE input off the...

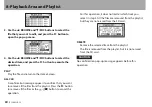
Page 63: ... is OFF or changing the BALANCEvalue has no effect on the volume Disabling the MIC LINE input When you want to listen to just the playback signal you can disable the MIC LINE input to prevent any unwanted noise If you want to disable the MIC LINE input built in microphones or LINE IN jack press the MIC button when the Home Screen is open so that the MIC or LINE icon appears as dark letters on a li...

Page 64: ...ng Using the PLAY MODE screen to set the playback area Follow these procedures to set the playback area on the PLAY MODEscreen 1 Press the MENU button to open the MENUscreen 2 Use the BROWSE and MIC button to select PLAY MODEand press the Á button or button to open the PLAYMODEscreen 3 Select the AREAitem so that its setting value appears as light letters on a dark background 4 Use the VALUE butto...

Page 65: ...ome Screen Playback area indication Selecting a folder for the playback area 1 Regardless of the current playback area if you select a folder on the BROWSEScreen the playback area changes to the selected folder 1 On the Home Screen press the BROWSE button to open the BROWSE screen 2 Use the BROWSE and MIC buttons to select the desired folder light on dark For instructions about using the BROWSEscr...

Page 66: ...SE button to open the BROWSEscreen 2 Use the BROWSE and MIC buttons to select the desired folder light on dark 3 Press the button to show the contents of that folder 4 Use the BROWSE and MIC buttons to select the desired file light on dark For instructions about using the BROWSEscreen see BROWSE screen navigation on page 57 5 Press the Á button to open the pop up menu shown below 6 Use the BROWSE ...

Page 67: ...page 57 2 Select the file that you want to add to the playlist and press the Á button to open the following pop up menu For more information about selecting files see BROWSE screen navigation on page 57 3 Select ADDLIST and press the Á button to add that file to the playlist The pop up menu closes 4 Repeat steps 2 and 3 as necessary Numbers are assigned to the files in the order that they are adde...

Page 68: ...s to confirm that you want to remove all the files from the playlist Press the Á button to remove all the files or the ª button to cancel this operation For this operation it does not matter which track you select in step 3 All the files are removed from the playlist but they are not erased from the SD card DELETE Remove the selected track from the playlist The file is removed from the playlist bu...

Page 69: ...o move the file to a different position in the playlist In the above example the file in the 4th position has been moved to the 3rd position 2 Press the Á button to complete the movement and return to the ordinary PLAYLISTscreen The file number no longer appears light on dark CANCEL No operation is conducted on the selected file and the pop up menu closes 8 Playback Area and Playlist ...

Page 70: ...een 50 x0 5 and 150 x1 5 of the original speed in 10 increments default value x1 0 When the SPEEDis set from x0 5 x0 9 the icon is shown and when it is set from x1 1 x1 5 the icon is shown Changing the key You can use the KEY function to change the pitch of playback in semitone intervals and the FINE TUNE function to change it in cents without changing the speed Press the KEY button to show the KE...

Page 71: ... button to use the flashback function This jumps back a few seconds and continues playback Set the amount of time to go back using the FLASHitem 1 Press the MENU button to open the MENUscreen 2 Use the BROWSE and MIC buttons to select the PLAY MODEmenu item 3 Press the Á button or button to open the PLAY MODEscreen 4 Use the BROWSE and MIC buttons to select FLASH setting value appears light on dar...

Page 72: ...ously repeat playback loop part of a file that you select 1 During playback or when paused press the LOOP button to set the point where you want to start loop playback The current position is set as the IN starting point 2 Press the LOOP button at the point when you want loop playback to stop The current position is set as the OUT ending point and loop playback between the IN starting and OUT endi...

Page 73: ...he button to save the OUT ending point NOTE Use the  and buttons to switch between IN starting and OUT ending points 6 Press the LOOP button briefly to start loop playback Using loop playback with the playlist When the playback area is set to playlist up to 5 loops with distinct IN starting and OUT ending points can be set per file Follow the procedures below to set and play back loops of desired...

Page 74: ...UT ending point This is not possible when there is no IN starting and OUT ending point Press the ª button during playback to pause and press the HOME button when paused to returned to the Home Screen 4 Next use the same buttons to move the OUT ending point to the desired position and press the button to save the OUT ending point NOTE Use the  and buttons to switch between IN starting and OUT endi...

Page 75: ...ack area You can also play just one file 1 Press the MENU button to open the MENUscreen 2 Use the BROWSE and MIC buttons to select PLAY MODEand press the Á button or button 3 Use the BROWSE and MIC buttons to select the REPEATitem and use the VALUE buttons to set the playback mode OFF default Play all tracks in the playback area in sequence This is the ordinary playback mode SINGLE Play one file w...

Page 76: ...that has a built in SD card slot or by using a card reader Preparing audio files on a computer Use the abilities of your computer OS or a software application to copy music files from a CD or other source to your computer When copying files to your computer choose file types that this unit can handle the MP3 and WAV files types listed above Copying audio files from a computer 1 Connect the unit to...

Page 77: ... two levels of sub folders inside the MUSIC folder Since you can set the unit to only play the contents of a specific folder you can conveniently organize tracks into musical categories and artists See Folder operations on page 59 Name the sub folders and music files as you like and these names will appear on the unit s display Transferring audio files to a computer 1 Click the LR 10 drive that ap...

Page 78: ...o select the desired item When selected the setting value appears as light letters on a dark background Use the VALUE buttons to change the setting value REVERB Select the type of reverb to use LEVEL knob Use the REVERB item to adjust the output level of the selected reverb type TIME knob Use the PRESETitem to adjust the reverb time of the selected reverb type The reverb time range is set optimall...

Page 79: ...large hall like space HALL 2 This is a warm reverb modeled after a large hall like space ROOM This reverb is modeled on a small indoor space STUDIO This reverb is modeled on a studio like space PLATE 1 This is a bright plate reverb PLATE 2 This is a warm plate reverb 12 Using the built in effects ...

Page 80: ... mode The options are AUTO ª chromatic tuner mode and OSC Á oscillator mode After selecting the mode press the TUNER button again to make settings for that mode 3 The first item shown for each mode is CALIB Use this to set the frequency of A between 435 Hz and 445 Hz The setting value is shown on the right side of the screen This setting is the same for both tuner modes Use of each tuner mode is e...

Page 81: ...ighted A bar appears to the left if the tuning is too low and a bar appears to the right if it is too high The longer the bar is the more out of tune the instrument is Oscillator mode The built in oscillator can output a tone for tuning through the built in speaker or the LINE OUT jack The tuning pitch can be set in a three octave range C3 B5 OSC appears in the upper right In addition to the CALIB...

Page 82: ...change the setting value TEMPO Set the speed to a value between 20and 250beats per minute BPM The default value is 120 BEAT Set the accent frequency between 0and 9 There is no accent when set to 0 The default value is 4 LEVEL Set the metronome volume between 0and 10 The default value is 5 Starting and stopping the metronome When the METRONOMEscreen is open press the Á button to start or stop the m...

Page 83: ...d search speed Use the CUE REV SPEEDitem to set the speed of forward backward searching when pressing and holding the Ô button during audio file playback Options x2 x4 x8 Default value x10 Setting the automatic power off time Use the AUTO OFFitem to set the time before the unit power automatically turns OFF after the last activity or operation when powered by the internal battery Options OFF Defau...

Page 84: ...C and UTILITY folders and a dr 1 sys file 1 Use the BROWSE and MIC buttons to select the QUICK FORMATitem Execappears light on dark 2 Press the Á button to open a confirmation pop up window 3 Press the Á button to execute quick formatting Press the ª button to cancel quick formatting Using FULL FORMAT Use the FULL FORMATitem to completely format an SD card Using the FULL FORMATitem deletes all mus...

Page 85: ...he MENUscreen 2 Use the BROWSE and MIC buttons to select the FILE NAMEmenu item and press the Á button or button to open the FILE NAMEscreen Use the BROWSE and MIC buttons to select each item when selected the becomes an and the setting value is highlighted or the cursor is shown You can make the following settings for the items on the screen File name format Use the VALUE buttons to set the TYPEi...

Page 86: ...When the WORDitem is selected use the  and buttons to move the cursor and use the VALUE buttons to change each character NOTE In addition to the alphabet and numbers the following characters can be used _ The default name prefix is LR0000 15 System settings ...

Page 87: ...ect the FOOT SWmenu item and press the Á button or button to open the FOOT SWscreen 3 The MODEitem and the three footswitch pedal assignments are shown 4 Use the VALUE buttons to change the MODEitem MODE FOOT SW L C R PLAY REW PLAY STOP FWD TRAINER FLASH PLAY STOP SPEED CHANGE RECORD OVERDUB REC PAUSE STOP MINUTES REW PLAY FWD 5 After completing the setting press the HOME button to return to the H...

Page 88: ...erted SD card System information page SYSTEM Shows information about the unit s system settings and firmware version When you are done press the HOME button to return to the Home Screen or press the MENU button to open the MENU screen File information page The FILEpage shows information about the currently playing file WAV or MP3 Shows the audio file format For WAV files bit length stereo mono and...

Page 89: ...playable files in the MUSIC Folder TOTAL FOLDER Shows the number of folders in the MUSIC Folder TOTAL SIZE Shows the total SD card memory capacity REMAIN SIZE Shows the amount of unused memory on the SD card USED SIZE Shows the amount of used memory on the SD card NOTE Use the button to switch between display of REMAIN SIZEand USEDSIZE 17 Viewing File Information ...

Page 90: ...about the unit s system settings and firmware version CUE REV SPD Shows the speed of forward and backward searching AUTO OFF Shows the automatic power OFF setting BATTERY This shows the battery setting System Ver Shows the system firmware version 17 Viewing File Information ...

Page 91: ...nnot be found or a file could be damaged Please check the file in question Non Supported The audio file is not a supported format Please see 11 Transferring songs to and from a computer for file formats that this unit can use Battery Empty The battery is almost out of power Replace the AA batteries I O Too Short The IN starting and OUT ending points are too close together Reset the IN starting and...

Page 92: ...d Card Change Card Something might be wrong with the card Change the card Protected Card Change Card This appears when the card is protected and lacks the necessary Music Folder and other folders and files Un lock the write protect switch restart the power and format the card Write Timeout Writing to the card timed out Backup files on the card to your computer and format the card Card Full The car...

Page 93: ...o DIVIDE and OVERDUB cannot be executed Not Continued If any of these errors occur turn the unit power OFF and restart it If the power cannot be turned OFF remove the batteries and disconnect the AC adaptor if connected If the error message continues to appear please contact a TEAC Repair Center File Error Can t Save Data Player Error Device Error Writing Failed Sys Rom Err Remote Cmd Remote Rx Sy...

Page 94: ...ur turn the unit power OFF and restart it If the power cannot be turned OFF remove the batteries and disconnect the AC adaptor if connected If the error message continues to appear please contact a TEAC Repair Center System Error 6 System Error 7 System Error 8 System Error 9 18 Messages ...

Page 95: ...ted The SD card is not recognized ª ª Confirm that the SD card is inserted completely Playback does not work ª ª If you are trying to play a WAV file confirm that the sampling frequency is supported by this unit If you are trying to play an MP3 file confirm that the bit rate is supported by this unit No sound is output ª ª Are headphones connected Check the connections with the monitoring system I...

Page 96: ...ELsetting low and the input gain setting high The playback sounds unnatural ª ª Confirm that the playback pitch is not being adjusted Confirm that the playback speed is not being adjusted I cannot erase a file ª ª Is the SD card write protect switch engaged This unit s files do not appear on the computer ª ª Confirm that the unit is connected to the computer using its USB port Are you using a USB ...

Page 97: ...t level 10 dBV 0 32V INPUT volume at 7 Maximum input level 6 dBV 2 0 V INPUT volume at 7 Minimum input level 22 dBV 0 08 V INPUT volume at 10 Built in microphone Omni directional Stereo Output ratings Analog output ratings LINE OUT Connector 1 8 3 5 mm stereo mini Output impedance 23Ω Nominal output level 14 dBV 10 kΩ load Maximum output level 2 dBV 10 kΩ load Maximum output 15 mW 15 mW 32Ω load B...

Page 98: ...cintosh Power PC iMac G3 G4 266 MHz or faster 64 MB or more memory USB port USB 2 0 recommended Recommended USB host controller Intel chipset Supported OS Windows Windows XP Windows Vista Windows 7 Macintosh Mac OS X 10 2 or later Other specifications Power Two AA batteries Alkaline or Ni MH AC adaptor TASCAM PS P520 sold separately USB bus power Power consumption 0 4 W during MP3 playback Battery...

Page 99: ...ck time when using headphones About 7 5 hours WAV MP3 music playback time when using the built in speaker Dimensions W x H x D 158 x 30 x 70 mm 6 220 x 1 181 x 2 756 in Weight 170 g 5 996 oz not including batteries Operating temperature range 0 40 C 32 F 104 F Dimensional drawings 158 mm 30 mm 70 mm Illustrations and other depictions may differ in part from the actual product Specifications and ex...

Page 100: ... com 5939 Wallace Street Mississauga Ontario L4Z 1Z8 Canada TEAC MEXICO S A de C V Phone 52 55 5010 6000 www teacmexico net Río Churubusco 364 Colonia Del Carmen Delegación Coyoacán CP 04100 México DF México TEAC UK LIMITED Phone 44 8451 302511 www tascam co uk Suites 19 20 Building 6 Croxley Green Business Park Hatters Lane Watford Hertfordshire WD18 8TE U K TEAC EUROPE GmbH Phone 49 611 71580 ww...

Reviews: