Chapter 6 –Taking Control
26
TASCAM SX-1
Quick Start Guide
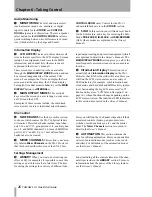
Audio Monitoring
1
MONITORING
The level and source select
(such as master output, cue, auxiliary, or digital
input) controls for the
STUDIO
and
CONTROL
ROOM
outputs are in this section. There is a speaker
select button for the
CONTROL ROOM
that allows
quick switching between two different sets of moni-
tors (which are fed by the Large and Small
CONTROL ROOM
outs). Control for the SX-1's
onboard talkback mic is in the
STUDIO
section.
2
SOLO
In this section you will find a level knob
for the Solo feature, and a key for selecting the Solo
Mode:
PRE-FADER
,
IN-PLACE
, or
USER-DEFINED
(AFL) (these modes are explained in the
Owner's
Manual
).
Information Display
3
LCD ACCESS
The keys in this section recall
screens that are specific to the LCD display. Screens
include: bus assignment, track waveform, MIDI
information, and channel trim (these screens are
explained in the
Owner's Manual
).
These screens are in addition to those available
through the
MAIN DISPLAY MODES
section and can
be accessed independently of the current VGA
screen. For example, the VGA can display the
Track
screen, and at the same time, the LCD can display
Routing
(for true dual monitor behavior, set the
MAIN
DISPLAY
button to
<INTERNAL>
).
4
MAIN DISPLAY MODES
This section's
keys select the screen you are viewing on your exter-
nal VGA and the LCD.
Examples of these screens include: the main track
screen, mixer overview, individual mixer channels,
input/output routing, and project management (which
are explained in detail in the
Owner's Manual
). The
MAIN DISPLAY MODES
section gives you all of the
most frequently accessed screens in one convenient
location.
5
Information Display
This section is not
actually labeled
Information Display
on the SX-1.
However, that title best describes this area. Here you
will find the LCD, stereo meters, and a variety of
LED indicators (for example, synchronization and
clock status, and hard disk and MIDI activity indica-
tors). Surrounding the big LCD are several “soft”
knobs and keys (see “LCD Screen Navigation” on
page 10), whose functions change depending on the
LCD’s current screen. The individual LED indicators
in this
section are covered in the
Owner's Manual
.
Mix Control
6
FADER BANKS
Use the keys in this section
to choose which sources the SX-1's physical faders
will control. Preset fader banks include: input chan-
nels 1-16 and 17-32, group returns 1-8, auxiliary bus-
ses 1-8, and MIDI channels 1-16 for each MIDI Out
port (A, B, C, and D). Up to 7 user defined fader
banks can also be created.
7
MIXER CHANNELS
This section is not actu-
ally labeled
Mixer Channels
on the SX-1. However,
that title best describes this area of the SX-1's face.
Here you will find the 16 channel strips and all their
associated controls (faders, pan pots, mute/solo
switches, record enable keys, etc.) and the master
fader. The
Mixer Channels
section is covered in
detail in the
Owner's Manual
.
8
AUTOMATION
This section contains the
keys for utilizing automation. Here you can enable a
variety of automation modes (such as write, touch
and trim). For definitions of the automation modes,
see the
Owner's Manual
.
Settings Management
9
LIBRARY
When you create a new setting (an
effect or EQ, for example), it is possible to save this
setting as a patch for recall at a later time. The keys
for saving the settings for a variety of different func-
tions (including all the control elements of the chan-
nel strips) reside in the
LIBRARY
section. For more
information about the power of the Library feature,
see the
Owner's Manual
.


